Robin's Urban Farmhouse
  • Robin\\\\\'s Latest
  • Meet Robin
  • The Chickens
  • The Garden
  • The Bakery
  • The House
  • Untitled

Pie Crust

1/11/2012

1 Comment

 
Picture
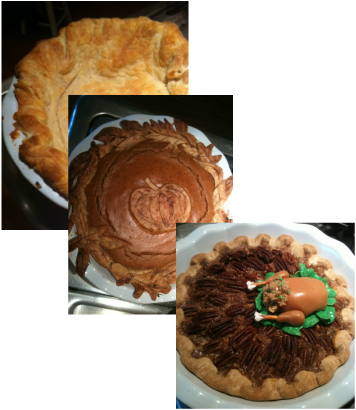
    There are a few things that are good to always have in your back corner.  Pie crust is one of them.  When I first started cooking pie crust, it was one of those illusive things that I could never seem to master.  After messing up several pies, and I finally getting it down, I thought I would share and hopefully save you from terrible pies.  
    Pie crust really shouldn't be sweet, so even if you are not a typical pie maniac, you can use this recipe for crust on things like chicken pot pies and quiches. At Thanksgiving my father-in-law Henry somehow managed to eat almost all the pie crust off the pumpkin pie without  disrupting, or eating, any of the filling.  So last time I saw him I made him cookies, just out of pie crust, with a little cinnamon sugar on top.  This seemed to quiet his hunger for crust. 
Picture
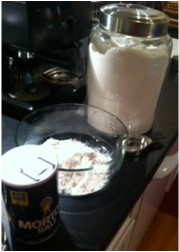
     I will go step by step with lots of detail about how I make the pie crust.  So if you just want to basics, the ingredients are below.  This was posted by Dana at allrecipes.com.  
     I prefer to make pie crust with only butter, instead of shortening.  This is mainly because I always have butter in the house, and I don't like to stock shortening as well. 

Ingredients:
This recipe makes enough for one pie crust.  So if you are making a pie that requires a top, double everything, then split it before you roll out the dough. 
  • 1 1/4 cups all-purpose flour
  • 1/4 teaspoon salt
  • 1/4 teaspoon white sugar
  • 1/2 cup butter, chilled
  • 8-9 tablesoons ice water

Picture
Directions:
*The key to a successful pie crust is to keep the butter really cold.  So as soon as you start cooking, put the butter in the freezer to chill.  Don't make this under a heater vent, or some other strange source of heat.  I actually had to close mine because it literally blew right where I roll my dough. 

1. In a large bowl, combine flour, salt, and sugar. 


Picture
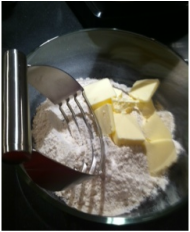
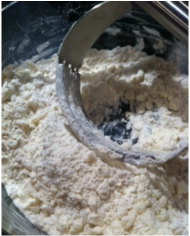
2. Slice the butter into pieces that are about 1 tablespoon in size. You can mix in the butter with a pastry cutter like I show in the picture.  You can also use a food processor, but use only the pulse button.  If you mix it too much, the crust will be doomed! Cut in the butter by repeatedly slicing the mixture with a pastry cutter.  Try to avoid squishing in a circle, like you would normally mix something. You want the butter to be in chunks about the same size as a pea.  By keeping these chunks cold and intact you will ensure that the crust is flaky.  As the crust cooks the butter kinds of acts like a little barrier or pocket.  If you over mix the butter, than it will just taste like bread. 

Picture
3. Fill a dish with ice water.  Add 1-2 tablespoons of water at a time to the flour mixture.  Using the pasty cutter, fold the mix over itself until the water is incorporated.  This should take 8-9 tablespoons of water. You just want enough that you can form a ball with the dough. 
4.  Use your hands to quickly form a ball.  Be careful not to knead or over squish it! Cover the dish with plastic and throw it in the freezer. If you are going to use the dough right away, then you really only need to leave it in for about 30 minutes.  That is always the longest I can wait.  If you are prepared, way to go, and you can refrigerate the dough until the next day.  
Picture
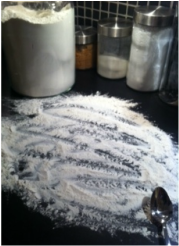
5.  When you are ready to roll out the dough, spread a layer of flour on the counter, or whatever surface you are using.  Keep your flour jar close in case you need more. If the dough starts sticking to any surface, add flour.  

Picture
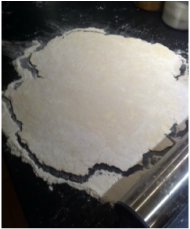
6.  Roll out the dough, flipping it often and respreading the flour underneath. Keep turning the dough and roll from all sides.  Do whatever you can to avoid having to ball it up and roll it a second time! When you think it is about the right size for a 9 inch pie pan, hold the pan over the dough to check.  
Picture
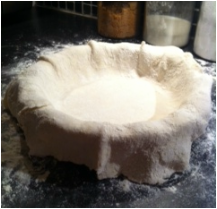
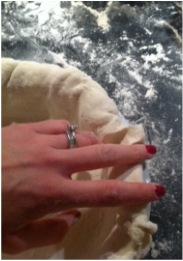
7. Flop the crust onto the pie pan.  Lift the sides to settle it into the middle rather than stretching it in.  Run your knuckle around the inside edge to make sure it is all the way down.
Picture
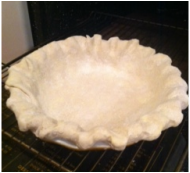
8.  The edging on the pie is really a matter of personal preferance.  If you want it neat and tidy.  I would slide around the underneath edge of the pie pan with a paring knife and cut off the excess.  If you don't care terribly about the neatness, which was obviously the case in this picture, you can fold the excess under, which will give you a thick crust.  Keep in mind that the crust will shrink up as it cooks.  If you are cooking the shell without a filling, leave it hanging over the edge just a touch.  This will act like a hook and avoid having the crust shrink into the middle.  That happened a bit on this pie.  You can use a fork to put a bit of a pattern on the pie.  During fall I cut out leaves and acorns and such, and place these around the edge for crust.  Most of the time I use the typical, "Pull through your fingers" method.  Place two fingers on one side, put another finger on the other side, and pull through each other.  This will seal the edge if you folded the excess under.  It gives the pie a scalloped edge.  
Picture
9. Baking.  If you are filling the pie, follow the temperature on the filling recipe.  If there isn't one, I would say 375 or 400 degrees.  If you are baking the crust by itself, cook it at 425 degrees for about 3 minutes.  The edges are the highest and thus cook the fastest.  Either cover them with a crust edge (pampered chef makes one), or a rim of tin foil.  This will slow down the cooking of the edges and allow everything to finish on time.  This is especially important if there is filling in the pie when it is being cooked. This si kind of obvious, but take it out when the crust is browned and flaky.   


Picture

I hope you give this a try, because pie crust from scratch is worth every bit of effort! When you break off apiece, or cut it with your fork, you will hear a mouth watering crunch, miniscule pieces will go flying everywhere, and it will melt in your mouth. Enjoy!

1 Comment

Tortilla Soup

1/9/2012

1 Comment

 
Picture
    Ole! Tortilla Soup - a soup everyone can get on board with.  This is a simple recipe that packs a big punch.  It is a great vegetarian dinner choice!

Ingredients:
Serves 6
1 yellow onion
3 cloves garlic
6 cups water
2 cubes vegetable bullion
1 15 oz can of black beans (drain the liquid)
1 1/2 cups corn
1 23 oz can of crushed tomatoes
1/2 cup rice

Picture
Ingredients Continued
2 teaspoons chili powder
1 teaspoon cumin
1 teaspoon dried oregano
1 teaspoon salt
1 anaheim pepper (or the pepper of your choice)
1 bunch of fresh cilantro

1 avocado
sour cream
3 flour tortillas
butter

Optional: Chicken thighs and chicken bullion (to substitute of vegetable)

Picture
   Heat a bit of butter in a dutch oven, or soup pot.  Chop the onion coarsely and sauté at medium heat.  While the onion cook, peel and chop three large cloves of garlic.  Add this to the pan.  If you want to include chicken in this recipe add it now and brown the sides.  Before adding water remove the chicken and chop it, then return it to the pot.  The chicken does not need to be completely cooked.  Continue to cook until the edges of the onion begin to brown.  
    Add in 6 cups of water and cubes of bullion.  Add in corn, black beans, and crushed tomatoes.  Bring this to a simmer and then reduce heat.  
     Add in rice.  Sprinkle in chili powder, cumin, salt, and oregano.  Finely chop the anaheim pepper and seeds and add to the soup.  Chop and add a handful of cilantro leaves, discard the stems.  Place a lid on the soup and cook for 20 minutes.  
    

Picture
While soup is simmering prepare the toppings.  Chop another handful of cilantro leaves and discard the stems.  Slice 1 avocado in half, remove the seed.  While still in the skin make thin slices in the avocado.  Chop three tortillas into thin strips.  Add a bit of butter to a sauce pan and brown the tortillas.  
     Serve soup into bowls.  Sprinkle tortilla strips on the soup.  Spread a few slices of avocado, then add a dollop of sour cream.  Lastly sprinkle the cilantro on top! Enjoy the warm cozy feeling you'll get when eating and the wonderful smell in your house! 

1 Comment

Seedlings

1/8/2012

0 Comments

 
Picture
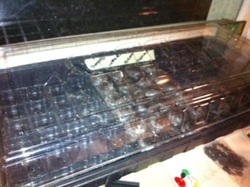
  I'm getting a little sick of pulling weeds and looking at a dead vegetable garden.  The weather has been so warm this winter that I feel like it is time to start throwing seeds into the ground. (Plus there is no snow, which means I can't ski, which means more time in the garden) I am going to go against my instinct, and throw seeds somewhere else. 
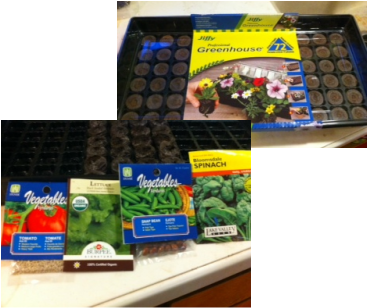
     I bought this seeds starter at Home Depot.  Any local hardware or garden store should have these.  They are great because you can moisten only as many dirt packs as you are ready to use.  

Picture
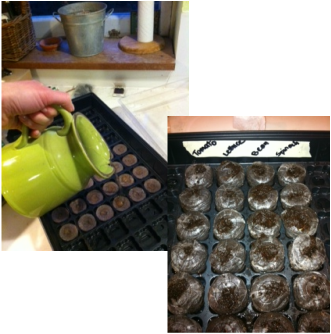
   Remove the disks of dirt that you are not using right away and pour water on the ones you want to plant in.  Wait for them to soak up the water for about a half an hour. While you are waiting I would recommend choosing and labeling which seeds you are planting.  I just used masking tape for this.   Add a bit more water as needed until the dirt is completely saturated. The dirt pods will expand quite a bit. I usually plant 2-3 seeds in each dirt patch to ensure that SOMETHING will grow.  Today I planted tomatoes, lettuce, snap beans, and spinach.
    I keep the tray on the window sill in the basement.  You basically want the seeds in a location that is slightly warmer than outside and gets some sunlight.  This could be a basement, garage, or indoor window sill.   

Picture
        Starting seedlings inside allows the seeds to get a few weeks head start.  Then when the soil and weather warm up, the plants are already a bit strong and stand a better chance out in the elements.  At this point in the year we may still have freezing temperatures at night and your poor little plants will be goners. 
      I like these dirt pods because they have a thin cheesecloth-like layer around the outside.  This allows the roots to grow out, but the dirt to stay in, which makes for easy transplantation later in the season.   
      If you don't want to buy the dirt packs I have a few other ideas for you.  In past years I have saved old containers that plants have come in, then started my seeds there.  This is green and free! If you do this I would recommend really packing down the potting soil.  When you transplant the seedlings into the ground you want the dirt to stay intact so it doesn't rip out the roots. 

Picture
     Last year I was feeling more hippie than usual, and on a mission to be green.  If this is your ideology, you will love this!  I saved all our old toilet paper rolls and started my seeds in there.  I used a tray to support the dirt, rubber banded several rolls together, filled them with potting soil and pushed in my seed. 
     Toilet paper rolls definitely offer some advantages.  Not only are you reusing your trash for good purposes, but the whole roll can be put in the ground when transplanting.  This greatly reduces the risk of disrupting the tiny roots and killing the plant.  The toilet paper roll eventually disintegrates and the plants grows! The only disadvantage is that they are made of paper.  So in a few cases the paper rolls began to mold and disintegrate before I have transplanted the seedlings.  They held so much of the water that some of the seeds rotted instead of growing.  Whatever container you choose, it feels good to get planting!

0 Comments

Savory drop biscuits

1/5/2012

0 Comments

 
Picture
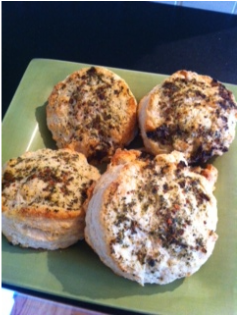
     These are a buttery biscuit, that are full of flavor. This recipe is quick and easy. It takes about a half an hour in total with the baking and is a great way to show up to a dinner party looking like you cooked all day!  
       I created this recipe recently when I  promised to bring bread to my friend Brian and Jen's dinner party, but ran out of time to take hours to bake bread. All the recipes I found used shortening and things I did not have around the house.  I tried to keep this one basic.
      When you are eating this you can pull it apart layer by layer and enjoy all the flavor.  If you want to keep it savory, follow the recipe as is.  However, it is also very versatile.  If you want more of a breakfast biscuit, then substitute orange juice for the water, hold the herbs, and sprinkle a little white sugar on top before baking.  Enjoy experimenting!
  

Recipe: Biscuits
Makes 5-7 biscuits
Ingredients:
1 1/2 cup all purpose flour
1 tablespoon sugar
1 1/2 teaspoon baking powder
1/2 teaspoon cream of tartar
1/2 cup salted butter very cold (1 tablespoon is used for a glaze)
1/2 cup water
dried herbs

Directions:
1. Preheat oven to 400 degrees F. Combine flour, sugar, baking powder, and cream of tartar in a bowl.  Mix together with a fork.
2. Cut the butter into chunks and add it.  Leave one tablespoon out for later. With a pastry cutter, cut in the butter until it is about pea size chunks. 
3. Add water a bit at a time.  Mix it in gently until a dough ball can be formed. Do not over mix. You may not need all of the water. 
4. Turn the dough onto a floured surface and knead about three times.  You just want to get all the chunks incorporated, but you don't want to ruin the structure of the dough.
5. Using your hands flatten the dough until it is about one inch thick.  Cut out biscuits with a biscuit cutter, or some other cute cookie cutter if you want.
6. Melt the remaining butter in a small dish.  Sprinkle in herbs of your choice, basil, parsley, dried red peppers, etc. Baste that mixture on the top of the biscuits. 
7.  Bake for 20-25 minutes at 400 degrees.  Take them out when the top looks golden brown and crispy.  The biscuits should separate in layers and be nice and moist inside. Serve hot if possible.

0 Comments

And they say size doesn't matter...

1/4/2012

1 Comment

 
Store bought eggs versus home grown.
Picture
Clearly Nugget and Barbecue win. 
1 Comment

Shepherd's Pie

1/3/2012

1 Comment

 
Picture
    I admit, the British are not known for their excellence in food.  But there are few things that I think they did right, or at least started out well and left room for improvement. Shepherd's pie is one of them.  
    I love to walk down to our local pub, Bon Lair, and have a pint of cider.  When you walk in you start hearing that song from Cheer's in your head "Everybody knows you name, duh duh duh..." I am absolutely sure that no one there knows my name, but it gives you that feeling.  Everything is decorated in a very European style with the old dark wood, colorful football jerseys, and traditional bar towels.  Above the bar the regulars have their specific beer mugs hanging that they have earned from years of dedicated patronage.  The cash register has to be wound up before the old thing can be opened.  I love it. This is at 37th and J by the way if anyone wants to visit. 
     Occasionally I order food there, and specifically Shepherd's pie.  Now, I am not a trained food critic, but when your food arrives I have great, hungry expectations.   When I take my first bite, I think, oooh, needs something, and I add salt.  Then taste again and think, still not quite right, and add pepper.  After that I except it for what it is, and eat. After enough of this, and ordering Shepherd's pie at a few different pubs, I decided to take a stab at it myself.  I think you'll like it!

      Shepherd's pie is traditionally made with mutton, or lamb, and a mashed potato crust.  I usually use ground beef because I usually have it in my fridge and it works just fine.  The nice thing is that this dish is easy to alter and add in whatever veggies you have left to use, mushrooms for example are a nice substitute for the other veggies.  Just resist the temptation to add in too many things.  The recipe is easy to make, and healthy!

Picture
Shepherd's Pie
Ingredients:

Mashed potatoes 
3-4 Russet potatoes
1 tablespoon butter 
3/4 cup milk
1/2 teaspoon salt (use Kosher if you have it)
1/2 teaspoon pepper

Beef ensemble 
1 tablespoon butter
1 large yellow or white onion
1 1/2 pound ground beef or lamb
1 16 oz can of beef broth of 1 cube Beef bouillon dissolved in 2 cups of water
2 tablespoons flour
1/2 Cup chopped carrots
1/2 Cup peas
1/2 Cup corn 
1/2 teaspoon Salt (use Kosher if you have it)
3/4 teaspoon Pepper
1 teaspoon garlic powder
1 tablespoons worcestershire Sauce (this is kind of the magic ingredient here)


Picture
Directions:
1) Preheat the oven to 425 degrees. Wash the potatoes thoroughly, cut them in quarters put them in a saucepan.  Add water until the potatoes are submerged and bring it to a boil.  Cook for 20-25 minutes or until the potatoes are tender enough to easily pierce with a fork.  


2) While the potatoes are cooking, chop the onions coarsely. Put 1 tablespoon of butter in a frying pan.  On medium heat brown the onions and the beef simultaneously .  As they are cooking break up the beef so it is a bit chunky. 

3) Chop carrots and add to the pan. **Good opportunity to use those carrots from the garden** If you are using frozen carrots, wait until later to add them.  


Picture

4) When the potatoes are cooked mash them in the sauce pan.  Be careful to use something that won't scratch your pan.  Add the milk a splash at a time and continue mixing. You want the mashed potatoes to be firm enough to hold their shape, but still spreadable.  Add 1 tablespoon butter, and 1/2 teaspoon salt, and 1/2 teaspoon pepper. 
5) In the beef pan, move everything to the edges to make a crater in the middle.  Pour in beef broth.   Sprinkle 2 tablespoon of flour and mix well.  This will thicken the broth so it more like a gravy.  

6) Stir in 1 teaspoon garlic powder, 3/4 teaspoon black pepper, 1/2 teaspoon salt,  and 1 tablespoons worcestershire sauce into beef. 

7) Add peas, and corn to the beef mixture.  I usually use frozen vegetables for these so they only need to cook for two or three minutes. 


Picture
8) Spread the beef mixture into the bottom of a casserole dish.  Spoon the mashed potatoes on top of the beef in globs.  Then spread them with a spoon.  You want the potatoes to cover the entire surface and seal in the beef.  I like to form little peaks on top of the potatoes so they crisp up in the oven.  Bake at 425 degrees about 25 minutes or until the top of the potatoes become crispy and brown.  Let stand for 5 minutes before serving.


Picture
The last step is to enjoy the rich gravy flavor of the meat sauce mixed with the creaminess of the potatoes.  While it's hard to plate this neatly, there is a nice contrast of colors with the white, deep brown, and pop of green, orange, and yellow of the vegetables.  If you are a beer drinker, I would recommend serving with a beer.  I myself don't enjoy beer, but I hear from the locals that it is a good match!

1 Comment

Citrus trees and my farming dreams

1/2/2012

1 Comment

 
Picture
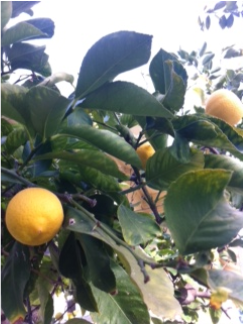
    On our little farm we have several fruit trees, and among them are an naval orange tree and a meyer lemon tree.  I thank the person who planted these because they are great!  If I ever have a real farm or any land for that matter, here is my plan.  I want to plant a small orchard with about 25 trees.  Each would be a different fruit bearing tree.  I would put them in seasonal order so that one end of the orchard would be trees that fruit in January.  These do exist, persimmon and orange for example.  Then the next tree over would be a February tree and so on until you got back to the pomegranate trees in the fall. Then I would have an endless supply of peaches, apricots, plums, figs, and anything else you can think of. Bees would love me. A girl can dream can't she? 
      Back to realty.  Like I said, we have an orange tree and a lemon tree.   Usually they produce large, sweet fruit.  The lemon tree is in the front yard and produced three or four crops a year!  When we moved in complete strangers would walk by and say,"I love your lemons, I always take one, I hope that's okay".  I smiled and thought to myself "Those are out lemons, go get your own, shoo, shoo!" But I always said something like, "Oh, help yourself, we have plenty" and mumbled under my breath as they walked on.
     Thankfully the orange tree is in the backyard.  Every January through April it produces huge, refreshing, sweet oranges.  Just as the fruit crop is finishing up, the tree graces us with fragrant blossoms that you can smell from the whole yard.  You would be surprised how creative you get when you have an abundance of fruit that you don't want to waste!
     Last summer to my surprise our lemon tree was a sad mess. The leaves were small and yellow.  The fruit was either nonexistent, or dry and bitter.  Our huge meyer lemons, were not living up to the neighbors expectations!  We couldn't figure out what was going on.  The orange tree seemed to be doing fine.  The only difference between their care was that we run the chipper under the orange tree.  Anything that is too big or corse for the compost gets chipped, and it happens below the orange tree.  The chippings make a nice ground cover, but I guess they were also supplying the tree with nutrients. 

Picture
     After asking around at the local nursery and do some research we did three things.  One: we trimmed the lemon tree way back.  We had totally been neglecting to trim it.  The lemon tree had fruit or blossoms on it all year, and I never had the heart to cut off branches with lemon.  Much to my disappointment this was apparently killing the tree. 
      Two: Citrus trees also get sucklers.  They are parts of the tree that grow, but produce no benefits, or fruit.  They simply suck nutrients, so get rid of them.  Sucklers are usually bright green and grow straight up, not out like most branches. Ours usually grow from the base of the tree, or directly out of a main branch.  So we got rid of these. 

Picture
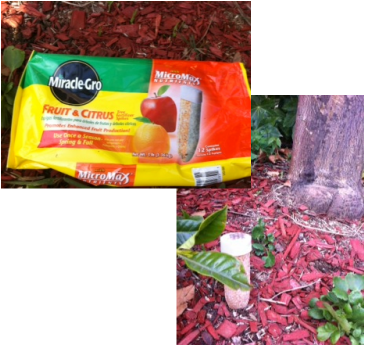
       Three: I bought citrus nutrients sticks from Home Depot.  I have been pounding two or three of them in every 4 months. Spread them out around the base of the tree, a few feet from the trunk.
     I am happy to say that the lemon tree is making a complete come back.  This summer's fruit should be big and delicious again. The oranges on our tree are getting larger and should be ripe in a few weeks! I can't wait for fresh squeezed OJ, it is the cure for winter blues. 

1 Comment
Forward>>

    Robin's Blog

    I am living in Downtown 
    Sacramento creating my little urban farm!

    Archives

    June 2014
    April 2014
    January 2014
    July 2013
    April 2013
    January 2013
    November 2012
    October 2012
    September 2012
    August 2012
    July 2012
    June 2012
    May 2012
    April 2012
    March 2012
    February 2012
    January 2012
    December 2011
    November 2011

    Categories

    All
    All
    Appetizers
    Breads
    Breakfast
    Chickens
    Crock Pot
    Desserts
    Fall Foods
    Gardening
    Gifts
    Holiday
    Holiday Foods
    Home Improvements
    Recipes
    Salads
    Sewing
    Soups
    Travel

    RSS Feed

Powered by Create your own unique website with customizable templates.