Robin's Urban Farmhouse
  • Robin\\\\\'s Latest
  • Meet Robin
  • The Chickens
  • The Garden
  • The Bakery
  • The House
  • Untitled

Power Packed Muffins

6/30/2014

0 Comments

 
Picture
       Love eating baked goods? Me too! But I don't always love the feeling of a greasy cookie in my stomach.  Most of the ingredients in these muffins are actually good for you! So you don't even have to feel bad about eating them.  They are full of vegetables and fruits which not only gives you a good way to clean out the fridge of wilting celery and bruised apples, but it is a great way to hide the vitamins and nutrients in something soft and delicious.  Kids go absolutely nuts for them, I have yet to have a child eat one and not ask for more!
         My friend Lara introduced me to this veggie muffin idea which is a fantastic way to get people (especially little people) to eat their veggies without cramming spinach down their throats.  I posted this link in one of my previous posts.  After making this recipe several times now I found that there is room for improvement. I have reduced the sugar, eliminated the juices, and increased the spices so the muffins are reminicent of carrot cake. I thought I would give you my version for you to try!
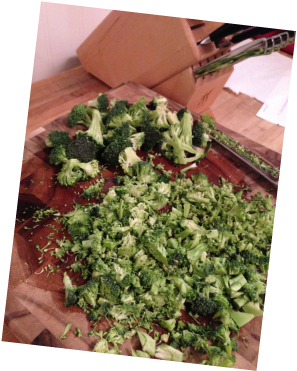
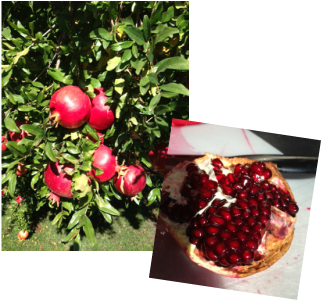
        I will tell you that the fruits and vegetables you can add are very versatile.  I generally try and put at least one apple and one banana in to add sweetness and creaminess.  The rest is up to you! Carrots and sweet potatoes work great for the veggies, as well as any leafy greens, cauliflower, squash, or any other vitamins you are looking to infuse into your diet (or that of your kids). You do not need to precook anything, but if they are already cooked, that works too! 
        Lastly, often times I will blend the fruits and veggies on a different day than I bake the muffins.  Maybe I had a left-over smoothie, or simply the vegetables were starting to get old and I didn't have time for baking.  Anyhow, I usually make a double batch of the produce puree so it is less work next time.  You can simply freeze the puree and thaw when you want to use it. Here it is! I would love to hear comments about what you put in these magic little treats. 


Directions:
1) Preheat oven to 375 degrees. 
2) Grease mini muffin pans.  This makes about 50 mini-muffins.  (They may not cook all the way through if you use regular size muffins)
3) Mix ingredients in the order below (or really any order you want, these don't need to be very precise). The batter should be viscus but not pourable, use a spoon to put it in the muffin tins. 
4) Bake for 35 minutes at 375 until the edges start to brown, the inside will still be moist. 
5) Allow the muffins to cool on a cooling rack and enjoy!

Ingredients:
1 cup whole wheat flour
1 cup all purpose flour
3/4 teaspoon baking powder 
1/2 salt
1/4 teaspoon (or a few sprinkles) nutmeg
1/4 teaspoon (or a few sprinkles) ground cloves
1/2 teaspoon cinnamon
1/2 cup sugar
4 tablespoons butter
2 eggs
1 teaspoon vanilla
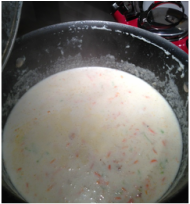
about 2 1/2 cups blended fruits and vegetables
1/2 cup greek yogurt (of whatever fat content you usually eat)


0 Comments

Chicken Salad Sandwiches

4/14/2014

0 Comments

 
Picture
     I made these sandwiches for my son's first and my husband's thirty something birthday this weekend.  They disappeared quickly off the platter, so I thought I would share the recipe!
     I really like how simple these were to make.  You use a rotisserie chicken, so you really just have to put the ingredients together, rather than  doing much cooking.  The other bonus is, you can make the chicken salad ahead of time.  Then when it is time to eat, you can quickly throw together the sandwiches.  All of the condiments and seasoning are already mixed in. The recipe makes a lot, so this is good for a party, or a few days worth of lunches.  I am not usually one for mayonnaise based salads, but I enjoyed this!

 I got the recipe from the food network. I pretty much followed these ingredients except I added about a cup of roughly chopped walnuts (make sure to warn anyone with allergies).

Ingredients
2 cups chopped rotisserie chicken, skin removed (I used the whole chicken)
1/2 cup diced celery
1/3 cup diced carrot
1/3 cup diced red onion
1/2 cup mayonnaise with olive oil
2 tablespoons yellow mustard
1 teaspoon celery salt
1 teaspoon granulated garlic
Pinch of paprika
Freshly ground pepper
6 whole-wheat sourdough rolls, split and toasted Lettuce and tomato, for topping

Directions
Combine the chicken, celery, carrot, red onion, mayonnaise, mustard, celery salt, granulated garlic, paprika and 1 teaspoon pepper in a bowl. Mix until combined.

Serve the chicken salad on the toasted rolls with lettuce and tomato.

0 Comments

The New Year

1/22/2014

0 Comments

 
Picture
    The new has swooped in and I have been busy running after it! Being a mom has taught me a lot of patients and how to prioritize time.  One thing that sadly got pushed to the back burner is my blog! I want you to know that I have still been cooking, baking, and creating, but I haven't had much time to write about it.  
   Since I last wrote our biggest change is that we have moved houses! I never thought I would be able to leave our little gem of a house, but we began to burst at the seems.  We found a bigger house three block away and are now having fun decorating and organizing a new place.  I'll put up some pictures when everything is finished!
    My son is now 9 months old and diving into solids foods with all eight teeth!  I have enjoyed making homemade baby food which is surprisingly easy with a little hand mixer. I thought I would share some of my ideas! 

Picture
    Baby Henry is starting to become a bit more independent and boycotting being spoon fed.  Although I know there are lots of great foods and snacks for babies that are pre-made, it doesn't feel right in my gut to feed him processed food unless I need to.  So I thought I would share my homemade "baby crackers" that I have been making him.  I will warn you, that they don't dissolve like the rice puffs so they need to be chewed or broken into small pieces. 

Picture
      Really they are just organic white sweet potatoes sliced thin and baked hot so they crisp right up! This by the way, is a great healthy snack for any age baby (husbands included). I used one of my small cookie cutters to cut out shapes in order to create corners to get crispy. But slices sweet potatoes would work too!  
     Then I put  a little vegetable oil on the cookie sheet. I flipped the potato pieces in it to coat them with a small amount of oil and baked at 400 for about 30 minutes.  Flip them halfway through so both sides brown.  You can bake the outsides of the cutout.  But I also use them to puree into baby food. 

      My friend Lara shared a recipe with me for little vegetable muffins that I also wanted to pass on.  The recipe has two cups of pureed veggies and fruits in it.  So this can literally be anything you have in the house that can be baked into a muffin.  This is a great way to sneak in a daily does of vegetables and hide it from those picky eaters who would otherwise scoff at cauliflower and spinach! Give them a try!http://www.superhealthykids.com/healthy-kids-recipes/power-packed-fruit-and-veggie-muffin-for-picky-eaters.php

Have a great day and thanks for reading! 
0 Comments

Chocolate Cake

7/17/2013

0 Comments

 
Picture
     So...I haven't written in three months! Coincidentally, my baby is three months old.  That adorable little bundle keeps me busy all the time, and when I am not, I'm savoring the chance to take a deep breath and do nothing. 
     On days when he is particularly trying, I find myself sneaking into the kitchen after he is asleep and whipping out a batch of cookies.  There is something about baking that makes me feel like all is right in the world. By the way, I don't recommend this as a means for loosing your baby belly!  
   This week it was my friend Whitney's birthday.  She is amazing about baking cakes for everyone else, so I figured she deserved a quality birthday cake, even if Baby Hank is in one arm while I bake with the other. 
    I haven't loved the last few chocolate cakes I have made so I went on a hunt for a new recipe.  I found this one and love it! There is a bit of espresso in the cake and the frosting which gives a nice full rich flavor.  The cake turned out moist but was not super dense.  It was a good consistency for a multi-layer cake because it was firm enough to carve. In the center of the two cake layers I added raspberries, because who doesn't appreciate the combination of raspberries and chocolate!
      I altered most of the frosting ingredients so I will put the original recipe, and what I actually put in next to it. I wanted it to be a little lighter than typical chocolate frosting.  I can't really say which is better, because I didn't try hers.  After I had frosted the main cake I added a bit more cocoa to the last of the frosting to darken the color.  I then used a piping bag and a few more berries to decorate the cake.  Give this a try and let me know what you think!

Picture
The recipe was created by Robyn Stone, I found it on her website addapinch.com.

  • Ingredients:
  • 2 cups all-purpose flour
  • 2 cups sugar
  • ¾ cup cocoa
  • 2 teaspoons baking powder
  • 1½ teaspoons baking soda
  • 1 teaspoon salt
  • 1 teaspoon espresso powder
  • 1 cup milk
  • ½ cup vegetable oil
  • 2 eggs
  • 2 teaspoons vanilla extract
  • 1 cup boiling water

  • Chocolate Frosting
  • 1½ cups butter (3 sticks) (I also added one block of cream cheese)
  • 1 cup cocoa   (I added only enough to color the frosting brown with light chocolate flavor, maybe 2 tablespoons?)
  • 5 cups confectioner’s sugar (I added about 3 cups)
  • ½ cup milk (I used 1/4 cup)
  • 2 teaspoons vanilla extract
  • ½ teaspoon espresso powder

Instructions

  1. Preheat oven to 350º F. Prepare two 9-inch cake pans by spraying with baking spray or buttering and lightly flouring.
  2. For the cake:
  3. Add flour, sugar, cocoa, baking powder, baking soda, salt and espresso powder to a large bowl or the bowl of a stand mixer. Whisk through to combine or, using your paddle attachment, stir through flour mixture until combined well.
  4. Add milk, vegetable oil, eggs, and vanilla to flour mixture and mix together on medium speed until well combined. Reduce speed and carefully add boiling water to the cake batter. Beat on high speed for about 1 minute to add air to the batter.
  5. Distribute cake batter evenly between the two prepared cake pans. Bake for 30-35 minutes, until a toothpick or cake tester inserted in the center comes out clean.
  6. Remove from the oven and allow to cool for 10 minutes.
  7. Frost cake with Chocolate Frosting.
  8. For the Chocolate Frosting:
  9. Add cocoa to a large bowl or bowl of stand mixer. Whisk through to remove any lumps.
  10. Melt butter and pour into bowl with cocoa powder. Whisk together until well-combined.
  11. Add sugar and milk to cocoa mixture by adding 1 cup of sugar followed by about a tablespoon of milk. After each addition has been combined, turn mixer onto a high speed for about a minute. Repeat until all sugar and milk have been added.
  12. Add vanilla extract and espresso powder and combine well.
  13. If frosting appears too dry, add more milk, a tablespoon at a time until it reaches the right consistency. If it appears to wet and does not hold its form, add more confectioner’s sugar, a tablespoon at a time until it reaches the right consistency.
0 Comments

The Nursery

4/11/2013

3 Comments

 
Picture
     Well, following in his father's footsteps, the baby is late! The last few weeks have been long and uncomfortable.  I have found it very strange to be sitting around hoping for extreme pain to hit, but that's where I am! 
      The good news is, I have had lots of time to get everything in the house and the nursery all organized!
   I have even been cooking some of my recipes and freezing them so we have some dinners stored up when the baby arrives. 

Picture
    We wanted the room to have a peaceful and calm feeling.  Mostly so that when we are freaking out the baby room is relaxing! We used gray and white as the main colors with a few green accents here and there.

Picture
     For me the room wouldn't feel full of love if there wasn't something handmade in it.  So I ordered a toy chest, put it together, and decided to paint it! We thought it would be fun if there was a train on the front.  I looked through many different train pictures, drew out some sketches and got started!

Picture
    Here it is finished! It will double as a good place for storage and a window seat.  
     Now all we need is the baby!

3 Comments

Lemon Chicken with Capers

1/30/2013

0 Comments

 
Picture
We found a great recipe for lemon chicken with capers.  Thought I would share because it was delicious! We enjoyed the chicken with steamed cauliflower and garlic herb couscous.  It took about 30-40 minutes to get everything cooked.  I skipped flattening the chicken with a mallet and just bought thin slices chicken breasts. 

Picture
From Food.com By Gatorbek
Servings:4

Ingredients:
4 medium boneless skinless chicken breasts
1/2 cup flour, divided
1 teaspoon salt
2 eggs
2 teaspoons olive oil
2 tablespoons butter
2 tablespoons garlic, minced
1/2 cup chicken stock
1/4 cup dry white wine
1 large lemon
2 tablespoons capers, drained and chopped
1 tablespoon fresh parsley, chopped

Directions:

1) Place each chicken breast between two sheets of wax paper. With a mallet, flatten each to about 1/4 inch thick. (This is not necessary if you buy think sliced chicken breasts)

2) In one pie plate, beat eggs slightly.  In another pie plate, mix 1/4 cup flour with salt.

3) Coat chicken with flour mixture, then dip in egg. We dipped the chicken in flour one more time and then put it on a plate until all the chicken was coated so some didn't cook more than others. Add more flour and salt as needed. 

4) In nonstick skillet, heat olive oil over med high heat until hot.  Stir in 1 Tbsp butter until melted.

5) Add chicken. Cook 5 minutes to brown, then reduce heat to med.

6) Turn chicken and cook about 4-5min more until juice runs clear when pierced.  Then transfer chicken to a warm dish.

7) Lower heat if needed to maintain medium-low to medium heat so as not to scorch the garlic, then add garlic to the drippings in the skillet.

8) In a cup, mix stock, wine, lemon juice, and 1 1/2 teaspoons of flour until smooth. 

9) Stir into mixture in skillet. Scrape skillet to incorporate any browned bits from the chicken.  Heat to a boil, boil 1 minute. Stir in capers and remaining 1 tablespoon of butter, simmer until thickened.

10)Pour sauce over chicken, sprinkle with parsley and garnish with additional lemon slices.

Note: Occasionally, this has turned out a little more "tangy" than I would like with too much lemon. If this happens, just dilute with a little extra chicken stock or broth mixed with cornstarch or flour to keep thicker consistency.


Read more at: http://www.food.com/recipe/skillet-lemon-chicken-with-capers-281300?oc=linkback

0 Comments

Fun Dinner Idea!

1/24/2013

1 Comment

 
Picture
Make your own pizza night! My sister Dana and her boyfriend Sean often join us for a quiet Sunday night dinner to recover from whatever fun was had that weekend.  Dana (a veggie) had some soyrizo at home that she was all excited about.  So we decided to make our own pizzas tonight.  
 

Picture
As I was preparing for them to come over I realized that it was a super easy dinner to get ready and that I should share it all with you! 

The only thing that took a little forsight was the dough.  If you have a bread maker it is easy to throw all the ingredients in and hit the dough cycle.  You just have to remember to do that about 2 hours before you want to eat.  Otherwise, there is always Boboli!

Once the dough is ready, you punch it down and kneed it.  Cut the dough according to how many pizzas you are making and flatten them out.  We then spread a little olive oil and punched them with a fork, so no big bubbles disrupt your toppings while it bakes.  Let the dough sit for about 15 minutes before making the pizzas. 


Picture
I walked to the grocery, bought one bag of items and had it prepped in about a half an hour.  Just for the presentation I put all the possible toppings in little bowls.  This way you can survey the goods before you make any commitments. I put out pizza sauce, mozzarella cheese, and parmesan cheese.  For the meats we had turkey salami or the vegi option of soy chorizo.  For the veggies I slices cherry tomatoes, fresh basil, marinated artichoke hearts, slices mushroom, and pineapple.  Of course you can out whatever toppings you would like! Lastly I included some homemade olives and roasted garlic.  

Picture
I have to give some credit here to my flagrantly Italian/Spanish friend Tyler. Years ago he taught me how to make delicious roasted garlic.  Tyler, feel free to correct me here if I have made any procedural errors! First you slice of the top of a head of garlic (I may have sliced off a bit too much on this one). Drizzle a bit of olive oil on top.  Wrap it in foil with the sliced top pointing up and bake it at 350 for about 40 minutes.  
You'll end up with the most delicious, mild, roasted garlic flavor that can be spread on just about anything! You want the cloves to be soft, but not mushy.  I checked them with a toothpick here and there. 

Picture
So finally, let everyone top their pizzas. (isn't Justin handsome)  Bake them at 425 until the top of the cheese starts to brown and  bon apetite! 

We added a game to mix while we were eating.  However, I lost big time, so it wasn't nearly as fun as last time I played when I won!!

1 Comment

Broccoli-Cheddar Soup

1/17/2013

0 Comments

 
Picture
     On a frosty winter day, an entire dinner themed "Comfort foods" sounds pretty good! It was time for our monthly 'family dinner' with friends, and a comfort food was your ticket in the door.  After debating over several different soups, I decided to try broccoli cheddar.  I got the seal of approval at dinner that it was blog-able, so here it is! 
    Although I have been a super lazy blogger lately, I have been cooking! The urge to share it has returned!
    

Picture
     I originally got the recipe off of the food network.  Here is the link to it.  After reading several of the reviews and doing some taste testing I changed quite a few things.  So below if my version. I was cooking for a large group.  I would say that it serves 8-12 depending on whether you are eating it as a main course, or a starter. 

Picture
Ingredients:
  • 3/4 cup butter (12 T) butter 
  • 2 small onion, chopped
  • 1/2 cup all purpose four 
  • 4 cups (1 quart) half-and-half (fat free version is optional depending on what you news year's resolution was)
  • 4 cups low-sodium chicken broth (I also added one cube of chicken bouillon for an added richness in the flavor)
  • 4 bay leaves
  • Kosher salt (I didn't need any) and freshly ground pepper
  • 8 7-inch sourdough bread  boules (round loaves) (If you are wanting to eat fewer carbs, you can always use normal bowls)
  • 6 cups broccoli florets (about 1 1/2 heads)
  • 1 large carrot, diced
  • 1 stock of celery chopped finely
  • 2 1/2 cups (about 8 ounces) grated sharp yellow cheddar cheese, plus more for garnish
  • 4 ounces cream cheese

Picture
Notes:
    I used my food processor and grated all the vegetable except the broccoli. I then gave it a little rinse and used it to grate the cheese.   This made it really quick and easy! 

The original recipe calls for the soup to be pureed, however I enjoyed having some variance in texture.  So grate everything small instead of chopping and avoid the pureeing. 

The broccoli is kind of the star of the show, and thus should not be grated.  I chopped half of it very fine to enhance the flavor of the soup, and left some of it a bit bigger to give a chunkier texture to the soup.  

*If you decided not to use bread bowls, I think some cubed potato would be another yummy and nutritious addition. 


Picture
Directions:
Melt the butter in a large Dutch oven or pot over medium heat. Add the onion and cook until tender, about 5 minutes. 
Whisk in the flour and cook until golden, 3 to 4 minutes, then gradually whisk in the half-and-half until smooth. 
Add the chicken broth, and bay leaves,  then season with salt and pepper and bring to a simmer. Reduce the heat to medium-low and cook, uncovered, until thickened, about 20 minutes.

Meanwhile, prepare the bread bowls: Using a sharp knife, cut a circle into the top of each loaf, leaving a 1-inch border all around. Remove the bread top, then hollow out the middle with a fork or your fingers, leaving a thick bread shell.

Add the broccoli, carrots, and celery to the broth mixture and simmer until tender, about 20 minutes. Discard the bay leaves. 

Gradually mix the cheese into the soup and whisk over medium heat until melted. Add up to 3/4 cup water if the soup is too thick. Ladle into the bread bowls and garnish with cheese.
Lastly, enjoy the warm richness of soup on a cold day, an seen above!

0 Comments

Third Trimester

1/13/2013

0 Comments

 
Picture
       I have officially entered my third trimester! I am relieved.  Every week I get closer I feel better about the chances of the baby being born healthy! The worried mom thing sure kicked in fast! 
       You hear about all these crazy things that pregnant women do, and you think "I'll never do that"  but then your body takes over.  I am not naturally a clean  person, but my husband has been working hard over the last ten years to make me one.  Once the third trimester hit, it was like this foreign nesting bug took me over! I have been cleaning out closets and drawers that were long over due! I know it has been way too long, because today we went on a crazy sorting binge to take things to good will and an old teaching ID from 2006 fell out of the purse I was donating! 
     Beside having crazy urges to get organized, it is such an amazing and exciting time.  I think somehow being pregnant is a slight beacon of hope for people.  Yesterday I was standing at a crosswalk opposite a couple waiting for the light to change and the woman was clearly pointing at me and talking to her partner about my belly. Upon crossing, she stopped me on the street to tell me how excited she was for me and that she hoped she was just like me one day.  It reminded me that amazing things that are happening to me as I go about my day.  I can feel the baby move on and off all day now.  When I am lying down you can even see him kick and drag his heal (or some body part) along my belly!

Picture
      After debating for a long time whether or not to find out the sex of the baby, we gave in to our curiosity.  As you can see from the rather graphic picture, it is a boy! 

Picture
       As the clock ticks, the nursery begins to take shape.  First we had to get rid of all of our guest room and office furniture that currently occupies the "baby room".  Then we had to sort a ridiculous number of files to condense them into out new mini office. It looked like this awful mess for a long time. 
      Then it was project time! We haven't worked on a good messy project in our house for a while so it was kind of fun.  As most 90 year houses do, we have plaster walls which means there are cracks.  So I started by plastering over all the cracks. Wait a day and sand.  Then we painted. Back when Justin didn't know if the baby was a boy or girl, he was fairly impartial to everything baby.  So I picked out the paint color, and crib color, and changing table color myself.  Then we found out the baby is a boy and out came the involved Dad in him. So after the first coat of paint it was decided that we needed a new color.  We also sent back all the furniture I had and got a different crib and changing table and ...Yes, I am kind of complaining, but in the end I am happy that he is involved now.  Paint again, and then take a deep breath.  

Picture
     The good news is that the room is really taking shape! We wanted a neutral gray that could work if the the next baby was a boy or girl and something simple so that it has a calm energy about it for mom and dad! 
    We buit the crib and changing table and I love them.  I also laid out some adorable baby things that I am starting to collect and they always make me excited!
   So I am plugging along, taking my vitamins and exercising.  I look like I swallowed a soccer ball, and I couldn't be happier!  


0 Comments

Pomegranate Jelly

11/20/2012

0 Comments

 
Picture
     Have some time off for the holidays! Good. Pomegranate jam is a great thing to make during  autumn to get your kitchen smelling amazing and get some of those gifts knocked out for the holidays.  We happen to have a pomegranate tree in our yard, but you can get them in large quantities at the farmers market. I used between 20-25 to make a double recipe of jam.  This made about 15 small jars full.  You can also use many other fruits to make jam, and the process is really the same.  
    Here is the link to the recipe and more directions. Recipe

Picture
  You need to be a bit careful with pomegranates, because the juice is festively red, and likes to spray, spatter, and stain.  Because of this, I set all my materials up prior to opening any fruit, and I did it outside. 
   Kitchen aid and all, out we went!  I had a bowl of water to rinse, a knife to cut, rubber gloves, the juicing attachment, a bowl with a strainer on top, and a bucket for the empty shells. 

Picture
      The first step is to extract the juice from the pomegranate.  There are really two methods for doing this.  You can pick out all the seeds and then put them in the food processor to cut off the flesh of the seed and then juice it. If you do this, I recommend scoring the pomegranate into quarters and pulling it apart rather that cutting through the middle.  This will avoid cutting many of the seeds and making a mess. 
      The other option is to go outside where everything can get good and juicy, cut the pomegranate in half, and shove it on the juicer! 
       I have done both.  The first produces the best flavor a pomegranate can make.  It is sweet, tart, and rich.  However, it took me a whole day to get enough seeds out to make a batch of jam.  This fall I decided to go with the quick and dirty.  It only took about an hour to get the juice out.  However, the taste has a bit of the bitter, nuttiness that the pomegranates have when you eat the berry with the seed. 
    I also admit, but juicing station looked like the scene of a murder when I was done.

Picture
   Once you have all the juice you need, take respite from the great outdoors and head back inside.  You have to prepare your jars by boiling them for a few minutes to kill any bacteria.  Then pour boiling water over the kids to do the same.  
   The process of actually cooking the jam is fairly fast so make sure the sugar and pectin are ready to go, and have a timer on hand. 
    Follow the recipe to cook the juice, pectin, and sugar. I stirred with one hand and kept my other on the stove knob, because the juice can boil out of control very quickly. 

Picture
    
      Very carefully fill the jars.  I would recommend gloves because this stuff is hot! 
    The last step is to boil the filled and sealed jars for five minutes so that they can stay on the shelf unrefrigerated.  Be very careful lifting these in and out of the boiling water.  My tongs slipped on a big jar which splashed boiling water and burned my arm pretty badly.  I conveniently wasn't wearing sleeves or one of my 10 adorable aprons! 

Picture
       I definitely plan to eat a few of these jars.  But I also plan to give them as gifts. I like giving homemade gifts that are a labor of love.  People will appreciate it! In order to enhance the appearance a bit I printed little gift labels that I got at Office Depot. Project done! Gifts prepared.  Time to enjoy Thanksgiving break.  Have a wonderful week and make sure to tell those you love how thankful you are for them!

0 Comments
<<Previous

    Robin's Blog

    I am living in Downtown 
    Sacramento creating my little urban farm!

    Archives

    June 2014
    April 2014
    January 2014
    July 2013
    April 2013
    January 2013
    November 2012
    October 2012
    September 2012
    August 2012
    July 2012
    June 2012
    May 2012
    April 2012
    March 2012
    February 2012
    January 2012
    December 2011
    November 2011

    Categories

    All
    All
    Appetizers
    Breads
    Breakfast
    Chickens
    Crock Pot
    Desserts
    Fall Foods
    Gardening
    Gifts
    Holiday
    Holiday Foods
    Home Improvements
    Recipes
    Salads
    Sewing
    Soups
    Travel

    RSS Feed

Powered by Create your own unique website with customizable templates.