Robin's Urban Farmhouse
  • Robin\\\\\'s Latest
  • Meet Robin
  • The Chickens
  • The Garden
  • The Bakery
  • The House
  • Untitled

October Family Dinner

10/30/2012

0 Comments

 
Picture
      We had yet again another successful family dinner.  We were a little distracted because we were also watching the Giant's beat the Tigers and carving pumpkins.  Still everything threw together a yummy fall dish.  We were able to experience everyone's recipes! 
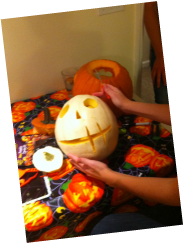
   This is a picture of Whitney's very scary pumpkin from the Nightmare before Christmas (I think). Mine will not be included...I was not feeling the carving and mine ended up looking messy, terrible, and not very creative!
   I am not posting anyone's recipes except the one I made.  However, if you want them, write a comment and I will get the recipe and add it for you. 

Picture
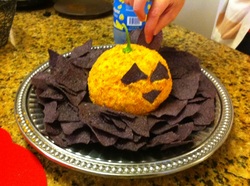
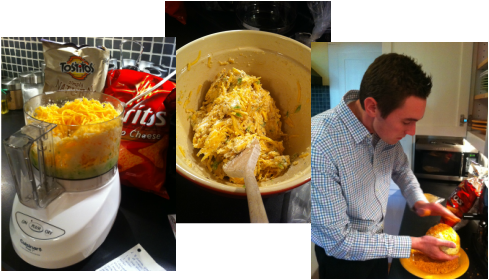
We brought a pumpkin shaped cheese ball for an appetizer.  I was kind of grossed out while we were making it because all the flavors smelled sooo strong.  However, everything came together nicely and it was a hit at the party. This is a good simple recipe that you can make ahead of time.  You can really form the cheese into any shape, so it would work for a lot of special occasions.  Here is the link to the recipe with some pictures of the steps.  

Picture
Picture
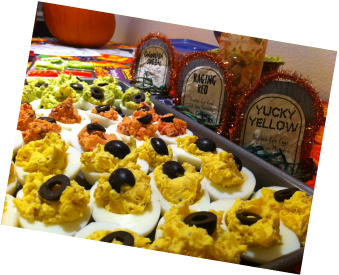
    Dana Started us off with some creepy deviled eggs with adorable labels. They were three color and flavor combos; mustard and yellow bell peppers, sraracha and red beats, and avocado and dill.   She also made some black berry cocktails, but they were not pregnancy proof so I didn't have one.  

Picture
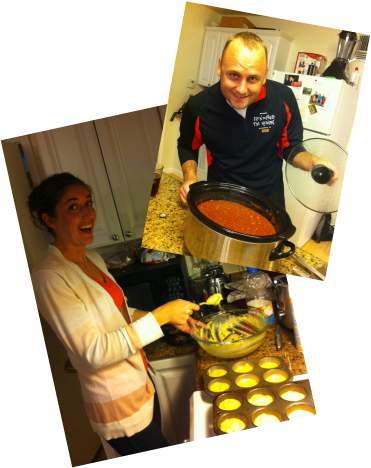
Philip and Whitney hosted the event.  They treated us to three different kinds of chili with freshly baked cornbread.  They had spicy chili, pumpkin chili, and veggie chili.  Thanks guys!

Picture
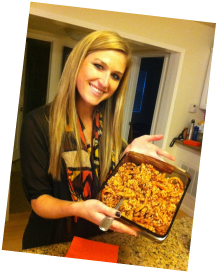
Kim made maggots and worms! Yes, it sounded pretty gross, but it was good.  This consisted of some wild rice and grilled hot dogs.  Very creative!

Picture
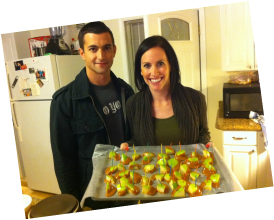
Lastly, for dessert, Sarah and Nick brought us hand dipped caramel apples! They were delicious! Thanks everyone for all the yummy food...until November!

0 Comments

Justified Laziness

10/21/2012

2 Comments

 
Picture
     I though this would be as good a time as any to tell you why I have been lazy, not writing, and not inventing cool recipes.  I am pregnant! I am so excited to be expecting our first baby!
     However the pregnancy has been horrible for Robin's Urban Farm House.  For the last three months I have wanted very little to do with food, have had no energy for gardening, and have not felt inspired to write.  Now that I am emerging from the haziness of the first trimester I am coming back to life.  
    I have to admit that I didn't have it all that bad. I only got sick here and there. It is crazy to me how tired I was! You read about all these things, but I just felt like my body was being taken over! Luckily my husband took over grocery shopping and cooking.  Anytime I went near the butcher shop I thought I was going to lose my lunch right there in the grocery. He put up with me having random mood swings and being too tired to function after work.  (I say this is the past tense hoping that these things may be behind me.)
     I have been feeling great the last few weeks and am getting my energy back.  My belly has started to pop out and this week for the first time someone knew I was pregnant ( and not just fat). This picture of from last month's ultrasound.  I will have some new ones next week.  
   The baby is due in April so I won't have to go through a Sacramento summer preggers! Anyways, we are excited, thought it would be fun to tell you all!
Round Robin

2 Comments

Happy 87th Birthday Grandma!

10/9/2012

1 Comment

 
Picture
   This weekend we celebrated my grandmother's 87th birthday! Additionally my husband was in Vegas on a guy's weekend.  So I had the whole weekend to make a mess of my kitchen and create  an artful cupcake for my grandma. 
   I have an absurd amount of weeds in my garden right now! Some of those pesky weeds are mint, so I decided to make chocolate mint cupcakes.   I wanted something that was more elegant and had flavors an adult would enjoy. 

Picture
     All of the recipes came out of my Martha Stewart cupcake book.  It makes 18 cupcakes.  The actual cupcake part was about as easy as it gets and the cupcakes turned out moist, even, and beautiful.  They are great if you want a cupcake where you are going to to leave some of the surface exposed. 
   The leaves on the top were much more challenging.  So if you are feeling artsy go for it, they were beautiful.  If you aren't, throw an Andes mint on top and call it a day! I used a combo of these methods. 

Picture
Ingredients
  • 1 1/2 cups all-purpose flour
  • 3/4 cup unsweetened Dutch-process cocoa powder
  • 1 1/2 cups sugar
  • 1 1/2 teaspoons baking soda
  • 3/4 teaspoon baking powder
  • 3/4 teaspoon salt
  • 2 large eggs
  • 3/4 cup buttermilk
  • 3 tablespoons vegetable oil
  • 3/4 cup warm water
  • 1 teaspoon pure peppermint extract

Directions
  1. Preheat oven to 350 degrees. Line standard muffin tins with paper liners. Whisk together flour, cocoa powder, sugar, baking soda, baking powder, and salt. Add eggs, buttermilk, oil, water, and peppermint extract, and beat with a mixer on low speed until smooth.
  2. Divide batter among muffin cups, filling each 2/3 full. Bake, rotating tins halfway through, until a tester inserted in the center comes out clean, 20 to 25 minutes. Let cupcakes cool in tins on wire racks for 10 minutes. Transfer cupcakes to racks, and let cool. Undecorated cupcakes will keep, covered, for 1 day, or frozen for up to 2 months.
  3. Spoon buttercream into a pastry bag fitted with a large, plain tip. Pipe small mounds on tops of cupcakes. Flatten mounds with an offset spatula, then top with chocolate-mint leaves.

Picture
Frosting
     For the frosting I made Martha's mint butter cream.  I am not putting up the recipe because it was the most time consuming, mess making, hardest frosting I have even made.  You had to make a custard, cook mint leaves, straining them, bla bla bla, it was ridiculous. In the end I did my own thing with it and was frustrated that I had spent so much time following the specifications of the frosting recipe. 
    Here is what I basically did (or would recommend to you).  Make a basic butter cream frosting, or any yummy white frosting.  Cut 9 Andes Mints in half diagonally to have for extra garnish on the cupcakes that need a little more. Do this first in case some don't cut well.  Then chop up about 10 or 12 other Andes mints and mix them in to the frosting. Pipe on the frosting with a wide round tip.  I just put a flat bit of frosting in the middle leaving the shiny edge of the cupcake exposed. 


Picture
Chocolate Leaves
Okay, let's be honest, those directions for the leaves sound simple, but this was hard.  It was impressive, so I encourage you to try it, but I made enough leaves for 3 per cupcake and I ended up with 1 successful leave per cupcake with a very few that scored a second leaf.  Don't worry, I have some pointers for you that were learned through the trial and error method.  They will save you some effort! 


Tools and Materials
  • Small paintbrush
  • Fresh mint leaves
  • Bittersweet chocolate, melted and cooled slightly
  • Skewers
  • Kitchen tweezers

Chocolate-Mint Leaves How-To1. Using paintbrush, coat underside of 1 leaf with a thick layer of chocolate. Drape leaf, chocolate side up, over a skewer set on a parchment-lined baking sheet, top. Repeat. Refrigerate until set, about 10 minutes.Gently grasp each leaf with tweezers, and peel from chocolate. Frost tops of cupcakes with buttercream. Decorate with chocolate leaves.


Picture
My Tips
1. Wash the mint leaves and choose the ones you want.  Make sure to either dry them each or let them dry for a long time before you get started.  The ones that had water still on them make the chocolate all chunky and then would not peel off when the chocolate was cooled.

2. Chop the chocolate very finely.  In my book it talked about using certain brands of very high quality chocolate, tempering it, and having it at 185 degrees.  I don't have a candy thermometer, so I just used normal bakers chocolate and "guessed" how to temper the chocolate, but it worked!

3. Melt the chocolate over, but not touching, boiling water.  Stir as it is melting. When it looked shiny and yummy I started painting!

Picture
3. I turned the heat down as low as it would go on the stove and took a spoonful of chocolate at a time.  Otherwise it cools too fast and becomes difficult to use. 
*** Put something under the parchment paper that fits in your fridge.  I didn't do this and had to painstakingly move each leave to a small cookie sheet***  
 Paint each of the front side of the leaves.  It is gets on the back try and get it off with your finger or it makes them very hard to peal off. Lay the leaves over a spoon if you want them to be three dimensional.  

4. Cool them for about 10 minutes in the fridge. 

5. Use tweezers to peel the real leaf off.  Don't touch them with your hands because they will melt in front of your eyes.  I found it was helpful to have a second tweezer to push on the chocolate gently on each side of where I was holding the leaf.  This spread the pressure out as I was peeling the leaf off and avoided cracking the chocolate.  After peeling a few the chocolate will start to get soft and you will need to put it back in the fridge. Repeat until done!


Picture

6. Place the leaves on the cupcake. The texture really looked beautiful! Add Andes mints where it looks nice and chill in the fridge.  Bring everything to room temperature before serving.  You will only need one per person because they are rich, but delicious!

1 Comment

    Robin's Blog

    I am living in Downtown 
    Sacramento creating my little urban farm!

    Archives

    June 2014
    April 2014
    January 2014
    July 2013
    April 2013
    January 2013
    November 2012
    October 2012
    September 2012
    August 2012
    July 2012
    June 2012
    May 2012
    April 2012
    March 2012
    February 2012
    January 2012
    December 2011
    November 2011

    Categories

    All
    All
    Appetizers
    Breads
    Breakfast
    Chickens
    Crock Pot
    Desserts
    Fall Foods
    Gardening
    Gifts
    Holiday
    Holiday Foods
    Home Improvements
    Recipes
    Salads
    Sewing
    Soups
    Travel

    RSS Feed

Powered by Create your own unique website with customizable templates.