Robin's Urban Farmhouse
  • Robin\\\\\'s Latest
  • Meet Robin
  • The Chickens
  • The Garden
  • The Bakery
  • The House
  • Untitled

Pasta e Fagioli

2/28/2012

0 Comments

 
Picture
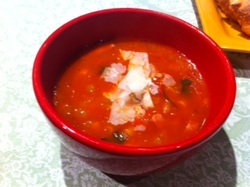
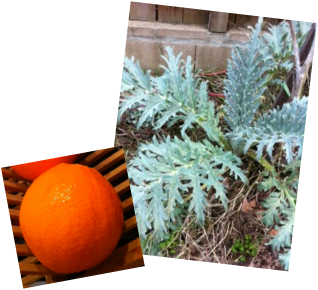
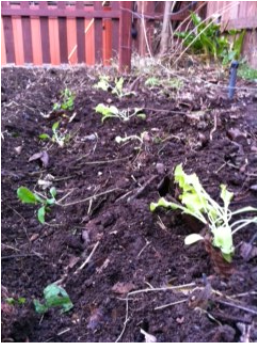
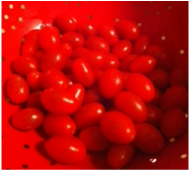
    In St. Maartin there is a great restaurant that serves the most amazing pasta fargioli.  I think we went there three times in a week and all six of the people we were with ordered this delicious dish.  In case you are not familiar with this, is it a tomato based soup with a rich broth, white cannellini beans, and small pasta.  When I had it in the restaurant I thought it was just a basic tomato broth, but it has a very rich flavor.  Upon making it I realized that there are tons of vegetables tat you chop small, and they cook into the broth. Try and use fresh vegetables where you can, or even produce from your own garden! This is why it has such a good flavor!  
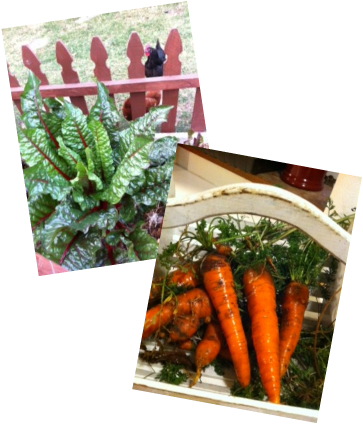
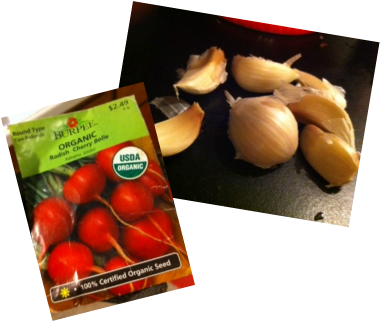
   Anyways,  at work the other day my husband emailed me the recipe and asked if I could make it for dinner.  I love that! That means I don't have to come up with a brilliant idea for dinner, I just have to cook it, which I never mind! It is a Rachel Ray recipe from her website.  There are only two changes I could suggest.  One is to add a little but of chard from the garden, and the second is to use the whole can of beans without draining the juice.  We felt like it could have a bit more bean flavor.  Other than that it was rich and delicious and I will definitely make it again! 

Picture
Ingredients
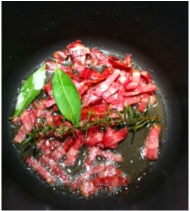
  • 2 tablespoons (2 turns around the pan) extra-virgin olive oil
  • 1/8 pound (about 3 slices) pancetta, chopped
  • 2 (4 to 6-inch) sprigs rosemary, left intact
  • 1 (4 to 6-inch) sprig thyme with several sprigs on it, left intact
  • 1 large fresh bay leaf or 2 dried bay leaves
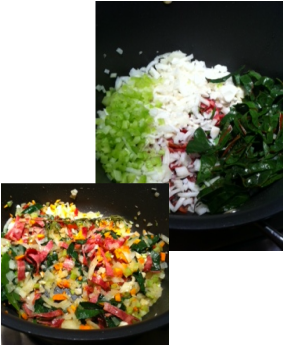
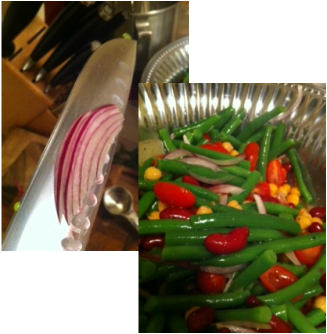
  • 1 medium onion, finely chopped
  • 1 small carrot, finely chopped
  • 1 rib celery, finely chopped
  • 4 large cloves garlic, chopped
  • Coarse salt and pepper
  • 2 (15 ounce) cans cannellini beans
  • 1 cup canned tomato sauce or canned crushed tomatoes
  • 2 cups water
  • 1 quart chicken stock
  • 1 1/2 cups ditalini
  • Grated Parmigiano or Romano, for the table
  • Crusty bread, for mopping


Picture
Directions:
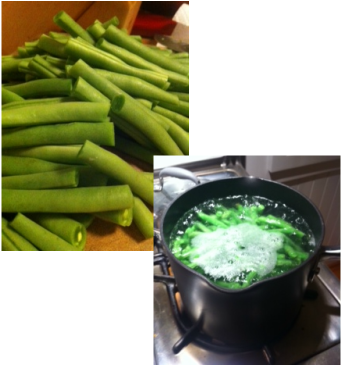
Heat a deep pot over medium high heat and add oil and pancetta. Brown the pancetta bits lightly, and add herb stems, bay leaf, chopped vegetables, and garlic. Season vegetables with salt and pepper. Add beans, tomato sauce, water, and stock to pot and raise heat to high. 

Picture
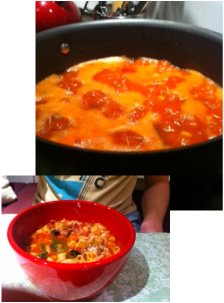
Bring soup to a rapid boil and add pasta. Reduce heat to medium and cook soup, stirring occasionally, 6 to 8 minutes or until pasta is cooked al dente. Rosemary and thyme leaves will separate from stems as soup cooks. Remove herb stems and bay leaf from soup and place pot on table on a trivet. Let soup rest and begin to cool for a few minutes. Ladle soup into bowls and top with lots of grated cheese. Pass crusty bread for bowl mopping.
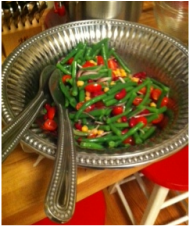
   My husband was more into the chunky food than the broth.  So here is his bowl for reference.  You have a cold rainy few days coming up.  This is the perfect way to break the chill!

SERVES 6; Calories: 365; Total Fat 10 grams; Saturated Fat: 2 grams; Protein: 18 grams; Total carbohydrates: 50 grams; Sugar: 8 grams Fiber 9 grams; Cholesterol: 13 milligrams; Sodium: 1,101 milligrams

0 Comments

February Harvesting

2/26/2012

0 Comments

 
Picture
      Since we are just going out of winter there may not be as strong of a harvest as other months.  However, if you dig deep there is no telling what you might find! First of all our orange tree is going nuts.  Every morning I walk out to get an orange for my lunch.  I figure a jolt of vitamin C never hurt anyone! Usually there is just one orange that has fallen off the tree and is sitting on the ground like it there just for me.  
    When I went till the garden last weekend I realized that there were carrots that had continued to grow over the winter.  Most of them just had a little tuft of green, so make sure to take a look below the soil! 
    If you have chard or other leafy green that thrive in the winter, it is ripe and ready right now.  I have been slicing up our chard and adding it to pasta , or soups.  It is also good to sauté with some garlic and lemon. Did you know chard has 13 different  polyphenol antioxidants? Amazing.   
My herb garden has been pretty stagnant over the winter.  But right now the oregano is taking off and the rosemerry and sage have held strong during the winter.  

Picture
     Last season we transplanted our artichoke plant.  I was a little nervous about this because artichokes generally don't produce a harvest until there second summer and I had grown it from seed.  Unfortunately I didn't realize how big they get and it was blocking the light on a lot of the planter.  The whole plant was maybe two feet tall.  When I dug it up we found it had one main root that was about twice the height of the plant! Anyways, after I transplanted it died.  We didn't get anything but a few tiny inedible artichokes before it croaked.  The great new is, it has come back in full force and I am hoping for some beautiful artichokes this summer!

Picture
     Under the hay I also discovered two potato plants pushing their way through! I am still chitting some potatoes tonight to put a few more in, but they will have a head start.  I guess there must have been a few potatoes I never discovered last season.  
    Of course there are always the eggs! Barbecue laid this mini one today.  She does that sometimes. 

0 Comments

February Planting

2/25/2012

0 Comments

 
Picture
      Remember back in January I planted those seeds in the basement? Well they grew, and now they are ready to go in the ground.  So I took my bran new soft soil and transfered the little seedlings in to the ground.  The first year I planted a veggie garden I loved just throwing plants here and there.  Much to my orderly husband's dislike I ended up with a very jungley garden.  It was pretty, but it was very hard to navigate in order to weed and harvest.
   Enjoy the sunny weekend we are having and throw some seeds in the ground! You will be happy you did when you can walk outside in your own yard and come back in with most of a meal! 
 

Picture
In February you can plant:
onions
garlic 
shallots
lettuces
potatoes
chard
radishes
broccoli
cauliflower 
bock chow

     I transfered the lettuce, arugula, and tomato seedlings and planted them in rows. I know they look a droopy, but they will get stronger as their roots grow in.  I planted them pretty close, because by the time the tomatoes get big and cast a shadow, the lettuce will be pretty much done for the season.  It is a little early for the tomotoes to thrive, but they were getting too tall for the plastic green house, so in the ground they go!

Picture
     I also planted a row of radish seeds so I will have ingredients for a garden salad! Radishes are fairly hardy, so they are okay to go directly into the soil.  Just make sure they get good and wet after you plant them so the moisture penetrates the inner seed.  You can also soak the seeds in water for about 24 hours before planting.  This will shorten the germination time by a few days.  
        I then broke up a head of garlic that I had in the kitchen.  Garlic is the easiest! Just pop each individual clove into the ground about two inches under the soil.  Put them the same direction a clove sits.  They need a bit of cold first to activate and trick the seed into thinking it is winter.  So if you have had the garlic in the house, put it in the fridge for a few days and then plant it.  While the garlic is growing it does not need very much water. Keep this in mind while you are planting.  It just needs enough to keep the leaves rigid.  It will grow thin green stalks.  When they are ready to harvest the stocks will turn brown and completely fall to the grown.  Under the soil will be a plump new globe of garlic! If you get anxious and pick it early (I have done this many times) then you will have a skinny little garlic that isn't very good.  
    Over the next few weeks I plan to till the other garden beds, and plant some of the vegetables listed above. One more tip to keep in mind.  Onions and carrots are great to plant next to each other.  The pests that like carrots don't like the smell of onions and vice versa.  Carrots are not good to transplant because the root is too sensitive.  So wherever you plant your onions, leave a space for a row of carrots as well.  I will write about how to do potatoes because it is an interesting process! Soon I will write about what to harvest this time of year! Have fun in the mean time!

0 Comments

February Gardening Tips

2/20/2012

0 Comments

 
Picture
        This Presidents Day weekend we spent an amazingly fun three days in Tahoe with our friends.  We rented a cabin and hung out, ate good food, made sledding ramps, skied, and enjoyed the mountains.  The lack of snow, and fresh mountain air jolted me into spring mode and inspired me to come home and work in the garden. I also realized that is was about time for the February gardening post since February is half way over! 
     I decided I would categorize this into three posts so they are not too long.  So today I will write about preparing the soil.  Then the next two days I will tell you what I have been planting and harvesting.   Who knew there could be so much to dirt!

Picture
How to Prepare the Soil:
    I looked out in my garden today and saw a field of weeds that I was not excited to pick all winter.  Obviously this is not a good environment for new seedlings to thrive, so out with the old, in with the new.  We have this extremely hardy awful grass that likes to grow in our yard, so I had to get out the big guns! My RotoTiller. 
     It is my woman power tool.  It chops weeds, loosens the soil, and mixes in the compost all in one.  I know I sound like an infomercial for it, but it does good work. You can rent them at Home Depot if you don't have one, or if you are feeling like you need a particularly good workout you can do it by hand with a hoe. 

Picture
Step One:
   Get rid of anything that will get jammed in the rototiller blade, old markers from last years planting, rocks, big sticks, and any other random things that may have found their way into the garden.  I had about three major jams that really slowed me down! This year I will not be using little wire signs to label the garden. 

Step Two: 
   Till everything once.  I only do one planter box at a time.  So it only takes about five minutes.  This will cut up any major weeds and loosen the soil around the roots.  I have a very small tiller so that I can go in between sprinkler lines and existing rows of plants. Then pull remaining weeds.

Step Three:
   Turn the compost so it continues to rot.  See the compost blog if you are curious about this process. Spread any compost material that is ready on top of the soil.  If you don't compost you can use plant vitamins from the hardware store. 

Step Four:
    Till the soil again to further cut up any remaining weeds, mix in compost and loosen the soil.  I recommend starting at one end and pulling the rototiller towards you so you don't walk on the fresh soil.  When you are done it will be light and fluffy and ideal for fresh little roots.  You can plant now, or leave that for another day.  As you can see I still have some weeds in there to tackle, but small victories work well for me! Until tomorrow...

0 Comments

Chunky Oatmeal Cookies

2/16/2012

0 Comments

 
Picture
  Yes, there is snow! And this means it's time to ski.  I love heading up the mountain before the world is awake and seeing fresh glistening snow against the green trees.  It is a solid day of good outside exercising with the bonus of cuddling on the chairlift.  But let's be honest.  There has to be some food incentive if I am going to work that hard.  So, with ski season comes chunky oatmeal cookies!!
   

Picture
      They are the perfect pocket liner to give you a little burst of energy and sugar throughout the day.  The recipe is not very original, but it is moist and hearty.  I use the Quaker Oats recipe and add some chunk.  We are heading to Tahoe tomorrow with a bunch of friends to spend the weekend in the snow. So that means it's baking time.   By the way, I realize that this is totally against Feel Good February, but who really thought I would make it the whole month without baking.  This is my cheat for the week. 

Picture
Ingredients: Makes about 4 dozen(depending on how much dough you eat)
1/2 cup plus 6 tablespoons soft butter
3/4 cup firmly packed brown sugar
1/2 white sugar
2 eggs (thank you chickens)
1 teaspoon vanilla
1 1/2 cup flour
1 teaspoon baking soda
1 teaspoon ground cinnamon
1/2 teaspoon salt
3 cups Quaker oats

The chunk:

3/4 cup raisins
3/4 cup chocolate chips
3/4 cup coarsely chopped walnuts or pecans (I left this out this time due to allergies)

Picture
Directions:
1. Preheat oven to 350 degrees.  Beat the softened butter and both sugars on medium speed until it is creamy. You might as well take a taste now because it is already amazing.
2. Beat in eggs and vanilla.  Make sure to scrape the sides.
3. Add combined flour, baking soda, cinnamon and salt and mix well. 
4. Mix in the oats.  Then add raising, nuts, and chocolate chips. It will be a stiff for dough, but that's okay.
5. Drop a tablespoon on an ungreased cookie sheet and bake for 10 minutes. 
6.  Let them sit for a minute or two them carefully move to a wire rack to cook completely. They are melt in your mouth delicious, and they are hearty on a hungry stomach!
Time to hit the slopes!

0 Comments

Who needs an "I Love You?"

2/14/2012

2 Comments

 
Picture
     Happy Valentine's day.  I know I really haven't been writing much and I am not sure why.  I feel a  little bit guilty that I don't have some amazing Valentine's dessert for you to cook.  Believe me, the ideas are in my head, but I haven't gotten them in the baking dish this year.   I guess one reason is that we are on a February diet.  So that really cuts into my inspiration for cooking. The cupcakes and chocolate pies dancing in my head have to wait.  I am dying to make a batch of cookies, but I guess you have to take a break from the gluttony once in a while.  
     I am not a huge Valentine's person.  I just feel like it is an excuse to buy lame stuffed animals or chocolates (of which I am not allowed to eat).  Also, being a second grade teacher, the experience is a little bit different.  I spend most of the day herding sugared up children which doesn't give me that glowing romantic feeling.  They love it and that is good.  I found these awesome mini-play doughs this year for my students and that was some great sugar free fun! However, I do appreciate the reminder to stop and realize the love that is in my life.  I am incredibly blessed.  I look forward to coming home each day.  I love spending time with my family, and I have great friends surrounding me.  So thanks guys!! This is everyone's reminder to find that person that you haven't told today how much you love them, and do it! 

2 Comments

Green Bean Salad

2/10/2012

0 Comments

 
Picture
    I made this salad last weekend and it was nice to see some bright vegetables during winter.  The green beans had a nice crunch and the sweetness of the cherry tomatoes contrasted well with the beans.  This salad would probably be better suited for summer when all these ingredients are in season locally, but it was delicious now too!  We ate it at our friend Mary and Ryan's.  They made delicious garlic steak sandwiches.  The salad was a nice accompaniment to something rich and heavy. 


Ingredients:
Green beans
Kidney beans-1 can
Garbanzo beans-1 can1 red onion (optional)
Cherry tomatoes
1 tablespoon olive oil
1 tablespoon rice vinegar
1 teaspoon salt
1 teaspoon pepper
1 teaspoon garlic powder

Picture
Directions:
1. Bring a medium sauce pan full of water to a boil.

2.  Wash the green beans, trim the end off, and cut them in half so they are easier to eat.  

3.  When the water is boiling drop the green beans in to blanch them.  This will take a about two minutes.  The beans will turn bright green.  You want them to still have a firm crunch but not have that hint of bitterness that raw green beans have.  Immediately put them in a strainer and run cold water over them so they stop cooking.  Put them in the serving bowl.  

Picture
4.  Slice the tomatoes in half long ways and add to the serving bowl. 

5.  Drain both the kidney beans and garbanzo beans and add them as well.


Picture
6.  The red onion is optional for those that enjoy raw onions.  The key here is to not over do it!  Slice the onions as thin as you possibly can.  Put about four slices of the onion in.  You want there to be a hint of flavor rather than bombard the salad.   

7.  Pour oil and vinegar over the whole salad.  Sprinkle in salt, pepper, and garlic powder.  

8. Toss and serve!

0 Comments

Unbelievable!

2/8/2012

1 Comment


Picture
    The opossum is back! Yes, the nasty little opossum that we trapped, drove out to the river and dumped.  It is come back with an attitude like "Hey roomies, I'm back!" He is hiding in the same places, eating my garden, and bothering us every night again when we try and get in the hot tub.  
     Now the hairy mongrel has taken to perching himself in the persimmon tree above the hot tub while we are soaking.  The worst part is, he isn't scared of us at all! 

Picture
   The other night we walk out, in our swimsuits, in the middle of winter to make the trek out to the hot tub.  I hear an odd and all too familiar scramble in the compost bin and I couldn't believe it! I don't know what kind of sense of direction this opossum has, but it is unbelievable! We literally put him in a pitch black planter, drove around for over three miles, and let him go.  Apparently the urge for home sweet home is stronger than I thought. 
     So again we danced this awkward dance, with a long pole, a opossum, and our swimsuits.  The good news is, this time I ran and got my phone to document.  We kept "nudging" him with the pole to try and give him the hint that he was not welcome.  He just scrambled around, but never fell off the fence.  Not once did he bare his teeth, hiss or anything.  It's like he is confused as to why his family is hitting him with a stick.  Eventually he walked to a more slippery spot and we shoved him out of the yard.  Unfortunately I have seen or heard him nearly every night since then.  I am waiting for some brilliant plan to formulate in my head.  Really I am seeing visions of the beeby gun dancing in my head. Help! 

1 Comment

Crispy Potato Skins

2/5/2012

0 Comments

 
Picture
      I am not sure if you all are familiar with Pioneer Women.  But my friend Jen gave me her novel last summer.  I blew through like a complete addict, sort of became obsessed with her, and have never looked back.  The best part is she is real, as well as her story! Unlike other book characters that I fall in love with, I can see what pioneer women is up to because she has an amazing blog.  Okay, you can't all leave me for her, but you should check out her blog too.   Because of this my mom got me her cookbook for Christmas.  I have yet to try something out of it I didn't like.  

Picture
     
    I haven't posted any of her recipes because I didn't know if that was cheating.  But I decided that potato skins should not be kept to myself on Superbowl weekend.  So, this recipe is all pioneer women. If you are thinking that there is a slight chance you might think about making these, you should.  You'll be happy you did. 

Picture
Ingredients:
8 slices of thick bacon (or if you live at my house turkey bacon)
8 cleaned russet potatoes
canola oil
kosher salt
1 1/2 cups sharp cheddar cheese
1 cup sour cream
4 green onions sliced

Picture
Directions:
1. Preheat the oven to 400 degrees. 

2. Fry up the bacon.  You want it a little crispy for some crunch! When it is cooled, chop it into small chunks.

3. Wash the potatoes and rub them with canola oil.  Bake them on a cookie sheet for 45 minutes to an hour until they are fork tender. 

Picture

4. Slice the potatoes in half lengthwise.  Scoop out the middle of the potato.  Leave a little bit in there for structure and taste.

5.  Brush both sides of the potatoes with canola oil and sprinkle both sides salt.  

6.  Bake the skins face down on the cookie sheet for 7 minutes to crisp everything up.

7. Flip the skins over and cook them face up for another 7 minutes.  They should have tinges of brown on the side that make your mouth water.  


Picture

8.  While this is all going on grate the cheese and chop the bacon into bits. 

9. Sprinkle the cheese into the potato skins and top with bacon.  Return this to the oven to melt the cheese.

10.  When you are ready to serve these scrumptious little treats, plop a dollop of sour cream in the middle and sprinkle with chives.  

0 Comments

Chili Trials!

2/3/2012

0 Comments

 
Picture
Meghan and I dancing our way through the Stagecoach Festival!
      My good friend Meghan cooked my chili recipe (click for recipe) and had some great ideas! She shared them with me, so I thought I would share them with you.  It is perfectly timed for super bowl weekend!

Here's from Meghan:
Ok — I am so sorry that it took me so long to write to you about this – because I made your recipe almost right away…  Ben says it is quite possibly the BEST chili he has ever had!  I made a few slight modifications — (most were accidental! - I forgot to add the corn!) but on the whole it was your recipe and it was soooo good.   

Picture
Ben and Meghan at her birthday dinner.
     Besides forgetting the corn  -- I served mine with a few different toppings…  Ben is not a huge fan of super spicy — so instead of jalepeno, I substituted green onions (same nice color and crunch with less heat).  I was worried that I made it too hot for his liking so I also served with a small dollop of sour cream to counter act the heat.   In terms of process — I am not sure that this makes any difference in the actual outcome — but it was fun to smell the spices cooking directly…  so I mixed my spices together in a small ramekin (although I should also admit that I am not patient enough to measure exactly — so I may have eyeballed some) and then added half  to 3/4 of the spice mixture while I was browning the meat (with the onion) so that I was sure that the meat was seasoned before I added the beans and tomato sauce.  When I added the beans I stirred in the remainder of the spices.   

It was so good that I have already bought meat to make more so that I can freeze it to have on hand for those nights when I don’t feel like cooking or haven't gone to the store! 

Next time I think I also might make corn bread to serve with it (which would have been a nice way to incorporate the corn that I forgot!!) but really it was so delicious that it didn’t even need the bread! 

Thank you Robin!!!! 

0 Comments
<<Previous

    Robin's Blog

    I am living in Downtown 
    Sacramento creating my little urban farm!

    Archives

    June 2014
    April 2014
    January 2014
    July 2013
    April 2013
    January 2013
    November 2012
    October 2012
    September 2012
    August 2012
    July 2012
    June 2012
    May 2012
    April 2012
    March 2012
    February 2012
    January 2012
    December 2011
    November 2011

    Categories

    All
    All
    Appetizers
    Breads
    Breakfast
    Chickens
    Crock Pot
    Desserts
    Fall Foods
    Gardening
    Gifts
    Holiday
    Holiday Foods
    Home Improvements
    Recipes
    Salads
    Sewing
    Soups
    Travel

    RSS Feed

Powered by Create your own unique website with customizable templates.