I love the feeling of having a big delicious breakfast on the weekends. Probably because on mornings that I work I'm lucky I grab a quick piece of toast! There is something about a homecooked breakfast that wraps me up and makes me feel hugged.
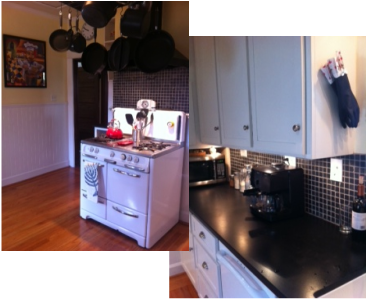
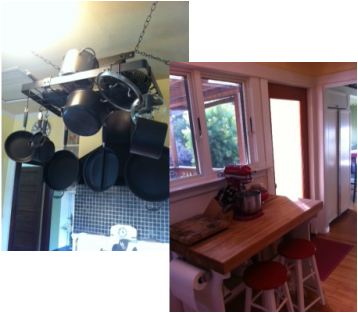
For us, a weekend breakfast is eaten in the nook. The morning sun pours in the window and we can watch the chickens pecking around in the grass. I can wear my pajamas and sit on the padded bench with my legs crossed up with me. So if you have a chance among all the new year celebrations, put on your robe, and whip up a Sunday morning breakfast.
Growing up we always used a boxed pancake mix. My mom would make the pancakes into all these crazy shapes for us. She would draw little faces and things with the batter and my sister and I would sit and wait to see what it looked like when she flipped it over.
I distinctly remember the first time I was married and tried to make a pancake breakfast. I looked in the cupboard and was bummed because we didn't have pancake mix. Then it dawned on me that HELLLOO, you can just make pancakes from scratch! So I found a recipe and was off and running. It is very simple. Now I just have to keep the baking ingredients stocked, pancake mix is never on the shopping list.
I made this recipe last weekend. The pancakes are fluffy and creamy. They kind of give you that eat slowly, melt in your mouth, life is good kind of feeling.
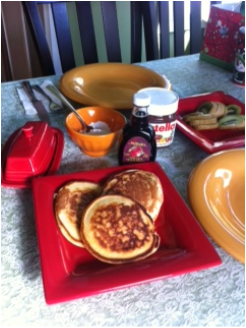
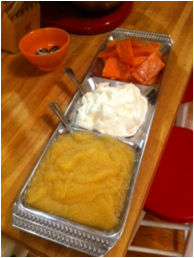
The pancakes are great, but the fun part is all the toppings. Lay out a spread of whatever you can find around the house. Syrup is an obvious choice. I always love some butter and powdered sugar, that was my favorite when I was little. We used some Nutella, or even peanut butter and jelly is fun. Think about cutting up some fresh fruit if you have it. Bananas, berries, and peaches are all great on pancakes. Enjoy your weekend and Happy New Year!
By the way, you can do this on Saturday too!
For us, a weekend breakfast is eaten in the nook. The morning sun pours in the window and we can watch the chickens pecking around in the grass. I can wear my pajamas and sit on the padded bench with my legs crossed up with me. So if you have a chance among all the new year celebrations, put on your robe, and whip up a Sunday morning breakfast.
Growing up we always used a boxed pancake mix. My mom would make the pancakes into all these crazy shapes for us. She would draw little faces and things with the batter and my sister and I would sit and wait to see what it looked like when she flipped it over.
I distinctly remember the first time I was married and tried to make a pancake breakfast. I looked in the cupboard and was bummed because we didn't have pancake mix. Then it dawned on me that HELLLOO, you can just make pancakes from scratch! So I found a recipe and was off and running. It is very simple. Now I just have to keep the baking ingredients stocked, pancake mix is never on the shopping list.
I made this recipe last weekend. The pancakes are fluffy and creamy. They kind of give you that eat slowly, melt in your mouth, life is good kind of feeling.
The pancakes are great, but the fun part is all the toppings. Lay out a spread of whatever you can find around the house. Syrup is an obvious choice. I always love some butter and powdered sugar, that was my favorite when I was little. We used some Nutella, or even peanut butter and jelly is fun. Think about cutting up some fresh fruit if you have it. Bananas, berries, and peaches are all great on pancakes. Enjoy your weekend and Happy New Year!
By the way, you can do this on Saturday too!
Pancakes
Ingredients
Directions
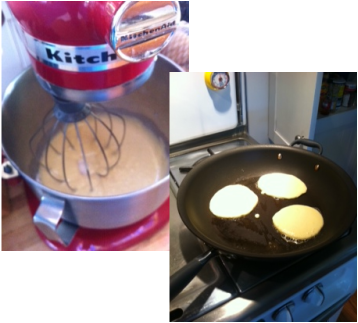
1. In a bowl, mix together the flour, baking powder, salt and sugar.
2. In a separate bowl, whisk together the milk, egg and melted butter.
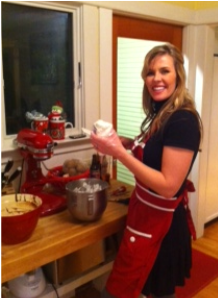
(I mixed it in my kitchen aid, because I am lazy and figured, if I have to wash a bowl and a spoon, the machine might as well do the mixing for me)
3. Mix the dry and wet ingredients together and whisk until smooth.
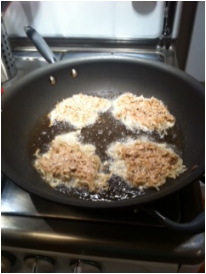
4. Warm a greased griddle or frying pan over medium heat. Pour the batter onto the griddle and brown on both sides.
***My mom taught me a little trick of the trade here. When you first pour on your batter little bubble are formed. Continue to cook the pancake until the bubbles pop, that's when it is cooked through and you can flip it. If the side starts to burn before most of the bubbles pop then tun down the burner.
Ingredients
- 1-½ cup All-purpose Flour
- 3-½ teaspoons Baking Powder
- 1 teaspoon Salt
- 1 Tablespoon Sugar
- 1-¼ cup Milk
- 1 whole Egg
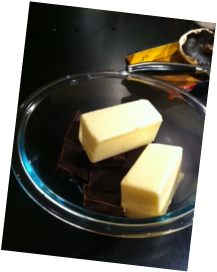
- 3 Tablespoons Butter, Melted
Directions
1. In a bowl, mix together the flour, baking powder, salt and sugar.
2. In a separate bowl, whisk together the milk, egg and melted butter.
(I mixed it in my kitchen aid, because I am lazy and figured, if I have to wash a bowl and a spoon, the machine might as well do the mixing for me)
3. Mix the dry and wet ingredients together and whisk until smooth.
4. Warm a greased griddle or frying pan over medium heat. Pour the batter onto the griddle and brown on both sides.
***My mom taught me a little trick of the trade here. When you first pour on your batter little bubble are formed. Continue to cook the pancake until the bubbles pop, that's when it is cooked through and you can flip it. If the side starts to burn before most of the bubbles pop then tun down the burner.


 RSS Feed
