The kitchen is really the heart and soul of our house. For one it is always the warmest room, due to our old old oven. For two it is full of food. So, people always tend to congregate in there.
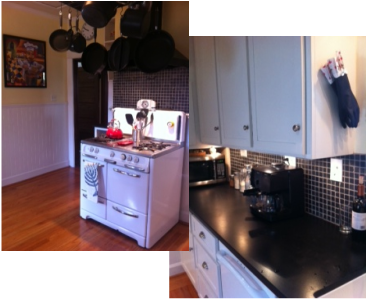
Luckily for us, the previous owners did a nice renovation in the kitchen. They modernized some features like the backsplash, counter tops, and hood, but kept some of the great period details like the Wedgewood stove and hard wood. Our stove is still complete with an original timer and little salt and pepper shakers.
Luckily for us, the previous owners did a nice renovation in the kitchen. They modernized some features like the backsplash, counter tops, and hood, but kept some of the great period details like the Wedgewood stove and hard wood. Our stove is still complete with an original timer and little salt and pepper shakers.
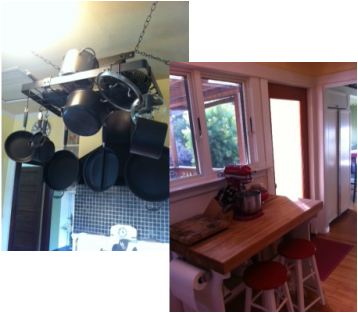
I have added a few things that make it more user friendly and give it some character. My mom gave us a pot rack for Christmas, so that was the first addition. This saves so much space in the cupboards!!
The island looks out over the porch and backyard so it is a great place to cook! We shortened and painted the stools so that we could actually sit at the island. Usually these stools are used by guests who are hanging out during cooking.
The island looks out over the porch and backyard so it is a great place to cook! We shortened and painted the stools so that we could actually sit at the island. Usually these stools are used by guests who are hanging out during cooking.
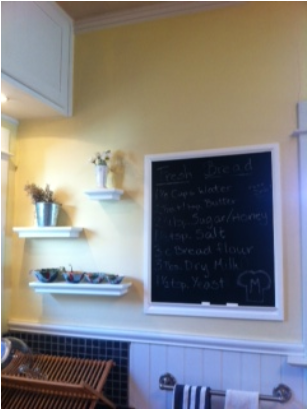
The walls in the kitchen are still the old plaster and lath, and were riddled with holes and scrapes from years of cooking. This summer I got up on my little ladder, filled in the cracks in the plaster, sanded them down and repainted. This really cleaned things up!
Then I had a whole patch of wall by the sink that was all naked. I decided to put a chalk board, so I could write recipes that I use often. What teacher can refuse a chalkboard! Most of the time the recipe for bread it up so I can quickly pop the ingredients into the bread maker and be done with it.
The chalkboard is fun, and not too complicated. There was of course a mandatory trip to the hardware store where I got a can of chalkboard paint, the molding, and one small piece of wood to hold the actual chalk. I measured and taped off the area where I wanted the board. I actually used saran wrap and painters tape, so that there was a large area covered. Then I put two coats of chalkboard paint up. While these were drying I measured and cut the edging. I then painted it with two coats of white paint we had laying around the basement. When everything was dry I removed the tape. I nailed in the molding, then touched up the paint over the nails. I love the look of it, and it would be great for a kids room!
My neighbor had given me the most adorable measuring cups you have ever seen and I wanted a place to display them. So I went to Target, found those great shelves and put them up. The measuring cups are on the bottom shelf. Those few changes really dressed up the whole area and made it a lot more interesting! One room completed, on to the next! Happy cooking!
 RSS Feed
