Robin's Urban Farmhouse
  • Robin\\\\\'s Latest
  • Meet Robin
  • The Chickens
  • The Garden
  • The Bakery
  • The House
  • Untitled

August Garden

8/12/2012

0 Comments

 
Picture
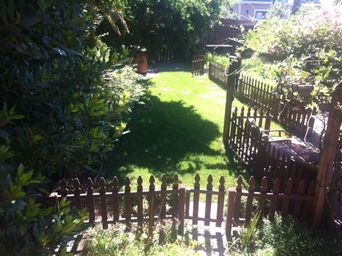
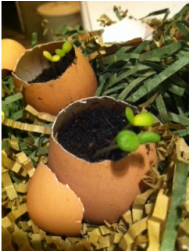
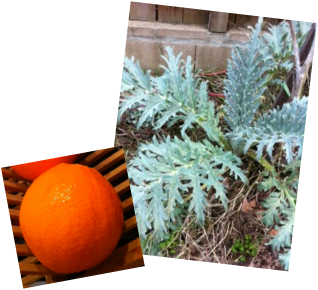
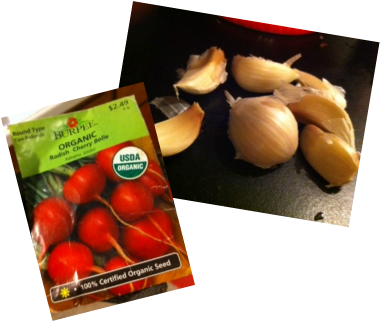
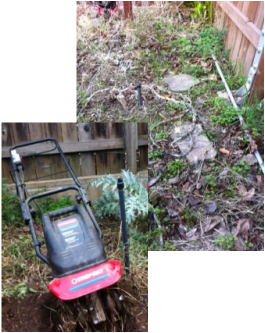
     First off, I have to admit I have completely neglected my garden this summer.  I don't know what got into me, but I just haven't wanted to go out and dig in the dirt.  So I am sorry I haven't written much about it.  Luckily, I was motivated in the spring.  So even without my sweet talking my plants and constant attention, veggies have still grown!!

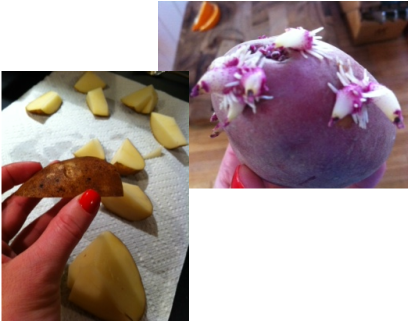
      When we were in Costa Rica the weeds got completely out of control! I never really recovered.  Consequently I noticed that a lot of the plants were flowering but not producing any fruit.  I decided if the birds and the bees weren't getting it done, then I was going to have to pollinate the garden myself! So I went out with a few Q-tips, rubbed it in the blossoms of the flowers and waited.  I kept a metal note of what flowers I had done this to.  To my surprise it worked and I got zucchini and cucumbers from it! 

Picture
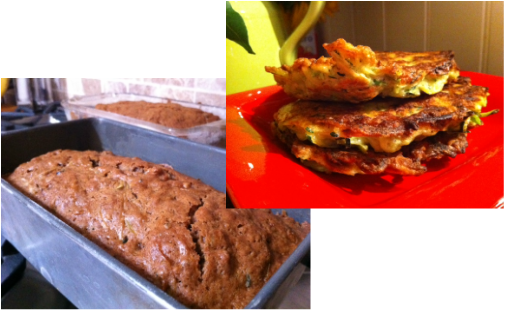
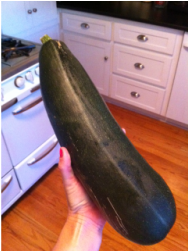
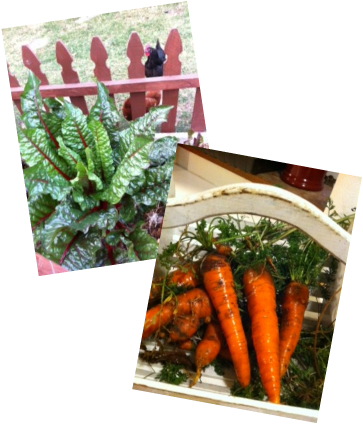
Naturally my favorite thing about having a garden is being able to cook with the food I harvest.  I found this gigantic zucchini hiding under all the weeds.  I would not recommend letting them get this big! But you use what you have! From this one zucchini I made four loafs of zucchini bread and zucchini fritters.  Unfortunately I didn't keep track of the recipe I was using, but I am sure you can all find one! The zucchini fritters are a lot like potato latkes and I love them! 

Picture
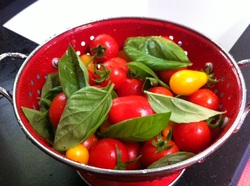
     School started last week and I was suddenly thrown into the routine of rushing all day at work, coming home tired, and trying to throw something edible together for dinner.  Here is my secret.  Keep boxes of pasta handy at all times! Then you can whip up some penne and go shopping the garden.  Tomatoes, cucumbers, basil, sage, zucchini, squash, etc. The fresh ingredients are tasty enough that you can really just use a little olive oil in stead of sauce. 

Picture
Garden Maintenance:
1. Weeding, weeding, and more weeding. I know, it's the pits.  
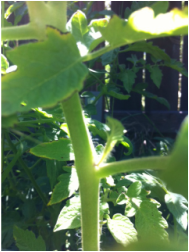
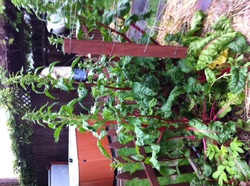
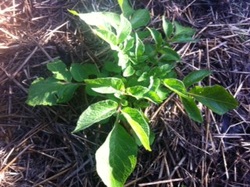
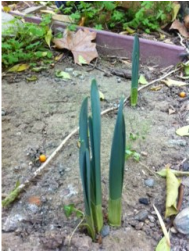
2. Also, maintain your tomato plants.  In the crotch of the branches little starter branches will grow like you see in this picture.  At the point in the summer they will not bare fruit.  So you have to pull these sucklers off.  The plant will use all the energy growing these extra branches that don't benefit you! If you have tomatoes on the vines, but they are not turning red, or they are splitting then cut back the water.  Tomatoes need to be starved of water a little in order to ripen. 
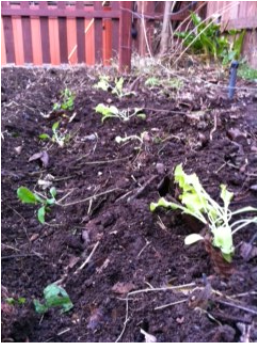
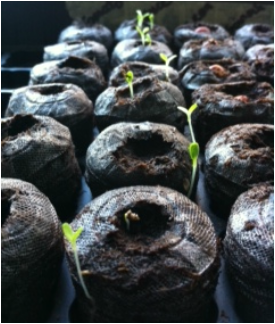
3. Plant anything that you want growing for the fall if you haven't already (I haven't).

0 Comments

May Gardening - The fruits of your labor

5/24/2012

5 Comments

 
Picture
      May is probably my favorite month in the garden.  The weather has warmed up but I'm not a sweaty mess after being outside.  Everything has started blooming into amazing bursts of color!  These are blossoms from our pomegranate tree which will turn into swollen globes of antioxidants in the fall. 
    You can literally see the fruits of your labor!

Picture
    Behind those blossoms you will start to see fruit growing! I have heard that it is good to water the fruit trees a lot at this point to help the fruit swell up, but that could be a wives' tale.  
    It is the time of year that you should turn back on the sprinklers.  Also, adjust everything to make sure that water is getting to the new season's plants and not the ghost of what was growing last year. 
    

Picture
    There are even some plants in May that have graced us with a harvest!     
    The artichoke plant is starting to make up for all the garden real-estate it's claimed! We have been enjoying about an artichoke a week.  I have to say, I love having a whole side dish in the backyard! It makes dinner much easier. 
   Even my most scraggly, slug eaten potato plants are throwing food my way!

Picture
Picture
Planting: 
    As everything begins to grow in and thicken, it is tempting to slip into the hammock and take a snooze.  Definitely do this, but also try and plant one new plant a week.  This way you will continue to have a harvest late into summer an fall.  You will thank me later!!!
    May is a great time to put things like peppers and eggplant in the ground.  My peppers are blossoming and starting to push out tiny little peppers.  Peppers generally like consistent watering.  Be careful not to have soggy soil or the won't thrive.  
May is also when cucumber plants and tomatoes will start to look alive.  Corn, sweet potatoes, snap peas, cantaloupe, and leaks can also be planted in May. 
    If you are planning on putting in squash or gourds for a fall harvest, you should start these seeds indoors in May or June. 

Picture
Weeding:
    We all hate it.  There really isn't anything fun about it, but it must be done.  My husband and I were busy or out of town every weekend in April and the weeds completely took over my garden.  I have spent all of May trying to dig deep in this nasty grass that grows and rescue the struggling plants underneath.  Luckily I have found good things growing! 
   Try and get the weeds up whenever you have a few minutes here and there. This way your new seedlings aren't struggling for sunlight and the weeds aren't sucking up all the nutrients in the soil.
    Some of the winter plants and lettuces may have gone to seeds.  When these plants bolt, like you see in the picture of my chard, rip them out.  They use a lot of the plant's energy to do this and they will taste bitter and gross. Chop them, compost them, and wait for the to serve you next year as dirt! Let me know how your garden is growing! I love comments!

5 Comments

March Into April In The Garden

4/6/2012

0 Comments

 
Picture
     What should you be doing in March and April? Planting, planting, planting! I'm sorry I didn't write a March garden tips.  Honestly, I was too busy working in the garden.  The sun calls me out there and suddenly all my spare time is consumed.  
   At this point though, anything and everything that you want in your summer garden should be planted.  Potatoes (which I will talk about), radishes, peppers, lettuce, cilantro, spinach, beets, cauliflower, broccoli, bok choy, leeks, turnips, chard, beans, cantaloupe, corn any of it! I didn't actually plant all of these things, but you could!
      Seeds love the fresh morning dew and the mild sunny days.  I would recommend reading the back of the seed packet for each so that you plant them in the ideal location.  If you planted a garden last year, try and rotate the crops.  Don't plant corn in the same place you did last year because the soil will be depleted of the nutrients corn uses.  I personally am not planting corn this year because it was tall and messy and we couldn't actually eat any of the corn I grew (tips please!) 
     Beware that broccoli and cauliflower turn out to be very large plants, so leave them lots of room or they will envelope other plants.  They might be good candidates for planting in the yard, rather than the veggie garden! Onions and carrots are good to plant together because the pests that like to eat one are deterred by the smell of the other plant. Beans need a lattice or something to grow up.  The tubers like radishes, beets, carrots, and turnips need room in the ground to grow, so try and put them in loose soft soil next to something that has a minimal root system like lettuce. 
    I took my own advice in January and planted a variety of lettuce in a pot.  There it is!

Picture
 I have also spent a fair amount of time time trimming.  I wanted to make sure that as things began to grow they were growing in the shape that I wanted to.  I also trimmed back trees that had grown over the winter and ae casting a shadow on the vegetable garden.  
    The one positive of having no more chickens is that I can now replant a garden in the chicken area.  They had eaten everything they could get their beaks on!  So I went and got myself a bunch of ranunculus and other pretty flowers and planted, planted, planted.  

Picture
Potatoes:
     I have been meaning to write about chitting potatoes.  There are a few ways you can get potatoes ready to put in the ground.  Now, depending on where you are this should be done early in the season while the nights are still very cold but not freezing.  You can wait until potatoes in your cupboard start to grow (that happens to me more than I would like to admit).  You can also stand a few potatoes up in an egg carton and leave them to sit until the eyes start to grow.  Or you can cut up a potato leaving one eye in each chunk.  Let the cut up potato dry for 24 hours so the cut parts form kind of a skin.  I have found them to be most successful when I plant the whole potato. 
   

Picture
     Whatever method you choose, plant them with the new growth pointing towards the sky.  Keep them shallow, then form a mound of dirt or compost over the planted potato.  As it begins to grow you want to keep adding a bit to the mound.  New potatoes will grow off the root of the plant.  So the hill ensures that water won't collect and rot the new potatoes.    
     This is what the plant looks like when it grows up! The plant will also strive to be above the dirt, so if you keep adding it, it will keep growing and the surface for making new potatoes will increase.  
My friend Dan acutally puts an old tire around his potato plants to make a seriously high hill and he says the whole thing is filled with potatoes at the end of the season!

Picture
Tomatoes:
It is still pretty cold for tomatoes.  They like it nice and hot.  So I would recommend still starting to tomatoes inside if you are starting by seed. I used some of the old plastic containers from flowers and started more tomatoes to make sure I have lots and lots come summer!
    I did put a few in the ground about a month ago, but they basically just sit there and don't grow until it is warmer.  However, they are susceptible to bugs!

Picture
Maintenance:
    Any time you get a free minute it is good to run out and pick a few weeds.  Even if it is only for five minutes.  In the spring it is ideal growing conditions and weeds spring up constantly.  Last year I let them get so out of control that the weeds literally took over one of the planters.  This weakens the soil and destroys the good plants growing.  
   All of the January planting should be growing in nicely.  The onions and garlic should be thin little plants right now.  You can basically water them here and there and leave them be until the end of summer. 
    All the lettuce is growing in nicely and is almost large enough to eat.  I try and harvest the lettuce by pulling off the outside leaves instead of uprooting the plant.  This way it can keep producing food for you until the heat of summer hits. 
   The last major battle for me is the slugs and snails, but this is a conversation for another day.  If you have any questions, or tips or me, send them in a comment!

0 Comments

Easter Egg Gifts

3/19/2012

0 Comments

 
Picture
     Here is an adorable little gift you can make that costs almost nothing!  I saw it on the cover of Starting From Seed and couldn't resist. I am going to give it to my family for a little Easter present.  These are Zinnia plants, so hopefully they will bring beautiful flowers! The recipient can crush the shell a bit and put it in the ground.  Done!
   

Picture
    Simply take a few eggs and poke a hole in the bottom. This is so water can flow out and not flood the seeds.  I used a metal barbecue skewer and tapped until a hole broke through.  
    Then hold the egg over a dish and tap with a knife along the top the basically cut the top off.  Plop the egg in your dish and rinse out the shell and set it to dry.  Eat the eggs of course. 

Picture
    Find something to put the eggs shells where they won't rock around.  FIll each egg about 3/4 of the way full of dirt.  Put three seeds in each to ensure that at least one grows.  If they all grow you may have to remove some. Water and wait! Soon you will have adorable sprouts.  
      I am hoping they will continue to grow until Easter.  I am watering them every few days and setting them outside here and there.  Mostly they are sitting on the window sill in the basement looking cute! Have fun. 

0 Comments

February Harvesting

2/26/2012

0 Comments

 
Picture
      Since we are just going out of winter there may not be as strong of a harvest as other months.  However, if you dig deep there is no telling what you might find! First of all our orange tree is going nuts.  Every morning I walk out to get an orange for my lunch.  I figure a jolt of vitamin C never hurt anyone! Usually there is just one orange that has fallen off the tree and is sitting on the ground like it there just for me.  
    When I went till the garden last weekend I realized that there were carrots that had continued to grow over the winter.  Most of them just had a little tuft of green, so make sure to take a look below the soil! 
    If you have chard or other leafy green that thrive in the winter, it is ripe and ready right now.  I have been slicing up our chard and adding it to pasta , or soups.  It is also good to sauté with some garlic and lemon. Did you know chard has 13 different  polyphenol antioxidants? Amazing.   
My herb garden has been pretty stagnant over the winter.  But right now the oregano is taking off and the rosemerry and sage have held strong during the winter.  

Picture
     Last season we transplanted our artichoke plant.  I was a little nervous about this because artichokes generally don't produce a harvest until there second summer and I had grown it from seed.  Unfortunately I didn't realize how big they get and it was blocking the light on a lot of the planter.  The whole plant was maybe two feet tall.  When I dug it up we found it had one main root that was about twice the height of the plant! Anyways, after I transplanted it died.  We didn't get anything but a few tiny inedible artichokes before it croaked.  The great new is, it has come back in full force and I am hoping for some beautiful artichokes this summer!

Picture
     Under the hay I also discovered two potato plants pushing their way through! I am still chitting some potatoes tonight to put a few more in, but they will have a head start.  I guess there must have been a few potatoes I never discovered last season.  
    Of course there are always the eggs! Barbecue laid this mini one today.  She does that sometimes. 

0 Comments

February Planting

2/25/2012

0 Comments

 
Picture
      Remember back in January I planted those seeds in the basement? Well they grew, and now they are ready to go in the ground.  So I took my bran new soft soil and transfered the little seedlings in to the ground.  The first year I planted a veggie garden I loved just throwing plants here and there.  Much to my orderly husband's dislike I ended up with a very jungley garden.  It was pretty, but it was very hard to navigate in order to weed and harvest.
   Enjoy the sunny weekend we are having and throw some seeds in the ground! You will be happy you did when you can walk outside in your own yard and come back in with most of a meal! 
 

Picture
In February you can plant:
onions
garlic 
shallots
lettuces
potatoes
chard
radishes
broccoli
cauliflower 
bock chow

     I transfered the lettuce, arugula, and tomato seedlings and planted them in rows. I know they look a droopy, but they will get stronger as their roots grow in.  I planted them pretty close, because by the time the tomatoes get big and cast a shadow, the lettuce will be pretty much done for the season.  It is a little early for the tomotoes to thrive, but they were getting too tall for the plastic green house, so in the ground they go!

Picture
     I also planted a row of radish seeds so I will have ingredients for a garden salad! Radishes are fairly hardy, so they are okay to go directly into the soil.  Just make sure they get good and wet after you plant them so the moisture penetrates the inner seed.  You can also soak the seeds in water for about 24 hours before planting.  This will shorten the germination time by a few days.  
        I then broke up a head of garlic that I had in the kitchen.  Garlic is the easiest! Just pop each individual clove into the ground about two inches under the soil.  Put them the same direction a clove sits.  They need a bit of cold first to activate and trick the seed into thinking it is winter.  So if you have had the garlic in the house, put it in the fridge for a few days and then plant it.  While the garlic is growing it does not need very much water. Keep this in mind while you are planting.  It just needs enough to keep the leaves rigid.  It will grow thin green stalks.  When they are ready to harvest the stocks will turn brown and completely fall to the grown.  Under the soil will be a plump new globe of garlic! If you get anxious and pick it early (I have done this many times) then you will have a skinny little garlic that isn't very good.  
    Over the next few weeks I plan to till the other garden beds, and plant some of the vegetables listed above. One more tip to keep in mind.  Onions and carrots are great to plant next to each other.  The pests that like carrots don't like the smell of onions and vice versa.  Carrots are not good to transplant because the root is too sensitive.  So wherever you plant your onions, leave a space for a row of carrots as well.  I will write about how to do potatoes because it is an interesting process! Soon I will write about what to harvest this time of year! Have fun in the mean time!

0 Comments

February Gardening Tips

2/20/2012

0 Comments

 
Picture
        This Presidents Day weekend we spent an amazingly fun three days in Tahoe with our friends.  We rented a cabin and hung out, ate good food, made sledding ramps, skied, and enjoyed the mountains.  The lack of snow, and fresh mountain air jolted me into spring mode and inspired me to come home and work in the garden. I also realized that is was about time for the February gardening post since February is half way over! 
     I decided I would categorize this into three posts so they are not too long.  So today I will write about preparing the soil.  Then the next two days I will tell you what I have been planting and harvesting.   Who knew there could be so much to dirt!

Picture
How to Prepare the Soil:
    I looked out in my garden today and saw a field of weeds that I was not excited to pick all winter.  Obviously this is not a good environment for new seedlings to thrive, so out with the old, in with the new.  We have this extremely hardy awful grass that likes to grow in our yard, so I had to get out the big guns! My RotoTiller. 
     It is my woman power tool.  It chops weeds, loosens the soil, and mixes in the compost all in one.  I know I sound like an infomercial for it, but it does good work. You can rent them at Home Depot if you don't have one, or if you are feeling like you need a particularly good workout you can do it by hand with a hoe. 

Picture
Step One:
   Get rid of anything that will get jammed in the rototiller blade, old markers from last years planting, rocks, big sticks, and any other random things that may have found their way into the garden.  I had about three major jams that really slowed me down! This year I will not be using little wire signs to label the garden. 

Step Two: 
   Till everything once.  I only do one planter box at a time.  So it only takes about five minutes.  This will cut up any major weeds and loosen the soil around the roots.  I have a very small tiller so that I can go in between sprinkler lines and existing rows of plants. Then pull remaining weeds.

Step Three:
   Turn the compost so it continues to rot.  See the compost blog if you are curious about this process. Spread any compost material that is ready on top of the soil.  If you don't compost you can use plant vitamins from the hardware store. 

Step Four:
    Till the soil again to further cut up any remaining weeds, mix in compost and loosen the soil.  I recommend starting at one end and pulling the rototiller towards you so you don't walk on the fresh soil.  When you are done it will be light and fluffy and ideal for fresh little roots.  You can plant now, or leave that for another day.  As you can see I still have some weeds in there to tackle, but small victories work well for me! Until tomorrow...

0 Comments

January Gardening Tips

1/16/2012

0 Comments

 
Picture
   The seeds are growing!  Okay, I admit, this is not as exciting as I think it is, but I love it when everything starts to grow again.  
     I've decided that once a month I will write to tell you what I am planting in the vegetable garden.  This way you can have a little nudge and help to schedule your garden.  It is always hard to stop the whirlwind of life to work in the dirt.  However, when I do I always feel more peaceful and grounded.  And there is nothing like walking into a garden and coming back with a whole basket of fresh food! 

In response to my blog about planting seeds inside, I received this:
Robin,
How long do I have to wait to plant seeds if I don't want to plant them inside.  Is it just until we are past the last frost?  Also, can I stagger planting so I have veggies at different times or do they have a specific growing season?
Thanks
Patti

     Fantastic question!! I have about ten different answers in my head.  First of all, if you want to plant directly in the ground you should wait about another month until you are sure the last freeze has passed. Although we have been having a crazy warm winter, you never know what may happen to the temperatures at night.    
     Most vegetables do have specific growing seasons depending on the temperatures that they thrive in.   Others are more hardy and will grow all year once they are established.  The good part is, if you plan out your vegetable garden a bit you can stagger the plants so that you always have something ready to eat (accept maybe in the dead of winter).  This also helps to maximize the space in your garden.  
     Certain plants will thrive in the early spring and be gone in time for summer veggies, and then transfer into a fall and winter garden.  This way you will always have something being produced even if your garden is very small.  When I eat out of the garden I am eating the tastes of the season and that enables me to fully experience the change of seasons!

Picture
January Gardening:
     In January there is still a good chance of a frost, so you mostly want to be preparing your garden for spring planting. Despite this, the daffodils seem ready to get spring started! Take a few minutes here and there to pull up the weeds that have grown.  If you have compost that is ready, spread it around in the dirt, or till it into the soil.  You can also spread a layer or hay or mulch to act as a weed barrier. 
     If you are an urban balcony farmer and using pots, think about getting some new potting soil to replenish the nutrients.  I did this for a few years and had a lot of fun with it!
     Start thinking about greens that like cold weather.  These include lettuces and spinach.  Lettuce will do well in a pot and can really look beautiful and artistic. By planting in a pot, you can keep the seedlings under an overhang and then move them more into the elements as the weather warms.  
     No matter where you are planting it is fun to try and design your planting so that the vegetables look not only delicious but beautiful!  Plant lettuce that grows tall in the middle such as iceberg.  Around that you can put a circle of red leaf lettuce and maybe around the outer circle, a row of low growing butter leaf lettuce.  I also try and apply these principals of decorative veggies in the garden as well. 
    Radishes and beans can also be successful in cold weather. Beans will need a structure to crawl up.  The vines will go as high as they can.  Radishes however only grow about 8-12 inches high.  They need more real estate under ground.  Because of this radishes and beans can be intermingled.  Make sure to loosen the soil with a trowel before planting radishes so that they can easily expand as they grow in the soil. 
    Lastly onions can be started in January.  I have tried onions from seeds and was very unsuccessful.  Last year I bought the little onion starters and had a crop of over 50 onions!
Freezing will kill any new seedling.  So if you do plant outside in January and there is a freeze, make sure to cover the plants.

0 Comments

Seedlings

1/8/2012

0 Comments

 
Picture
  I'm getting a little sick of pulling weeds and looking at a dead vegetable garden.  The weather has been so warm this winter that I feel like it is time to start throwing seeds into the ground. (Plus there is no snow, which means I can't ski, which means more time in the garden) I am going to go against my instinct, and throw seeds somewhere else. 
     I bought this seeds starter at Home Depot.  Any local hardware or garden store should have these.  They are great because you can moisten only as many dirt packs as you are ready to use.  

Picture
   Remove the disks of dirt that you are not using right away and pour water on the ones you want to plant in.  Wait for them to soak up the water for about a half an hour. While you are waiting I would recommend choosing and labeling which seeds you are planting.  I just used masking tape for this.   Add a bit more water as needed until the dirt is completely saturated. The dirt pods will expand quite a bit. I usually plant 2-3 seeds in each dirt patch to ensure that SOMETHING will grow.  Today I planted tomatoes, lettuce, snap beans, and spinach.
    I keep the tray on the window sill in the basement.  You basically want the seeds in a location that is slightly warmer than outside and gets some sunlight.  This could be a basement, garage, or indoor window sill.   

Picture
        Starting seedlings inside allows the seeds to get a few weeks head start.  Then when the soil and weather warm up, the plants are already a bit strong and stand a better chance out in the elements.  At this point in the year we may still have freezing temperatures at night and your poor little plants will be goners. 
      I like these dirt pods because they have a thin cheesecloth-like layer around the outside.  This allows the roots to grow out, but the dirt to stay in, which makes for easy transplantation later in the season.   
      If you don't want to buy the dirt packs I have a few other ideas for you.  In past years I have saved old containers that plants have come in, then started my seeds there.  This is green and free! If you do this I would recommend really packing down the potting soil.  When you transplant the seedlings into the ground you want the dirt to stay intact so it doesn't rip out the roots. 

Picture
     Last year I was feeling more hippie than usual, and on a mission to be green.  If this is your ideology, you will love this!  I saved all our old toilet paper rolls and started my seeds in there.  I used a tray to support the dirt, rubber banded several rolls together, filled them with potting soil and pushed in my seed. 
     Toilet paper rolls definitely offer some advantages.  Not only are you reusing your trash for good purposes, but the whole roll can be put in the ground when transplanting.  This greatly reduces the risk of disrupting the tiny roots and killing the plant.  The toilet paper roll eventually disintegrates and the plants grows! The only disadvantage is that they are made of paper.  So in a few cases the paper rolls began to mold and disintegrate before I have transplanted the seedlings.  They held so much of the water that some of the seeds rotted instead of growing.  Whatever container you choose, it feels good to get planting!

0 Comments

Citrus trees and my farming dreams

1/2/2012

1 Comment

 
Picture
    On our little farm we have several fruit trees, and among them are an naval orange tree and a meyer lemon tree.  I thank the person who planted these because they are great!  If I ever have a real farm or any land for that matter, here is my plan.  I want to plant a small orchard with about 25 trees.  Each would be a different fruit bearing tree.  I would put them in seasonal order so that one end of the orchard would be trees that fruit in January.  These do exist, persimmon and orange for example.  Then the next tree over would be a February tree and so on until you got back to the pomegranate trees in the fall. Then I would have an endless supply of peaches, apricots, plums, figs, and anything else you can think of. Bees would love me. A girl can dream can't she? 
      Back to realty.  Like I said, we have an orange tree and a lemon tree.   Usually they produce large, sweet fruit.  The lemon tree is in the front yard and produced three or four crops a year!  When we moved in complete strangers would walk by and say,"I love your lemons, I always take one, I hope that's okay".  I smiled and thought to myself "Those are out lemons, go get your own, shoo, shoo!" But I always said something like, "Oh, help yourself, we have plenty" and mumbled under my breath as they walked on.
     Thankfully the orange tree is in the backyard.  Every January through April it produces huge, refreshing, sweet oranges.  Just as the fruit crop is finishing up, the tree graces us with fragrant blossoms that you can smell from the whole yard.  You would be surprised how creative you get when you have an abundance of fruit that you don't want to waste!
     Last summer to my surprise our lemon tree was a sad mess. The leaves were small and yellow.  The fruit was either nonexistent, or dry and bitter.  Our huge meyer lemons, were not living up to the neighbors expectations!  We couldn't figure out what was going on.  The orange tree seemed to be doing fine.  The only difference between their care was that we run the chipper under the orange tree.  Anything that is too big or corse for the compost gets chipped, and it happens below the orange tree.  The chippings make a nice ground cover, but I guess they were also supplying the tree with nutrients. 

Picture
     After asking around at the local nursery and do some research we did three things.  One: we trimmed the lemon tree way back.  We had totally been neglecting to trim it.  The lemon tree had fruit or blossoms on it all year, and I never had the heart to cut off branches with lemon.  Much to my disappointment this was apparently killing the tree. 
      Two: Citrus trees also get sucklers.  They are parts of the tree that grow, but produce no benefits, or fruit.  They simply suck nutrients, so get rid of them.  Sucklers are usually bright green and grow straight up, not out like most branches. Ours usually grow from the base of the tree, or directly out of a main branch.  So we got rid of these. 

Picture
       Three: I bought citrus nutrients sticks from Home Depot.  I have been pounding two or three of them in every 4 months. Spread them out around the base of the tree, a few feet from the trunk.
     I am happy to say that the lemon tree is making a complete come back.  This summer's fruit should be big and delicious again. The oranges on our tree are getting larger and should be ripe in a few weeks! I can't wait for fresh squeezed OJ, it is the cure for winter blues. 

1 Comment
<<Previous

    Robin's Blog

    I am living in Downtown 
    Sacramento creating my little urban farm!

    Archives

    June 2014
    April 2014
    January 2014
    July 2013
    April 2013
    January 2013
    November 2012
    October 2012
    September 2012
    August 2012
    July 2012
    June 2012
    May 2012
    April 2012
    March 2012
    February 2012
    January 2012
    December 2011
    November 2011

    Categories

    All
    All
    Appetizers
    Breads
    Breakfast
    Chickens
    Crock Pot
    Desserts
    Fall Foods
    Gardening
    Gifts
    Holiday
    Holiday Foods
    Home Improvements
    Recipes
    Salads
    Sewing
    Soups
    Travel

    RSS Feed

Powered by Create your own unique website with customizable templates.