Robin's Urban Farmhouse
  • Robin\\\\\'s Latest
  • Meet Robin
  • The Chickens
  • The Garden
  • The Bakery
  • The House
  • Untitled

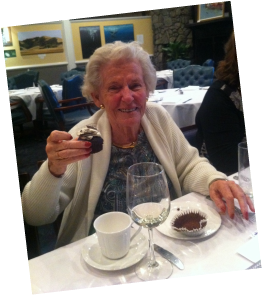
Happy 87th Birthday Grandma!

10/9/2012

1 Comment

 
Picture
   This weekend we celebrated my grandmother's 87th birthday! Additionally my husband was in Vegas on a guy's weekend.  So I had the whole weekend to make a mess of my kitchen and create  an artful cupcake for my grandma. 
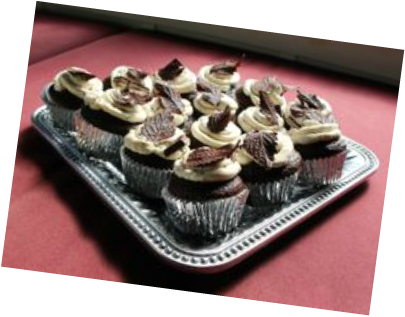
   I have an absurd amount of weeds in my garden right now! Some of those pesky weeds are mint, so I decided to make chocolate mint cupcakes.   I wanted something that was more elegant and had flavors an adult would enjoy. 
Picture
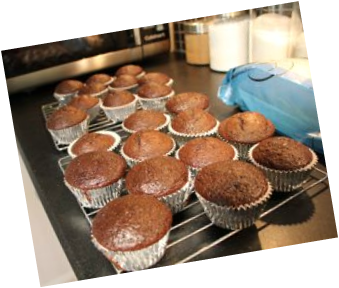
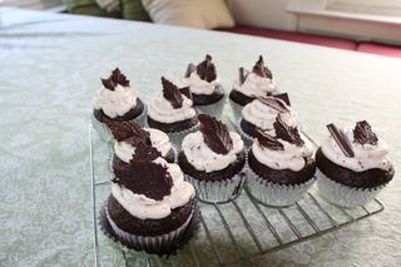
     All of the recipes came out of my Martha Stewart cupcake book.  It makes 18 cupcakes.  The actual cupcake part was about as easy as it gets and the cupcakes turned out moist, even, and beautiful.  They are great if you want a cupcake where you are going to to leave some of the surface exposed. 
   The leaves on the top were much more challenging.  So if you are feeling artsy go for it, they were beautiful.  If you aren't, throw an Andes mint on top and call it a day! I used a combo of these methods. 
Picture
Ingredients
  • 1 1/2 cups all-purpose flour
  • 3/4 cup unsweetened Dutch-process cocoa powder
  • 1 1/2 cups sugar
  • 1 1/2 teaspoons baking soda
  • 3/4 teaspoon baking powder
  • 3/4 teaspoon salt
  • 2 large eggs
  • 3/4 cup buttermilk
  • 3 tablespoons vegetable oil
  • 3/4 cup warm water
  • 1 teaspoon pure peppermint extract

Directions
  1. Preheat oven to 350 degrees. Line standard muffin tins with paper liners. Whisk together flour, cocoa powder, sugar, baking soda, baking powder, and salt. Add eggs, buttermilk, oil, water, and peppermint extract, and beat with a mixer on low speed until smooth.
  2. Divide batter among muffin cups, filling each 2/3 full. Bake, rotating tins halfway through, until a tester inserted in the center comes out clean, 20 to 25 minutes. Let cupcakes cool in tins on wire racks for 10 minutes. Transfer cupcakes to racks, and let cool. Undecorated cupcakes will keep, covered, for 1 day, or frozen for up to 2 months.
  3. Spoon buttercream into a pastry bag fitted with a large, plain tip. Pipe small mounds on tops of cupcakes. Flatten mounds with an offset spatula, then top with chocolate-mint leaves.
Picture
Frosting
     For the frosting I made Martha's mint butter cream.  I am not putting up the recipe because it was the most time consuming, mess making, hardest frosting I have even made.  You had to make a custard, cook mint leaves, straining them, bla bla bla, it was ridiculous. In the end I did my own thing with it and was frustrated that I had spent so much time following the specifications of the frosting recipe. 
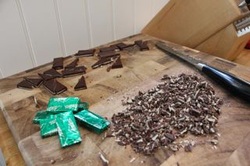
    Here is what I basically did (or would recommend to you).  Make a basic butter cream frosting, or any yummy white frosting.  Cut 9 Andes Mints in half diagonally to have for extra garnish on the cupcakes that need a little more. Do this first in case some don't cut well.  Then chop up about 10 or 12 other Andes mints and mix them in to the frosting. Pipe on the frosting with a wide round tip.  I just put a flat bit of frosting in the middle leaving the shiny edge of the cupcake exposed. 

Picture
Chocolate Leaves
Okay, let's be honest, those directions for the leaves sound simple, but this was hard.  It was impressive, so I encourage you to try it, but I made enough leaves for 3 per cupcake and I ended up with 1 successful leave per cupcake with a very few that scored a second leaf.  Don't worry, I have some pointers for you that were learned through the trial and error method.  They will save you some effort! 


Tools and Materials
  • Small paintbrush
  • Fresh mint leaves
  • Bittersweet chocolate, melted and cooled slightly
  • Skewers
  • Kitchen tweezers

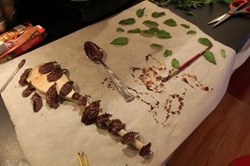
Chocolate-Mint Leaves How-To1. Using paintbrush, coat underside of 1 leaf with a thick layer of chocolate. Drape leaf, chocolate side up, over a skewer set on a parchment-lined baking sheet, top. Repeat. Refrigerate until set, about 10 minutes.Gently grasp each leaf with tweezers, and peel from chocolate. Frost tops of cupcakes with buttercream. Decorate with chocolate leaves.

Picture
My Tips
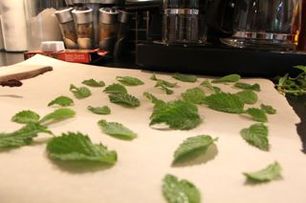
1. Wash the mint leaves and choose the ones you want.  Make sure to either dry them each or let them dry for a long time before you get started.  The ones that had water still on them make the chocolate all chunky and then would not peel off when the chocolate was cooled.

2. Chop the chocolate very finely.  In my book it talked about using certain brands of very high quality chocolate, tempering it, and having it at 185 degrees.  I don't have a candy thermometer, so I just used normal bakers chocolate and "guessed" how to temper the chocolate, but it worked!

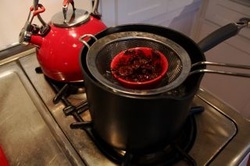
3. Melt the chocolate over, but not touching, boiling water.  Stir as it is melting. When it looked shiny and yummy I started painting!
Picture
3. I turned the heat down as low as it would go on the stove and took a spoonful of chocolate at a time.  Otherwise it cools too fast and becomes difficult to use. 
*** Put something under the parchment paper that fits in your fridge.  I didn't do this and had to painstakingly move each leave to a small cookie sheet***  
 Paint each of the front side of the leaves.  It is gets on the back try and get it off with your finger or it makes them very hard to peal off. Lay the leaves over a spoon if you want them to be three dimensional.  

4. Cool them for about 10 minutes in the fridge. 

5. Use tweezers to peel the real leaf off.  Don't touch them with your hands because they will melt in front of your eyes.  I found it was helpful to have a second tweezer to push on the chocolate gently on each side of where I was holding the leaf.  This spread the pressure out as I was peeling the leaf off and avoided cracking the chocolate.  After peeling a few the chocolate will start to get soft and you will need to put it back in the fridge. Repeat until done!

Picture

6. Place the leaves on the cupcake. The texture really looked beautiful! Add Andes mints where it looks nice and chill in the fridge.  Bring everything to room temperature before serving.  You will only need one per person because they are rich, but delicious!
1 Comment

Creamy Peanut Butter Cake with Chocolate Glaze

8/5/2012

0 Comments

 
Picture
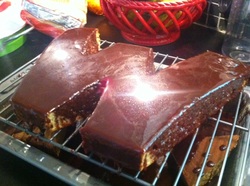
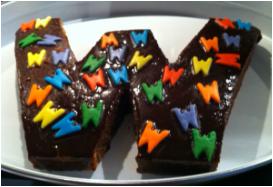
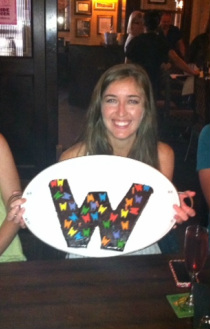
If the title alone doesn't make your mouth start watering then this might not be the recipe for you.  But I have to say, I thought it was delicious and even my cake hating sister (I don't know how it's possible for my sister to hate cake) gave it two thumbs up!  Obviously this cake is in the shape of a W.  That's because it was for my friend Whitney's birthday (and she does like bake). I was returning the favor, because she once baked me a peanut butter birthday that looked exactly like our cabin, where we were celebrating!

Picture
    Cutting the actual cake into a fun shape gives the cake some pizzaz and personalization!
    I started by buttering and flouring the cake pans.  This is by far the best way to get a smooth even surface when you flip your cake out.  
     I used Paula Deen's Peanut Butter Cake recipe.  Although I substituted butter for shortening and did not put actual peanuts in the frosting.  The frosting goes on more like a glaze than a frosting and then hardens as it cools. 

Picture
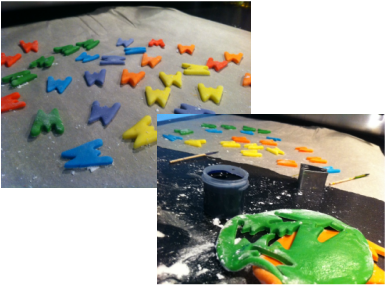
    While the cake was baking in the oven I got busy with the decorations! I tinted tiny chunks of white fondant to make various bright colors.  If you are doing this use powdered sugar to roll out the fondant.  Flour will alter the flavor.  I also recommend using gel food coloring or the concentrated food coloring in jars so the fondant doesn' become too wet and sticky! 

Picture
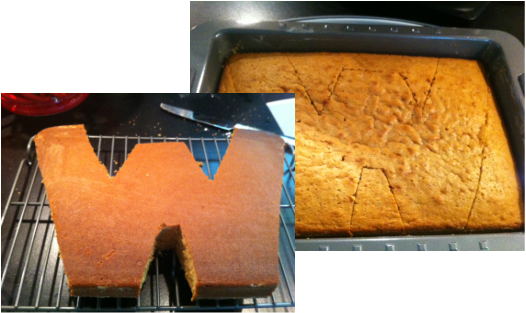
    When the cake was finished baking I let it cool in the pan.  I then cut the W out so that the edges of the pan supported the cake.  I held the cooling rack tights to the baking dish and flipped it. 
 

Picture
  The glaze was quick to cook! I poured it over the cake until I had a smooth finish.  Do this over something where the extra can drain out so you don't have a soggy cake.  Lastly I placed the W's randomly around the cake and it was finished! 

0 Comments

Monkeying Around

4/18/2012

2 Comments

 
Picture
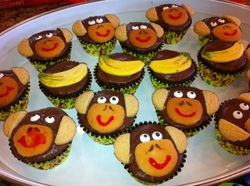
    My adorable little nephew (cousin's baby) Kairyn was born on the same day as my husband.  So tax day has now become a major birthday celebration in our family! For his first birthday my cousins, Lisa and Jake, threw him a monkey themed party.  It was fun to watch all the little ones "help" open the presents, which actually meant rip them all open at record speed.  To accompany this party I made some chocolate monkey and banana cupcakes. 

Picture
     I used a Hershey's recipe for both the cake and frosting, because it is dependably delicious and always moist! My sister said it was my best work yet (but really that means Hershey's has a great recipe).  
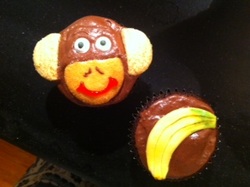
    For the middle of the face I used a Nilla Wafer and sliced just the top off.  For the ears I used half of a shortbread cookie.  I bought the eyes and cupcake tins at Raley's.  You can't really see the tins but they are covered in bananas and monkeys. I used a little tube of red gel frosting for the mouth and had tons of fun making the expressions!

Picture
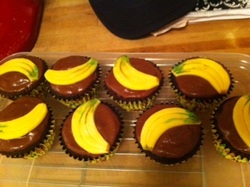
    The bananas are there just to break up the monotony of a million monkey faces.  I didn't want it to get creepy! I tinted a bit of fondant yellow.  Then used a simple round biscuit cutter and just cut it twice in a half moon shape.  I then trimmed off the very end and painted it with a bit of green food coloring and cocoa powder to give it some depth.  If you ever have the need for a jungle party, this was fun and not too time consuming! Give it a try!

2 Comments

Birthday Weekend!

4/17/2012

1 Comment

 
Picture
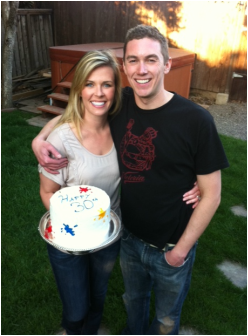
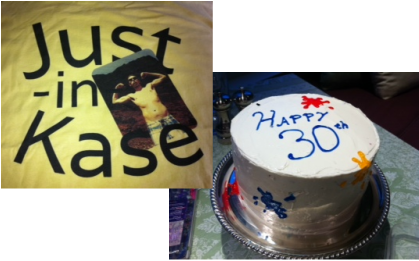
     This weekend was my husband's thirtieth birthday! We invited all our friends for an amazing day of paintball. I had shirts made with my strapping husband Justin flexing on it, so we all wore those to get painted up!  His middle name is Kase, so that is always fun to mess with!
     During the very first round of paintball I quickly ran to the nearest wall to hide behind and slowly crept my head up to see what was going on.  Within seconds I had been shot right between the eyes (thanks Brad). Thank goodness for goggles.  There is a learning curve to this paintball thing!   
         After running through creeks, ducking behind barricades, and getting shot with paintballs, we had worked up quite an appetite.  We came back to the house for some relaxation in the back yard, and food!  We had appetizers, pulled chicken sandwiches, cake, and Grater's ice cream from Cincinnati.      

Picture
      For the cake I used Martha Stewart's Perfect white cake recipe.  Per my husband's request, I added chocolate chips to the cake batter before baking it. The flavor was great, but I have to admit that the cake was a little dry.  For the frosting I used Martha's Italian Butter Cream frosting.  It has a great consistency, but make sure you serve it room temperature.  Mine was still a little cold from the fridge when I served it, and the consistency was a bit too stiff. 

Picture
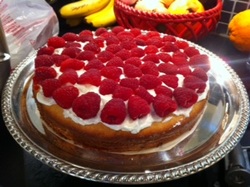
     For the filling used a bit of frosting and fresh raspberries.  The raspberries helped to balance the layers as well.  Where I needed more filling I used whole raspberries and where I didn't I sliced them in half.  They added a little zing to the rich frosting. 
      To decorate it I used gel frosting to make it look like the cake had been paint-balling with us! We served it with raspberry chocolate chip Graeter's ice cream and it was delish!
    After eating all this, we walked to Turn Verein which is our local German cultural center, to enjoy their Bockbierfest.  We danced the night away and came home with a smile.  Thanks to all our friends who came out to celebrate! It meant a lot to us and we had a wonderful time.  Happy Birthday Justin!

1 Comment

Banana Nut Bread

4/10/2012

2 Comments

 
Picture
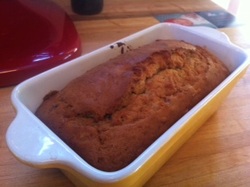
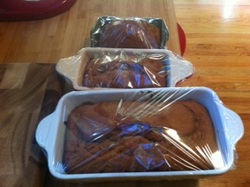
    When you've got old bananas, make banana bread!  I have been tweaking my banana bread recipe a little here and a little there while trying to taste for each ingredient.  I think it is finally time to share with you all!  However, if you bake it, I want feedback.  Even if you think it is awful, tell me so I can make it better.  This recipe makes two large loaf pans.  Or one big one for yourself, and 3 small ones for your friends. Okay, the recipe:


Ingredients:
3/4 cup butter at room temperature
3/4 cup brown sugar
1/4 cup white sugar
4 eggs
2 teaspoons vanilla
4/5 ripe banana
3 cup all purpose flour
1 teaspoon baking soda
1 teaspoon baking powder
1 1/2 teaspoons salt
1 teaspoon ground cinnamon
1 1/2 cups coarsely chopped walnuts

Picture
Directions:
1. Preheat oven to 350 degrees.

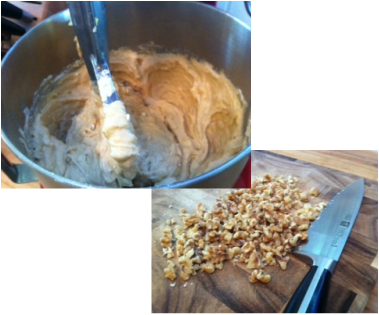
2. Mix butter and sugar together until creamy.  Use an electric mixer if you have one.  Beat in eggs one at a time.  Add vanilla.

3.  If you are mixing by hand then mash up the bananas prior to putting them in.  If you using an electric mixer you can just add them in chunks of banana at a time.


Picture
4. In a separate bowl mix together all the dry ingredients, except the walnuts.  Add this to the wet mixture in about three batches and mix only until combined.  

5.  Finally add in chopped walnuts.  Butter the bread pans and then fill them about 2/3 full. The batter will expand.  If you are having a serious sweet tooth that day you can sprinkle brown sugar on before you make it. 

6. Bake at 350 degrees for 55-60 minutes.  Test with a toothpick to make sure the middle is cooked.  The top should be brown and crispy.  When you take it out let the bread cool for about ten minutes.  Use a knife to separate the sides and enjoy hot!

2 Comments

Berry Birthday Pie

3/28/2012

3 Comments

 
Picture
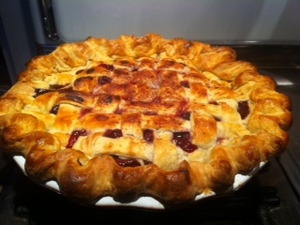
     Today is my sister's birthday, and sadly she doesn't love cake.  So I am making her a mixed berry pie for her birthday.  I love the tartness of the berries with the crisp buttery crust.  My goal for this pie was to make it sure it wasn't a runny mess, because that always makes serving so sloppy! This recipe originally came from allrecipes.com but I made several changes. 
      If you are making this in summer and have access to fresh berries, I would recommend using them! If not, frozen berries will work, but make sure that you thaw them and let any extra water drip out so the pie isn't too runny. 
      I started with my pie crust recipe.  Make sure to double the recipe so you have enough for the top crust and the bottom.  After you make this, put it in the freezer so it can stay nice and cold and easy to work with.  

Picture
Berry Mixture:
  • 1/3 cup all-purpose flour
  • 3/4 cup sugar
  • 1 tablespoon corn starch
  • 1/2 teaspoon ground cinnamon
  • 2 cups fresh blueberries
  • 2 cups fresh raspberries
  • 2 cups blackberries
  • 1 tablespoon lemon juice 
  • 1 tablespoon butter

Picture
Directions:
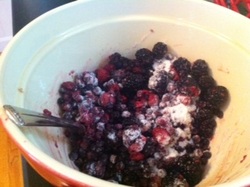
1. Mix the flour, sugar, and cinnamon together.  Then mix the berries in gently to coat them. 
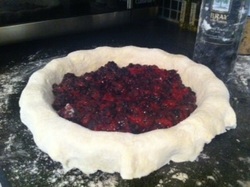
2. Roll out the first half of the dough and tuck it into the bottom of the pie pan.  
3. Gently spread the berry mixture in the center. 
4. Sprinkle a bit of lemon juice on top and chunk up a bit of butter and add it. 

Picture
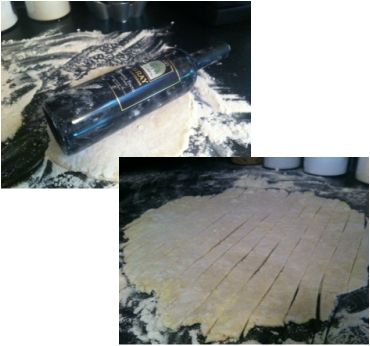
I had been baking at my sister's house last week and left a lot of my stuff there.  So when I went to roll out the dough I realized I didn't have a rolling pin or my rolling cutter! So, I improvised with a wine bottle and a knife.  Better than nothing!

4.  Roll out the second half of the dough and cut it into even strips.  I have a rolling cutter that cuts a scalloped edge which is adorable, but of course I didn't have it either.  No matter what you use to cut the strips make sure to cover it in flour every time it touches the dough so you don't rip it accidently. 

Picture
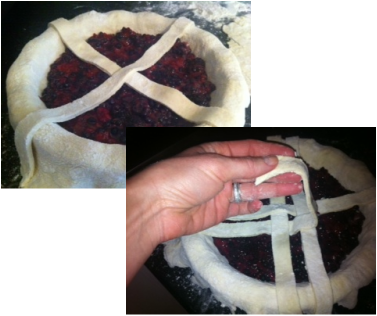
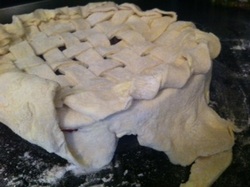
5.  In order to make the laticce crust start by laying the two longest strips at a 90 degree angle.  From there continue to add the next longest strip. I try and make the gap in between the same width as the strips.  Each one should alternate over, under, over, under. Continue this until you reach the edge of the pie in all directions.  Amazingly it will probably take almost every strip even though there are gaps. 

Picture
6.  At this point you have a few options.  My sister loves pie crust! So I folded up the extra laticce strips, then folded the excess pie crust over that and pinched it with my fingers.  If you don't want such a bolky crust then trip some before you finish it off.  

Picture
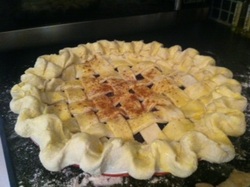
7.  Because I was using homemade pie crust there was flour everywhere.  In order to ensure that the crust looked shiny and beautiful I mixed one egg with a bit of water and brushed it on the surface.  I then sprinkled some sugar and cinnamon on top. 
8. The edges will naturally cook faster, so wrap foil or a crust guard around the edges o the pie.   
9. You are done! Bake it for about 50-60 minutes at 425 degrees until the crust is crispy and golden in the center.

3 Comments

Lemon Blackberry Cake

3/11/2012

1 Comment

 
Picture
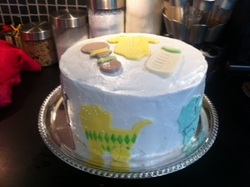
My friend Erica had a baby shower this weekend to welcome in their first little baby! They are waiting for the big surprise at birth to see if it is a boy or a girl.  So for the cake I decided to follow the theme of the invitations and go with baby carriages.  I made a lemon cake with a black berry filling and a meringue frosting.  I used a Martha Stewart recipe.  

Picture
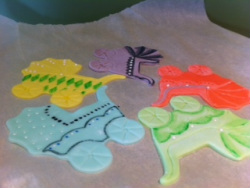
I make the decorations the night before to simplify everything a bit.  I started by taking small chunks of fondant that I bought at Michael's.  I tinted them with either a gel frosting or the intense cake coloring.  Avoid using regular food coloring because it is too wet and will make the fondant sticky. After you tint it, roll out the fondant using powdered sugar so it doesn't stick.  I then used cookie cutters. After that I added details with sprinkles, indentations with a toothpick, or painting them with food coloring. When all the decorations were done I covered them with plastic wrap over night. 

Picture
Cake Ingredients
  • 1 cup (2 sticks) unsalted butter, room temperature, plus more for pans
  • 2 1/2 cups all-purpose flour (spooned and leveled), plus more for pans
  • 1/2 teaspoon baking powder
  • 1/2 teaspoon baking soda
  • 1 teaspoon salt
  • 1 tablespoon lemon zest
  • 2 cups sugar
  • 2 large eggs plus 3 large egg yolks
  • 1/4 cup plus 2 tablespoons fresh lemon juice
  • 1 cup low-fat buttermilk
  • 1 lemon, thinly sliced and seeded

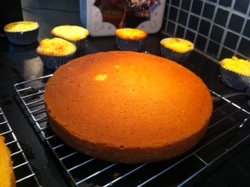
***I made a double recipe and then made a three layer stacking cake.  I had a bit of extra batter that I threw in some cupcake tins. This recipe makes for a beautiful flat perfect cake for stacking.  It make kind of pitiful cupcakes. 

Directions
  1. Preheat oven to 350 degrees. Butter and flour two 8-by-2-inch cake pans, tapping out excess flour. In a medium bowl, whisk flour, baking powder, baking soda, salt, and lemon zest.
  2. In a large bowl, using an electric mixer, beat butter and 1 1/2 cups sugar until light and fluffy. With mixer on low, beat in eggs and yolks, one at a time. Beat in 2 tablespoons lemon juice. Alternately beat in flour mixture and buttermilk beginning and ending with flour mixture; mix just until combined.
  3. Divide batter between pans; smooth tops. Bake until cakes pull away from sides of pans, 32 to 35 minutes. Let cool in pans 10 minutes. Run a knife around edges of pans and invert cakes onto a wire rack.
  4. While cakes are baking, bring remaining 1/2 cup sugar and 1/2 cup water to a boil in a saucepan. Add lemon slices and simmer 25 minutes. Using a slotted spoon, transfer lemon slices to a waxed-paper-lined plate. Stir remaining 1/4 cup fresh lemon juice into syrup. ***I did this next step and I didn't end of using the lemons because of my decorations, so this isn't necessary***
  5. Using a toothpick, poke holes in warm cakes on rack. Brush with lemon syrup. Let cool completely. Prepare frosting, substituting 2 tablespoons fresh lemon juice for vanilla extract. Frost cooled cakes and top with candied lemon slices.

Picture
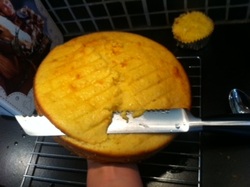
     If you are stacking cake layers higher than two layers, I would recommend taking a good look at them to see if they are flat.  If not, when the cake is completely cool, trim a bit with a bread knife and flatten things out.  Put the trimmed side down so you are not trying to spread frosting on the cut edge. 
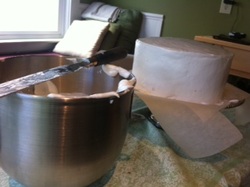
     Before laying the cake on the serving plate I like to put down a border of wax paper.  This way you can frost the cake without haveing to be too careful.  At the end of frosting slide it out, fix anything that needs it around the border, and you have a clean cake plate to serve from. 

Picture
Frosting Ingredients
  • 3 large egg whites
  • 3/4 cup sugar
  • Pinch of salt
  • 1/3 cup water
  • 1/4 teaspoon pure vanilla extract
Directions
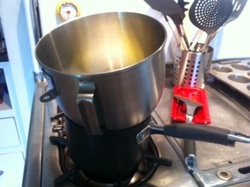
  1. In a heatproof bowl set over (not in) a saucepan of simmering water, combine egg whites, sugar, salt, and water. Cook over medium, stirring constantly, until sugar has dissolved (or mixture registers 150 degrees on an instant-read thermometer), 2 to 3 minutes. Transfer to a large bowl. Using an electric mixer, beat on medium-high until glossy, stiff peaks form (do not overbeat), about 3 minutes; reduce speed to low, add vanilla extract, and beat just until combined. Use immediately.

Picture
***This frosting was very light and meringue-like.    It was a bit hard to form to the cake because initially it is very viscus and then sets up quickly so you have to work fast. If I were to do this again I would use a butter cream recipe.  It gives you tons of flexibility with shaping and spreading it on a cake however it is a rich, thick flavor so you have to decide what you are prefer. 

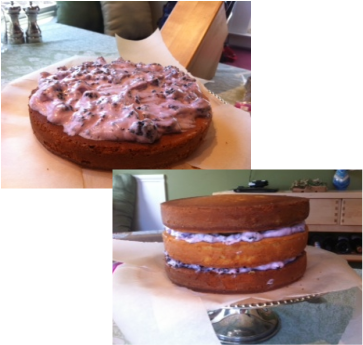
After making the frosting I scooped some into a separate bowl and mixed it with slices blackberries.  Make sure to rinse and dry the berries well so excess water doesn't ruin the frosting. Spread this in between the layers of cake.  It adds a bit of sour that contrasts well with the sweet cake. 

Picture
   When are the layers are construction I plop a bunch of frosting on the top of the cake.  I slowly spread it out until it starts spilling over the sides.  Then as it does I shape it down the side of the cake.  It is easier to encourage the frosting to go down than up! 


Picture
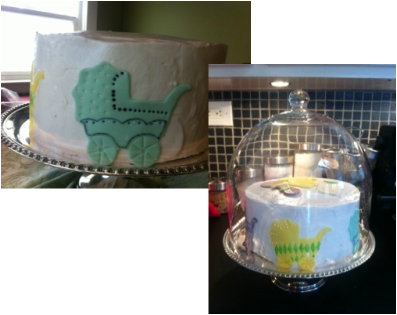
   When everything is set, carefully place the fondant decorations on the cake. Squish them in a little so nothing peals back off.   For me presentation is half the fun, so make sure you have a cake plate that you love! I found this one a few weekends ago in the back of an antique shop.  After about an hour of polishing it shined right up!

1 Comment

Chunky Oatmeal Cookies

2/16/2012

0 Comments

 
Picture
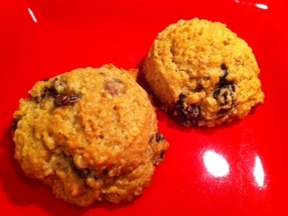
  Yes, there is snow! And this means it's time to ski.  I love heading up the mountain before the world is awake and seeing fresh glistening snow against the green trees.  It is a solid day of good outside exercising with the bonus of cuddling on the chairlift.  But let's be honest.  There has to be some food incentive if I am going to work that hard.  So, with ski season comes chunky oatmeal cookies!!
   

Picture
      They are the perfect pocket liner to give you a little burst of energy and sugar throughout the day.  The recipe is not very original, but it is moist and hearty.  I use the Quaker Oats recipe and add some chunk.  We are heading to Tahoe tomorrow with a bunch of friends to spend the weekend in the snow. So that means it's baking time.   By the way, I realize that this is totally against Feel Good February, but who really thought I would make it the whole month without baking.  This is my cheat for the week. 

Picture
Ingredients: Makes about 4 dozen(depending on how much dough you eat)
1/2 cup plus 6 tablespoons soft butter
3/4 cup firmly packed brown sugar
1/2 white sugar
2 eggs (thank you chickens)
1 teaspoon vanilla
1 1/2 cup flour
1 teaspoon baking soda
1 teaspoon ground cinnamon
1/2 teaspoon salt
3 cups Quaker oats

The chunk:

3/4 cup raisins
3/4 cup chocolate chips
3/4 cup coarsely chopped walnuts or pecans (I left this out this time due to allergies)

Picture
Directions:
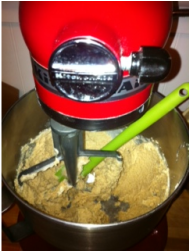
1. Preheat oven to 350 degrees.  Beat the softened butter and both sugars on medium speed until it is creamy. You might as well take a taste now because it is already amazing.
2. Beat in eggs and vanilla.  Make sure to scrape the sides.
3. Add combined flour, baking soda, cinnamon and salt and mix well. 
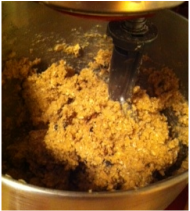
4. Mix in the oats.  Then add raising, nuts, and chocolate chips. It will be a stiff for dough, but that's okay.
5. Drop a tablespoon on an ungreased cookie sheet and bake for 10 minutes. 
6.  Let them sit for a minute or two them carefully move to a wire rack to cook completely. They are melt in your mouth delicious, and they are hearty on a hungry stomach!
Time to hit the slopes!
0 Comments

Berry Sauce

1/14/2012

1 Comment

 
Picture
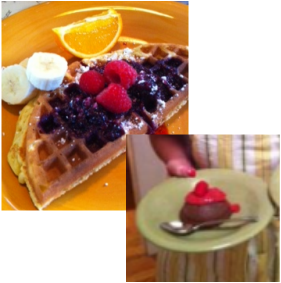
    This is a simple berry sauce that seems to go with whatever I put it on!! It has a sweet but tart flavor.  It is rich enough to make you feel like you have just entered a world of decadence, with a surprise berry here and there.  I have used it as a topping for Chocolate lava cakes. I would imagine that it would go well over a shortcake, or biscuits as well.
     Last weekend I made it and we poured it over waffles. I will put that recipe up tomorrow! You should just plan on having an amazing Sunday morning breakfast.  Invite friends over, or just enjoy whoever is in your house. It is a great way to welcome in the day!   

Picture
    You can use frozen or fresh berries for the sauce, it will taste delicious either way.  I would recommend having some fresh raspberries around as a topping.  
   
Ingredients:
2 cups berries: raspberries, black berries, and/or blue berries 
1/2 cup fresh raspberries
2 tablespoons white sugar
1/3 cup water

Picture
Directions:
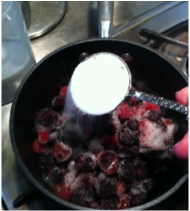
    Put two cups of berries in a small sauce pan over medium heat.  Sprinkle 2 tablespoons of white sugar over the top and mix it in.  Add 1/3 cup of water.  
     As the berries are cooking stir the sauce occasionally.  You want to smash some of the berries to release the juice and make it more of a liquid versus a solid.  It is nice to the punch of a berry here and there.
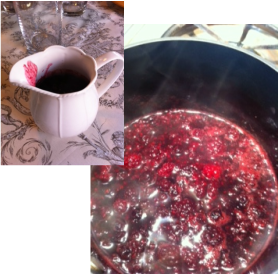
     Boil the mixture to thicken it, add a bit of foaminess, and really enhance the flavor. The time it cooks will depend on what you want the final product to be. Take a look at the pictures above.  For the waffles sauce I only boiled the berry sauce for 5-6 minutes.  I still wanted chunks of berries.  I had blue berries in the mixture so it was a dark, deep color.  For the sauce on the lava cakes I wanted it more smooth without any chunks.  I boiled this for 10 to 12 minutes.  I only used raspberries so it would have a bright pink color.  I mashed the berries thoroughly which produced a smooth, thick sauce.    
   Pour it into a cute little sauce pitcher and off you go! Put some fresh berries out as well to accompany the sauce, or add them to the plate before serving.  This gives it a fresh organic feeling, with the deep flavor of the sauce. 

1 Comment

Pie Crust

1/11/2012

1 Comment

 
Picture
    There are a few things that are good to always have in your back corner.  Pie crust is one of them.  When I first started cooking pie crust, it was one of those illusive things that I could never seem to master.  After messing up several pies, and I finally getting it down, I thought I would share and hopefully save you from terrible pies.  
    Pie crust really shouldn't be sweet, so even if you are not a typical pie maniac, you can use this recipe for crust on things like chicken pot pies and quiches. At Thanksgiving my father-in-law Henry somehow managed to eat almost all the pie crust off the pumpkin pie without  disrupting, or eating, any of the filling.  So last time I saw him I made him cookies, just out of pie crust, with a little cinnamon sugar on top.  This seemed to quiet his hunger for crust. 

Picture
     I will go step by step with lots of detail about how I make the pie crust.  So if you just want to basics, the ingredients are below.  This was posted by Dana at allrecipes.com.  
     I prefer to make pie crust with only butter, instead of shortening.  This is mainly because I always have butter in the house, and I don't like to stock shortening as well. 

Ingredients:
This recipe makes enough for one pie crust.  So if you are making a pie that requires a top, double everything, then split it before you roll out the dough. 
  • 1 1/4 cups all-purpose flour
  • 1/4 teaspoon salt
  • 1/4 teaspoon white sugar
  • 1/2 cup butter, chilled
  • 8-9 tablesoons ice water

Picture
Directions:
*The key to a successful pie crust is to keep the butter really cold.  So as soon as you start cooking, put the butter in the freezer to chill.  Don't make this under a heater vent, or some other strange source of heat.  I actually had to close mine because it literally blew right where I roll my dough. 

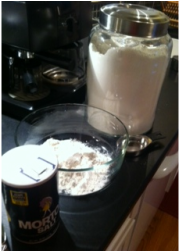
1. In a large bowl, combine flour, salt, and sugar. 


Picture
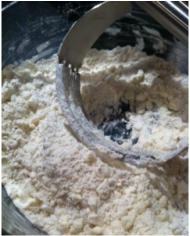
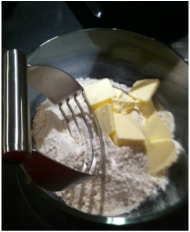
2. Slice the butter into pieces that are about 1 tablespoon in size. You can mix in the butter with a pastry cutter like I show in the picture.  You can also use a food processor, but use only the pulse button.  If you mix it too much, the crust will be doomed! Cut in the butter by repeatedly slicing the mixture with a pastry cutter.  Try to avoid squishing in a circle, like you would normally mix something. You want the butter to be in chunks about the same size as a pea.  By keeping these chunks cold and intact you will ensure that the crust is flaky.  As the crust cooks the butter kinds of acts like a little barrier or pocket.  If you over mix the butter, than it will just taste like bread. 

Picture
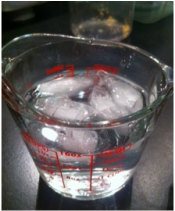
3. Fill a dish with ice water.  Add 1-2 tablespoons of water at a time to the flour mixture.  Using the pasty cutter, fold the mix over itself until the water is incorporated.  This should take 8-9 tablespoons of water. You just want enough that you can form a ball with the dough. 
4.  Use your hands to quickly form a ball.  Be careful not to knead or over squish it! Cover the dish with plastic and throw it in the freezer. If you are going to use the dough right away, then you really only need to leave it in for about 30 minutes.  That is always the longest I can wait.  If you are prepared, way to go, and you can refrigerate the dough until the next day.  

Picture
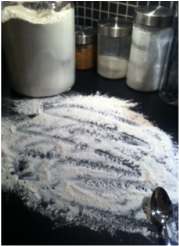
5.  When you are ready to roll out the dough, spread a layer of flour on the counter, or whatever surface you are using.  Keep your flour jar close in case you need more. If the dough starts sticking to any surface, add flour.  


Picture
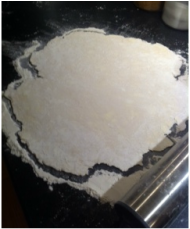
6.  Roll out the dough, flipping it often and respreading the flour underneath. Keep turning the dough and roll from all sides.  Do whatever you can to avoid having to ball it up and roll it a second time! When you think it is about the right size for a 9 inch pie pan, hold the pan over the dough to check.  

Picture
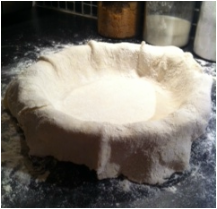
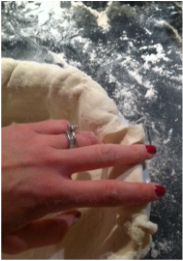
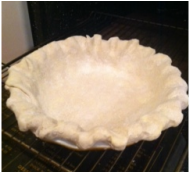
7. Flop the crust onto the pie pan.  Lift the sides to settle it into the middle rather than stretching it in.  Run your knuckle around the inside edge to make sure it is all the way down.

Picture
8.  The edging on the pie is really a matter of personal preferance.  If you want it neat and tidy.  I would slide around the underneath edge of the pie pan with a paring knife and cut off the excess.  If you don't care terribly about the neatness, which was obviously the case in this picture, you can fold the excess under, which will give you a thick crust.  Keep in mind that the crust will shrink up as it cooks.  If you are cooking the shell without a filling, leave it hanging over the edge just a touch.  This will act like a hook and avoid having the crust shrink into the middle.  That happened a bit on this pie.  You can use a fork to put a bit of a pattern on the pie.  During fall I cut out leaves and acorns and such, and place these around the edge for crust.  Most of the time I use the typical, "Pull through your fingers" method.  Place two fingers on one side, put another finger on the other side, and pull through each other.  This will seal the edge if you folded the excess under.  It gives the pie a scalloped edge.  

Picture
9. Baking.  If you are filling the pie, follow the temperature on the filling recipe.  If there isn't one, I would say 375 or 400 degrees.  If you are baking the crust by itself, cook it at 425 degrees for about 3 minutes.  The edges are the highest and thus cook the fastest.  Either cover them with a crust edge (pampered chef makes one), or a rim of tin foil.  This will slow down the cooking of the edges and allow everything to finish on time.  This is especially important if there is filling in the pie when it is being cooked. This si kind of obvious, but take it out when the crust is browned and flaky.   


Picture

I hope you give this a try, because pie crust from scratch is worth every bit of effort! When you break off apiece, or cut it with your fork, you will hear a mouth watering crunch, miniscule pieces will go flying everywhere, and it will melt in your mouth. Enjoy!

1 Comment
<<Previous

    Robin's Blog

    I am living in Downtown 
    Sacramento creating my little urban farm!

    Archives

    June 2014
    April 2014
    January 2014
    July 2013
    April 2013
    January 2013
    November 2012
    October 2012
    September 2012
    August 2012
    July 2012
    June 2012
    May 2012
    April 2012
    March 2012
    February 2012
    January 2012
    December 2011
    November 2011

    Categories

    All
    All
    Appetizers
    Breads
    Breakfast
    Chickens
    Crock Pot
    Desserts
    Fall Foods
    Gardening
    Gifts
    Holiday
    Holiday Foods
    Home Improvements
    Recipes
    Salads
    Sewing
    Soups
    Travel

    RSS Feed

Powered by Create your own unique website with customizable templates.