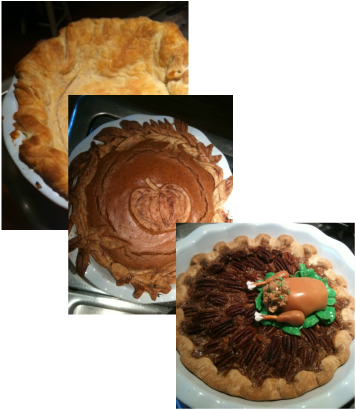
There are a few things that are good to always have in your back corner. Pie crust is one of them. When I first started cooking pie crust, it was one of those illusive things that I could never seem to master. After messing up several pies, and I finally getting it down, I thought I would share and hopefully save you from terrible pies.
Pie crust really shouldn't be sweet, so even if you are not a typical pie maniac, you can use this recipe for crust on things like chicken pot pies and quiches. At Thanksgiving my father-in-law Henry somehow managed to eat almost all the pie crust off the pumpkin pie without disrupting, or eating, any of the filling. So last time I saw him I made him cookies, just out of pie crust, with a little cinnamon sugar on top. This seemed to quiet his hunger for crust.
Pie crust really shouldn't be sweet, so even if you are not a typical pie maniac, you can use this recipe for crust on things like chicken pot pies and quiches. At Thanksgiving my father-in-law Henry somehow managed to eat almost all the pie crust off the pumpkin pie without disrupting, or eating, any of the filling. So last time I saw him I made him cookies, just out of pie crust, with a little cinnamon sugar on top. This seemed to quiet his hunger for crust.
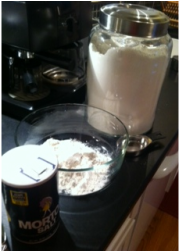
I will go step by step with lots of detail about how I make the pie crust. So if you just want to basics, the ingredients are below. This was posted by Dana at allrecipes.com.
I prefer to make pie crust with only butter, instead of shortening. This is mainly because I always have butter in the house, and I don't like to stock shortening as well.
Ingredients:
This recipe makes enough for one pie crust. So if you are making a pie that requires a top, double everything, then split it before you roll out the dough.
- 1 1/4 cups all-purpose flour
- 1/4 teaspoon salt
- 1/4 teaspoon white sugar
- 1/2 cup butter, chilled
- 8-9 tablesoons ice water
Directions:
*The key to a successful pie crust is to keep the butter really cold. So as soon as you start cooking, put the butter in the freezer to chill. Don't make this under a heater vent, or some other strange source of heat. I actually had to close mine because it literally blew right where I roll my dough.
1. In a large bowl, combine flour, salt, and sugar.
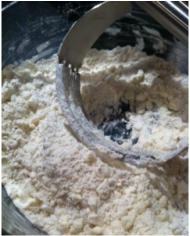
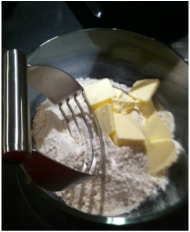
2. Slice the butter into pieces that are about 1 tablespoon in size. You can mix in the butter with a pastry cutter like I show in the picture. You can also use a food processor, but use only the pulse button. If you mix it too much, the crust will be doomed! Cut in the butter by repeatedly slicing the mixture with a pastry cutter. Try to avoid squishing in a circle, like you would normally mix something. You want the butter to be in chunks about the same size as a pea. By keeping these chunks cold and intact you will ensure that the crust is flaky. As the crust cooks the butter kinds of acts like a little barrier or pocket. If you over mix the butter, than it will just taste like bread.
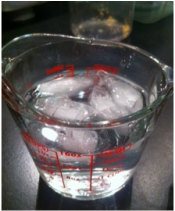
3. Fill a dish with ice water. Add 1-2 tablespoons of water at a time to the flour mixture. Using the pasty cutter, fold the mix over itself until the water is incorporated. This should take 8-9 tablespoons of water. You just want enough that you can form a ball with the dough.
4. Use your hands to quickly form a ball. Be careful not to knead or over squish it! Cover the dish with plastic and throw it in the freezer. If you are going to use the dough right away, then you really only need to leave it in for about 30 minutes. That is always the longest I can wait. If you are prepared, way to go, and you can refrigerate the dough until the next day.
4. Use your hands to quickly form a ball. Be careful not to knead or over squish it! Cover the dish with plastic and throw it in the freezer. If you are going to use the dough right away, then you really only need to leave it in for about 30 minutes. That is always the longest I can wait. If you are prepared, way to go, and you can refrigerate the dough until the next day.
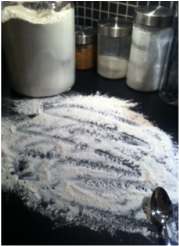
5. When you are ready to roll out the dough, spread a layer of flour on the counter, or whatever surface you are using. Keep your flour jar close in case you need more. If the dough starts sticking to any surface, add flour.
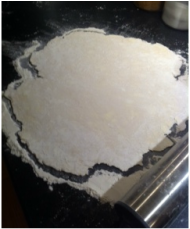
6. Roll out the dough, flipping it often and respreading the flour underneath. Keep turning the dough and roll from all sides. Do whatever you can to avoid having to ball it up and roll it a second time! When you think it is about the right size for a 9 inch pie pan, hold the pan over the dough to check.
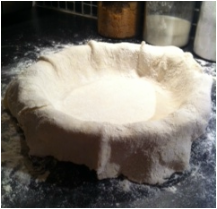
7. Flop the crust onto the pie pan. Lift the sides to settle it into the middle rather than stretching it in. Run your knuckle around the inside edge to make sure it is all the way down.
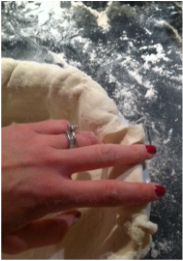
8. The edging on the pie is really a matter of personal preferance. If you want it neat and tidy. I would slide around the underneath edge of the pie pan with a paring knife and cut off the excess. If you don't care terribly about the neatness, which was obviously the case in this picture, you can fold the excess under, which will give you a thick crust. Keep in mind that the crust will shrink up as it cooks. If you are cooking the shell without a filling, leave it hanging over the edge just a touch. This will act like a hook and avoid having the crust shrink into the middle. That happened a bit on this pie. You can use a fork to put a bit of a pattern on the pie. During fall I cut out leaves and acorns and such, and place these around the edge for crust. Most of the time I use the typical, "Pull through your fingers" method. Place two fingers on one side, put another finger on the other side, and pull through each other. This will seal the edge if you folded the excess under. It gives the pie a scalloped edge.
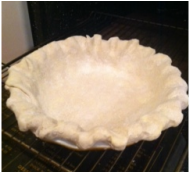
9. Baking. If you are filling the pie, follow the temperature on the filling recipe. If there isn't one, I would say 375 or 400 degrees. If you are baking the crust by itself, cook it at 425 degrees for about 3 minutes. The edges are the highest and thus cook the fastest. Either cover them with a crust edge (pampered chef makes one), or a rim of tin foil. This will slow down the cooking of the edges and allow everything to finish on time. This is especially important if there is filling in the pie when it is being cooked. This si kind of obvious, but take it out when the crust is browned and flaky.
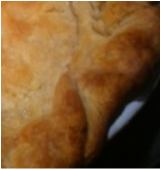
I hope you give this a try, because pie crust from scratch is worth every bit of effort! When you break off apiece, or cut it with your fork, you will hear a mouth watering crunch, miniscule pieces will go flying everywhere, and it will melt in your mouth. Enjoy!
 RSS Feed
