Robin's Urban Farmhouse
  • Robin\\\\\'s Latest
  • Meet Robin
  • The Chickens
  • The Garden
  • The Bakery
  • The House
  • Untitled

August Garden

8/12/2012

0 Comments

 
Picture
     First off, I have to admit I have completely neglected my garden this summer.  I don't know what got into me, but I just haven't wanted to go out and dig in the dirt.  So I am sorry I haven't written much about it.  Luckily, I was motivated in the spring.  So even without my sweet talking my plants and constant attention, veggies have still grown!!

      When we were in Costa Rica the weeds got completely out of control! I never really recovered.  Consequently I noticed that a lot of the plants were flowering but not producing any fruit.  I decided if the birds and the bees weren't getting it done, then I was going to have to pollinate the garden myself! So I went out with a few Q-tips, rubbed it in the blossoms of the flowers and waited.  I kept a metal note of what flowers I had done this to.  To my surprise it worked and I got zucchini and cucumbers from it! 
Picture
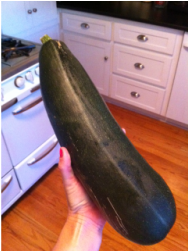
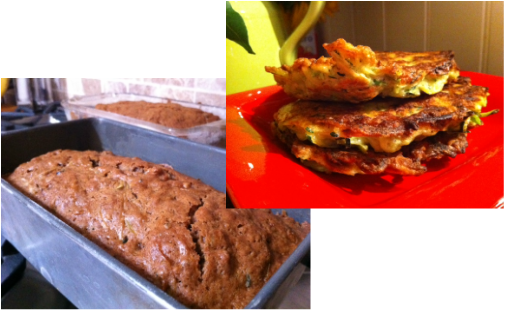
Naturally my favorite thing about having a garden is being able to cook with the food I harvest.  I found this gigantic zucchini hiding under all the weeds.  I would not recommend letting them get this big! But you use what you have! From this one zucchini I made four loafs of zucchini bread and zucchini fritters.  Unfortunately I didn't keep track of the recipe I was using, but I am sure you can all find one! The zucchini fritters are a lot like potato latkes and I love them! 

Picture
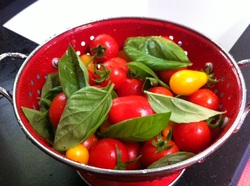
     School started last week and I was suddenly thrown into the routine of rushing all day at work, coming home tired, and trying to throw something edible together for dinner.  Here is my secret.  Keep boxes of pasta handy at all times! Then you can whip up some penne and go shopping the garden.  Tomatoes, cucumbers, basil, sage, zucchini, squash, etc. The fresh ingredients are tasty enough that you can really just use a little olive oil in stead of sauce. 

Picture
Garden Maintenance:
1. Weeding, weeding, and more weeding. I know, it's the pits.  
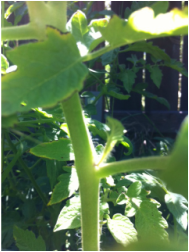
2. Also, maintain your tomato plants.  In the crotch of the branches little starter branches will grow like you see in this picture.  At the point in the summer they will not bare fruit.  So you have to pull these sucklers off.  The plant will use all the energy growing these extra branches that don't benefit you! If you have tomatoes on the vines, but they are not turning red, or they are splitting then cut back the water.  Tomatoes need to be starved of water a little in order to ripen. 
3. Plant anything that you want growing for the fall if you haven't already (I haven't).
0 Comments

Can we say Sexy Wife?

8/9/2012

1 Comment

 
Picture
     Our dear friends Candace and Eddie are getting married next weekend! I am very excited for the event. For Candi's bridal shower gift I wanted to get her something fun that really reflected her personality.  I couldn't find just the right thing.  
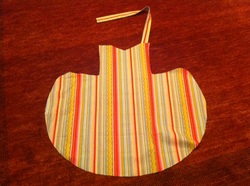
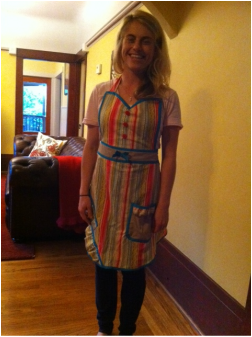
   Way back when Candace had asked me to teach her how to sew.  So I bought an apron pattern for a starter project (because I have a ridiculous obsession with cute aprons).  The wedding buzz began and the weeks passed, and no apron was ever assembled.  So I decided to do it for her as a gift!  I had so much fun making it and adding all the spunky details until they matched Candi exactly.  It thought one of you might like to try it! 

Picture
    I started with a trip to the fabric store with Grandma.  I felt like I was getting a peak into like in 50 years! We found a fun fabric and even louder edging to match.  I picked a subdued tan for the belt and pocket so it wasn't too crazy.  
  First off I cut the basic cut of the pattern.  I feel like you could almost do this without a pattern.  I really only used the main body piece and the straps piece of the pattern.  All the rest I just created.  The patterns are only about $3.  

Picture
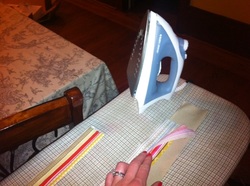
    On the whole project I tried to avoid having any rough edges. Since this is only one layer of fabric thick I really had to depend on the edging.  For the straps and the belt I cut a long strip, sewed it together, turned it inside-out like a tube and ironed it flat.  This made everything tidy and clean.  
   After some conferring with Grandma, I used the same procedure for the ruffles. 

Picture
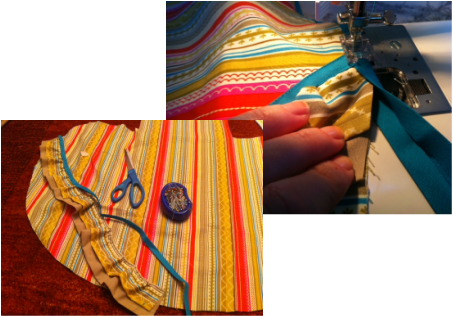
  I made the "tubes" of ruffles and layered two of them together.  I pinned them on and held it up in the mirror about 30 times to make sure they wrapped around just right.  The turquoise edging was again a life saver.  I folded it over the ruffles and sewed it all on together with matching thread.  
   After everything is on, sew edging around everything to tuck in the ruffle edges. 

Picture
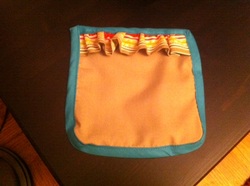
I used much of the same procedure for the pocket, except of course you don't sew the top shut.  Instead of just straps to hold on the bodies I extended into one long piece so it made more of a belt.  

Picture
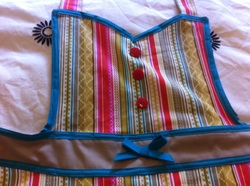
Lastly came the detail work, a little bow here, a few buttons there, and all the sudden it is adorable!

Picture
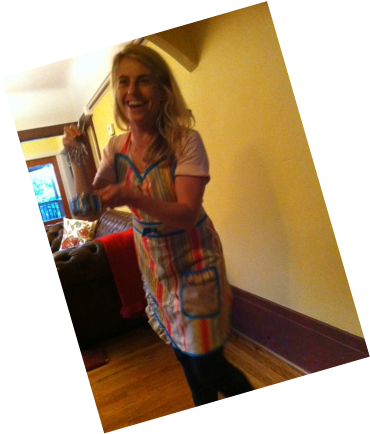
   I coupled the apron with some measuring cups, spoons, kitchen timer, and a whisk.  So now Candace is all set to be the hot wife in the kitchen! I would recommend this when you are feeling crafty and looking for a gift for the girl who has everything!

1 Comment

Creamy Peanut Butter Cake with Chocolate Glaze

8/5/2012

0 Comments

 
Picture
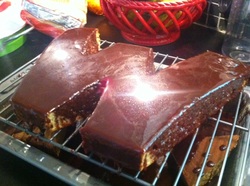
If the title alone doesn't make your mouth start watering then this might not be the recipe for you.  But I have to say, I thought it was delicious and even my cake hating sister (I don't know how it's possible for my sister to hate cake) gave it two thumbs up!  Obviously this cake is in the shape of a W.  That's because it was for my friend Whitney's birthday (and she does like bake). I was returning the favor, because she once baked me a peanut butter birthday that looked exactly like our cabin, where we were celebrating!

Picture
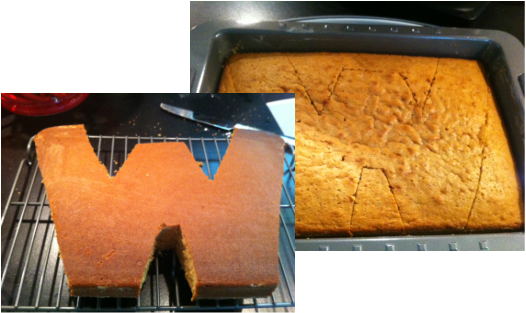
    Cutting the actual cake into a fun shape gives the cake some pizzaz and personalization!
    I started by buttering and flouring the cake pans.  This is by far the best way to get a smooth even surface when you flip your cake out.  
     I used Paula Deen's Peanut Butter Cake recipe.  Although I substituted butter for shortening and did not put actual peanuts in the frosting.  The frosting goes on more like a glaze than a frosting and then hardens as it cools. 

Picture
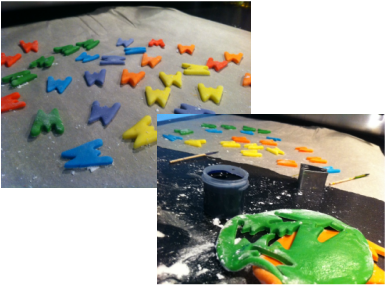
    While the cake was baking in the oven I got busy with the decorations! I tinted tiny chunks of white fondant to make various bright colors.  If you are doing this use powdered sugar to roll out the fondant.  Flour will alter the flavor.  I also recommend using gel food coloring or the concentrated food coloring in jars so the fondant doesn' become too wet and sticky! 

Picture
    When the cake was finished baking I let it cool in the pan.  I then cut the W out so that the edges of the pan supported the cake.  I held the cooling rack tights to the baking dish and flipped it. 
 

Picture
  The glaze was quick to cook! I poured it over the cake until I had a smooth finish.  Do this over something where the extra can drain out so you don't have a soggy cake.  Lastly I placed the W's randomly around the cake and it was finished! 

0 Comments

    Robin's Blog

    I am living in Downtown 
    Sacramento creating my little urban farm!

    Archives

    June 2014
    April 2014
    January 2014
    July 2013
    April 2013
    January 2013
    November 2012
    October 2012
    September 2012
    August 2012
    July 2012
    June 2012
    May 2012
    April 2012
    March 2012
    February 2012
    January 2012
    December 2011
    November 2011

    Categories

    All
    All
    Appetizers
    Breads
    Breakfast
    Chickens
    Crock Pot
    Desserts
    Fall Foods
    Gardening
    Gifts
    Holiday
    Holiday Foods
    Home Improvements
    Recipes
    Salads
    Sewing
    Soups
    Travel

    RSS Feed

Powered by Create your own unique website with customizable templates.