Robin's Urban Farmhouse
  • Robin\\\\\'s Latest
  • Meet Robin
  • The Chickens
  • The Garden
  • The Bakery
  • The House
  • Untitled

Power Packed Muffins

6/30/2014

0 Comments

 
Picture
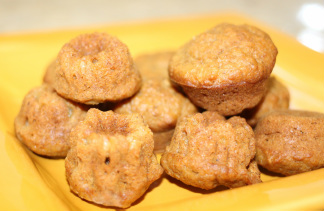
       Love eating baked goods? Me too! But I don't always love the feeling of a greasy cookie in my stomach.  Most of the ingredients in these muffins are actually good for you! So you don't even have to feel bad about eating them.  They are full of vegetables and fruits which not only gives you a good way to clean out the fridge of wilting celery and bruised apples, but it is a great way to hide the vitamins and nutrients in something soft and delicious.  Kids go absolutely nuts for them, I have yet to have a child eat one and not ask for more!
         My friend Lara introduced me to this veggie muffin idea which is a fantastic way to get people (especially little people) to eat their veggies without cramming spinach down their throats.  I posted this link in one of my previous posts.  After making this recipe several times now I found that there is room for improvement. I have reduced the sugar, eliminated the juices, and increased the spices so the muffins are reminicent of carrot cake. I thought I would give you my version for you to try!
        I will tell you that the fruits and vegetables you can add are very versatile.  I generally try and put at least one apple and one banana in to add sweetness and creaminess.  The rest is up to you! Carrots and sweet potatoes work great for the veggies, as well as any leafy greens, cauliflower, squash, or any other vitamins you are looking to infuse into your diet (or that of your kids). You do not need to precook anything, but if they are already cooked, that works too! 
        Lastly, often times I will blend the fruits and veggies on a different day than I bake the muffins.  Maybe I had a left-over smoothie, or simply the vegetables were starting to get old and I didn't have time for baking.  Anyhow, I usually make a double batch of the produce puree so it is less work next time.  You can simply freeze the puree and thaw when you want to use it. Here it is! I would love to hear comments about what you put in these magic little treats. 


Directions:
1) Preheat oven to 375 degrees. 
2) Grease mini muffin pans.  This makes about 50 mini-muffins.  (They may not cook all the way through if you use regular size muffins)
3) Mix ingredients in the order below (or really any order you want, these don't need to be very precise). The batter should be viscus but not pourable, use a spoon to put it in the muffin tins. 
4) Bake for 35 minutes at 375 until the edges start to brown, the inside will still be moist. 
5) Allow the muffins to cool on a cooling rack and enjoy!

Ingredients:
1 cup whole wheat flour
1 cup all purpose flour
3/4 teaspoon baking powder 
1/2 salt
1/4 teaspoon (or a few sprinkles) nutmeg
1/4 teaspoon (or a few sprinkles) ground cloves
1/2 teaspoon cinnamon
1/2 cup sugar
4 tablespoons butter
2 eggs
1 teaspoon vanilla
about 2 1/2 cups blended fruits and vegetables
1/2 cup greek yogurt (of whatever fat content you usually eat)

0 Comments

Banana Nut Bread

4/10/2012

2 Comments

 
Picture
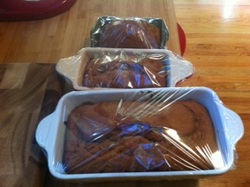
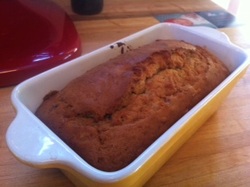
    When you've got old bananas, make banana bread!  I have been tweaking my banana bread recipe a little here and a little there while trying to taste for each ingredient.  I think it is finally time to share with you all!  However, if you bake it, I want feedback.  Even if you think it is awful, tell me so I can make it better.  This recipe makes two large loaf pans.  Or one big one for yourself, and 3 small ones for your friends. Okay, the recipe:


Ingredients:
3/4 cup butter at room temperature
3/4 cup brown sugar
1/4 cup white sugar
4 eggs
2 teaspoons vanilla
4/5 ripe banana
3 cup all purpose flour
1 teaspoon baking soda
1 teaspoon baking powder
1 1/2 teaspoons salt
1 teaspoon ground cinnamon
1 1/2 cups coarsely chopped walnuts

Picture
Directions:
1. Preheat oven to 350 degrees.

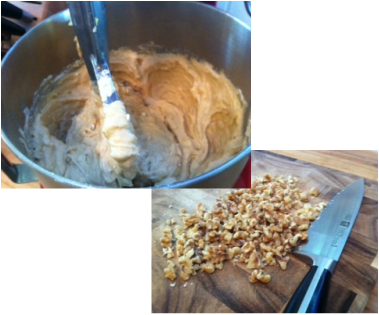
2. Mix butter and sugar together until creamy.  Use an electric mixer if you have one.  Beat in eggs one at a time.  Add vanilla.

3.  If you are mixing by hand then mash up the bananas prior to putting them in.  If you using an electric mixer you can just add them in chunks of banana at a time.


Picture
4. In a separate bowl mix together all the dry ingredients, except the walnuts.  Add this to the wet mixture in about three batches and mix only until combined.  

5.  Finally add in chopped walnuts.  Butter the bread pans and then fill them about 2/3 full. The batter will expand.  If you are having a serious sweet tooth that day you can sprinkle brown sugar on before you make it. 

6. Bake at 350 degrees for 55-60 minutes.  Test with a toothpick to make sure the middle is cooked.  The top should be brown and crispy.  When you take it out let the bread cool for about ten minutes.  Use a knife to separate the sides and enjoy hot!

2 Comments

Fresh Bread

4/2/2012

0 Comments

 
Picture
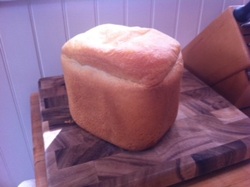
  One of my dear loves is fresh bread.  You know that smell... that "My house is warm and cozy, someone is baking" smell.  Fresh bread is the best for that!  Once I started baking fresh bread, packaged store bought bread was out of style at my house.  It became one of those things that you eat only when you are too hungry to function.  


Picture
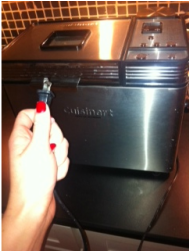
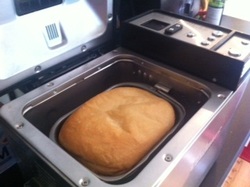
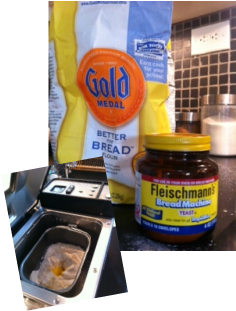
       I'll have you know that I don't sit around all day kneading bread.  Why would I do that when  bread maker can do that for me!! I simply dump in the ingredients, tell the machine when I want to be fed, and press start. This means I can set it before I go to bed and have steaming hot bread for breakfast.  You can't beat it! 
      In order to make life easy on busy days, I will measure out the dry ingredients ahead of time.  I put them into a ziplock and make about five loaves worth.  Then after a long day of teaching I can still manage to get some bread in the bread maker. 


Picture
      I usually make plain white bread, but it is fun to throw in herbs from the garden and produce olive oil rosemary bread, or a mix of random herbs. Occasionally I get fancy and used my bread machine to mix me up the dough for pizza, focaccia, challah, or brioche. 
    I will put the recipe for white bread (which is on my chalk board for immediate use) and rosemary bread. These are from the Cuisinart bread recipe booklet. You can also access all of their recipes online. 
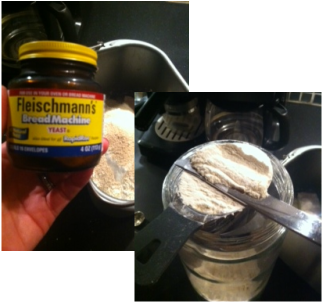
       I've included a picture of the Fleischmann's yeast because I really think it is the best. I also use bread flour instead of all purpose flour.  King Arthur's flour or Gold Medal bread flour are my favorites. 
      If you don't have a bread maker, and you love fresh bread, I would invest in one.  Otherwise, I hope this inspires you to make bread! If you want directions for how to do it by hand write a comment and I will write some up!

Picture
Basic White Bread-Machine Bread 
Ingredients: Medium loaf

Water, 80°–90°F 11⁄8 cups
Unsalted butter,   2 tablespoons + 1 teaspoon at room temperature 
Granulated sugar or honey  2 1⁄4 teaspoons 
Salt  1 1⁄8 teaspoons 
Bread flour  3 cups 
Nonfat dry milk  3 tablespoons 
Yeast, active dry, instant or bread machine  1 1⁄2 teaspoons 

Place all ingredients, in the order listed, in the bread pan fitted with the kneading paddle. Place the bread pan in the Cuisinart™Convection Bread Maker. Press Menu and select White. Press Crust and select Medium (or to taste). Press Loaf and select dough size. Press Start to mix, knead, rise, and bake. When pause signal sounds, remove dough and kneading paddle if desired, reshape dough and replace in bread pan. Press Start to continue. When cycle is completed, remove bread from machine and transfer to wire rack to cool. Bread slices best when allowed to cool. 
Calories 77 (17% from fat) • carb. 13g • pro. 2g • fat 1g • sat. fat 1g • chol. 3mg • sod. 116mg • calc. 16mg • fiber 0g


Rosemary Bread-Medium Loaf

Ingredients:

Water, 80°–90°F 3/4 cups
Olive Oil 3 Tablespoons
Salt  1 teaspoon
Bread flour  3 cups Rosemary chopped  2 teaspoons
Yeast, active dry, instant or bread machine  1 1⁄2 teaspoons 

*Sometimes I like to add chopped olives or other yummy tidbits to this*

Place all ingredients, in the order listed, in the bread pan fitted with the kneading paddle. Place the bread pan in the Cuisinart™Convection Bread Maker. Press Menu and select White. Press Crust and select Medium (or to taste). Press Loaf and select dough size. Press Start to mix, knead, rise, and bake. When pause signal sounds, remove dough and kneading paddle if desired, reshape dough and replace in bread pan. Press Start to continue. When cycle is completed, remove bread from machine and transfer to wire rack to cool. Bread slices best when allowed to cool. 

0 Comments

Pie Crust

1/11/2012

1 Comment

 
Picture
    There are a few things that are good to always have in your back corner.  Pie crust is one of them.  When I first started cooking pie crust, it was one of those illusive things that I could never seem to master.  After messing up several pies, and I finally getting it down, I thought I would share and hopefully save you from terrible pies.  
    Pie crust really shouldn't be sweet, so even if you are not a typical pie maniac, you can use this recipe for crust on things like chicken pot pies and quiches. At Thanksgiving my father-in-law Henry somehow managed to eat almost all the pie crust off the pumpkin pie without  disrupting, or eating, any of the filling.  So last time I saw him I made him cookies, just out of pie crust, with a little cinnamon sugar on top.  This seemed to quiet his hunger for crust. 

Picture
     I will go step by step with lots of detail about how I make the pie crust.  So if you just want to basics, the ingredients are below.  This was posted by Dana at allrecipes.com.  
     I prefer to make pie crust with only butter, instead of shortening.  This is mainly because I always have butter in the house, and I don't like to stock shortening as well. 

Ingredients:
This recipe makes enough for one pie crust.  So if you are making a pie that requires a top, double everything, then split it before you roll out the dough. 
  • 1 1/4 cups all-purpose flour
  • 1/4 teaspoon salt
  • 1/4 teaspoon white sugar
  • 1/2 cup butter, chilled
  • 8-9 tablesoons ice water

Picture
Directions:
*The key to a successful pie crust is to keep the butter really cold.  So as soon as you start cooking, put the butter in the freezer to chill.  Don't make this under a heater vent, or some other strange source of heat.  I actually had to close mine because it literally blew right where I roll my dough. 

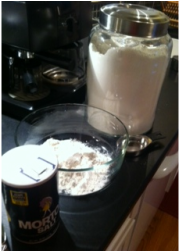
1. In a large bowl, combine flour, salt, and sugar. 


Picture
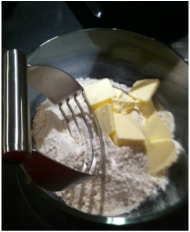
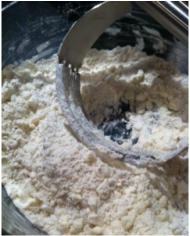
2. Slice the butter into pieces that are about 1 tablespoon in size. You can mix in the butter with a pastry cutter like I show in the picture.  You can also use a food processor, but use only the pulse button.  If you mix it too much, the crust will be doomed! Cut in the butter by repeatedly slicing the mixture with a pastry cutter.  Try to avoid squishing in a circle, like you would normally mix something. You want the butter to be in chunks about the same size as a pea.  By keeping these chunks cold and intact you will ensure that the crust is flaky.  As the crust cooks the butter kinds of acts like a little barrier or pocket.  If you over mix the butter, than it will just taste like bread. 

Picture
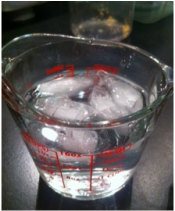
3. Fill a dish with ice water.  Add 1-2 tablespoons of water at a time to the flour mixture.  Using the pasty cutter, fold the mix over itself until the water is incorporated.  This should take 8-9 tablespoons of water. You just want enough that you can form a ball with the dough. 
4.  Use your hands to quickly form a ball.  Be careful not to knead or over squish it! Cover the dish with plastic and throw it in the freezer. If you are going to use the dough right away, then you really only need to leave it in for about 30 minutes.  That is always the longest I can wait.  If you are prepared, way to go, and you can refrigerate the dough until the next day.  

Picture
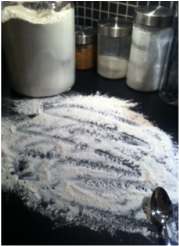
5.  When you are ready to roll out the dough, spread a layer of flour on the counter, or whatever surface you are using.  Keep your flour jar close in case you need more. If the dough starts sticking to any surface, add flour.  


Picture
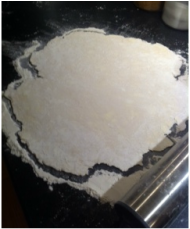
6.  Roll out the dough, flipping it often and respreading the flour underneath. Keep turning the dough and roll from all sides.  Do whatever you can to avoid having to ball it up and roll it a second time! When you think it is about the right size for a 9 inch pie pan, hold the pan over the dough to check.  

Picture
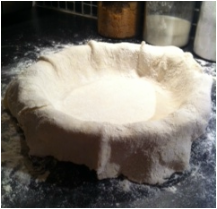
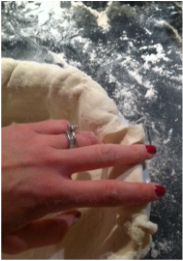
7. Flop the crust onto the pie pan.  Lift the sides to settle it into the middle rather than stretching it in.  Run your knuckle around the inside edge to make sure it is all the way down.

Picture
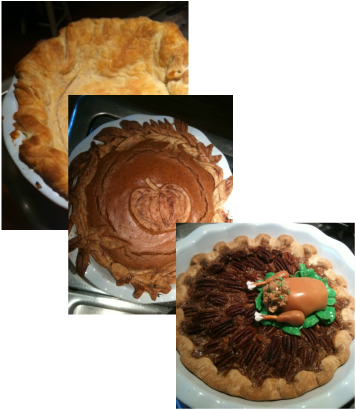
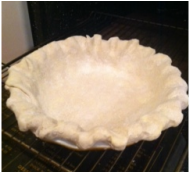
8.  The edging on the pie is really a matter of personal preferance.  If you want it neat and tidy.  I would slide around the underneath edge of the pie pan with a paring knife and cut off the excess.  If you don't care terribly about the neatness, which was obviously the case in this picture, you can fold the excess under, which will give you a thick crust.  Keep in mind that the crust will shrink up as it cooks.  If you are cooking the shell without a filling, leave it hanging over the edge just a touch.  This will act like a hook and avoid having the crust shrink into the middle.  That happened a bit on this pie.  You can use a fork to put a bit of a pattern on the pie.  During fall I cut out leaves and acorns and such, and place these around the edge for crust.  Most of the time I use the typical, "Pull through your fingers" method.  Place two fingers on one side, put another finger on the other side, and pull through each other.  This will seal the edge if you folded the excess under.  It gives the pie a scalloped edge.  

Picture
9. Baking.  If you are filling the pie, follow the temperature on the filling recipe.  If there isn't one, I would say 375 or 400 degrees.  If you are baking the crust by itself, cook it at 425 degrees for about 3 minutes.  The edges are the highest and thus cook the fastest.  Either cover them with a crust edge (pampered chef makes one), or a rim of tin foil.  This will slow down the cooking of the edges and allow everything to finish on time.  This is especially important if there is filling in the pie when it is being cooked. This si kind of obvious, but take it out when the crust is browned and flaky.   


Picture

I hope you give this a try, because pie crust from scratch is worth every bit of effort! When you break off apiece, or cut it with your fork, you will hear a mouth watering crunch, miniscule pieces will go flying everywhere, and it will melt in your mouth. Enjoy!

1 Comment

Savory drop biscuits

1/5/2012

0 Comments

 
Picture
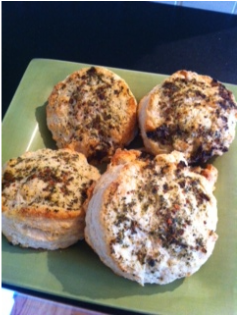
     These are a buttery biscuit, that are full of flavor. This recipe is quick and easy. It takes about a half an hour in total with the baking and is a great way to show up to a dinner party looking like you cooked all day!  
       I created this recipe recently when I  promised to bring bread to my friend Brian and Jen's dinner party, but ran out of time to take hours to bake bread. All the recipes I found used shortening and things I did not have around the house.  I tried to keep this one basic.
      When you are eating this you can pull it apart layer by layer and enjoy all the flavor.  If you want to keep it savory, follow the recipe as is.  However, it is also very versatile.  If you want more of a breakfast biscuit, then substitute orange juice for the water, hold the herbs, and sprinkle a little white sugar on top before baking.  Enjoy experimenting!
  

Recipe: Biscuits
Makes 5-7 biscuits
Ingredients:
1 1/2 cup all purpose flour
1 tablespoon sugar
1 1/2 teaspoon baking powder
1/2 teaspoon cream of tartar
1/2 cup salted butter very cold (1 tablespoon is used for a glaze)
1/2 cup water
dried herbs

Directions:
1. Preheat oven to 400 degrees F. Combine flour, sugar, baking powder, and cream of tartar in a bowl.  Mix together with a fork.
2. Cut the butter into chunks and add it.  Leave one tablespoon out for later. With a pastry cutter, cut in the butter until it is about pea size chunks. 
3. Add water a bit at a time.  Mix it in gently until a dough ball can be formed. Do not over mix. You may not need all of the water. 
4. Turn the dough onto a floured surface and knead about three times.  You just want to get all the chunks incorporated, but you don't want to ruin the structure of the dough.
5. Using your hands flatten the dough until it is about one inch thick.  Cut out biscuits with a biscuit cutter, or some other cute cookie cutter if you want.
6. Melt the remaining butter in a small dish.  Sprinkle in herbs of your choice, basil, parsley, dried red peppers, etc. Baste that mixture on the top of the biscuits. 
7.  Bake for 20-25 minutes at 400 degrees.  Take them out when the top looks golden brown and crispy.  The biscuits should separate in layers and be nice and moist inside. Serve hot if possible.

0 Comments

Happy Hannukah!

12/20/2011

0 Comments


Picture
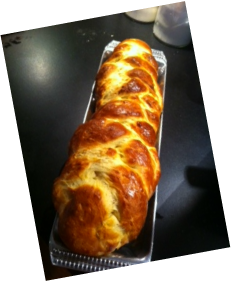
  Hannukah starts tonight at sundown, so homemade challah is on the agenda for today!  I had a request from my friend Adi for some Jewish recipes.  Here you go! These recipes are for all the shiksas out there, or anyone who wants to take a stab at some traditional jewish food. Challah is a delicious, rich, egg bread no matter what time of year it is!  I will post new Jewish recipes all this week.  
     In our house, we get to celebrate both Hannukah and Christmas.  How do I do that you might ask? Lots of cooking and presents!  Hannukah dinner is a carb loaded feast! In it's roots, Hannukah is a celebration of the oil that lasted for eight days.  So oil is the concentration of the meal. As with most holidays, we celebrate by spending time with our friends and family, and giving thanks for all the blessings in our life.
        For this year's Hannukah dinner we will be celebrating at our friend's house, so I will be making homemade Challah, and noodle kugle.  I am sure some latkes will make it on the table sometime this week as well!

Picture
     I am using a recipe out of my cuisinart recipe book for my bread maker.  I have to admit I totally cheat when I make bread.  I make it often, but I always use my bread maker.  I will write the recipe so you can make it by hand or with the bread machine.  
         If you are using a bread machine, put the ingredients in the bread maker in the order they are listed and set your maker to a dough setting.  You can pick up the directions at #4.  If you are making it by hand, follow the instructions below. 

Picture
Recipe: Challah - 2 pound loaf
Ingredients:
1 cup water
1/3 cup + 2 tablespoons butter
    -Butter should be at room temperature and cut into roughly 1 tbls pieces
2 eggs
1 egg for the egg wash
1 1/4 teaspoon salt
3 tablespoons + 2 teaspoons sugar
3 3/4 cup bread flour
2 1/4 teaspoons yeast (I recommend bread machine yeast)

Picture
1. Combine flour, sugar, salt, and yeast in a bowl and sit together.  Mix in water, butter and eggs. Mix until well combined.  
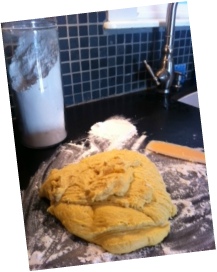
2. Place the dough ball onto a lightly floured surface but make sure to have a pile of flour sitting nearby.   Knead the dough by pushing the palm of your hand deeply into the dough ball, then fold the dough in half, turn a half turn and repeat. Add flour to the counter as needed so the dough doesn't stick.   Continue this process for about five minutes until the dough has become elastic.
3.  Put the dough back in the bowl and cover with a clean towel.  If the air is dry I sometimes moisten the towel.  Place the dough in a warm area and let it rise for one hour. 
4.  After this time punch down the dough and knead it a bit more, about 5 turns. 
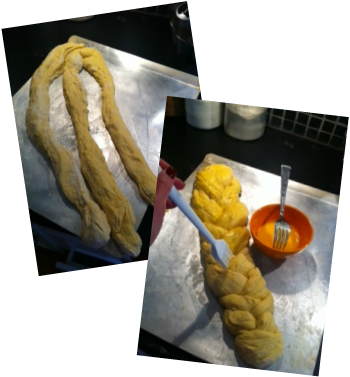
5. Divide the dough into 3 equal portions.  With your hands roll each piece out into a long rope about 12-18 inches long.  
6. Pinch one end of the dough together and place it in the corner of your baking dish.  Use an air pan if possible. Braid the three strand of dough until you get to end.  Pinch the ends together and tuck them  under the braid a bit.  
7.  Beat an egg thoroughly with 1 tablespoon of water and baste it over the whole loaf.  This will give it a nice shiny appearance when baked. 
8. Let the braid rise for 1 hour.  During this time, preheat the oven to 375 degrees.  
9. Bake the bread for approximately 25 minutes or until the top is golden brown.  You can cut it into slices or pull off chunks to serve.  

0 Comments

Orange Pomegranate Scones

11/12/2011

1 Comment

 
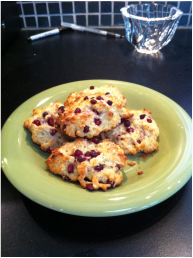
One of my favorite things about fall is the changing of the foods.  We have a pomegranate tree and they produce gorgeous, juicy pomegranates.  Take advantage of those antioxidants and get cooking! Here is my own recipe for orange pomegranate scones.  I made them for my staff at work and they were a hit! This recipe makes about 2 dozen scones.  If you are going to cut it in half I would recommend using two eggs.
Picture
4 Cups flour
4 teaspoons baking powder
2/3 Cup sugar
3 large eggs
2 sticks cold butter
1 Cup orange juice
2 Teaspoons vanilla
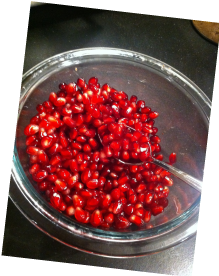
2 Cups pomegranate seeds (or about 2 poms. worth)
-To get the pomegranate seeds out I would recommend this technique.  Wear an apron! Score the skin of the pomegranate into quarters. Don't cut all the way through it.  If you do you will have juice splashing everywhere.  Pull the quarters apart and the rind breaks in natural spots.  Pull away the rind so that the seeds are exposed.  Then push them sideways so they fall, or pop out.  Keep breaking chunks apart until all the seeds are out. 

Picture
1. Preheat the oven to 400 degrees.
2. Combine flour, sugar, and baking powder in a large bowl.
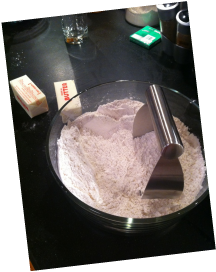
3. Slice butter into tablespoon sized pieces and add it to the dry ingredients.  Then cut in the butter with a pastry cutter.  Continue until the chunks of butter are about the size of a pea. 
4. Add the wet ingredients and stir to combine.  Only mix the batter until it forms a wet ball.  Do not over mix!
5. Fold in the pomegranate seeds.  Save a few to put on top. 
6. Spoon onto a baking sheet.  Put a few seeds on top for decoration.  You can also sprinkle a tiny bit of sugar on top for some texture.  
7. Bake 15-17 minutes until the top is brown and a bit crunchy.  

Picture
The seeds inside the pomegranate will give the scones a slightly nutty flavor.  Serve them hot and enjoy!

1 Comment

    Robin's Blog

    I am living in Downtown 
    Sacramento creating my little urban farm!

    Archives

    June 2014
    April 2014
    January 2014
    July 2013
    April 2013
    January 2013
    November 2012
    October 2012
    September 2012
    August 2012
    July 2012
    June 2012
    May 2012
    April 2012
    March 2012
    February 2012
    January 2012
    December 2011
    November 2011

    Categories

    All
    All
    Appetizers
    Breads
    Breakfast
    Chickens
    Crock Pot
    Desserts
    Fall Foods
    Gardening
    Gifts
    Holiday
    Holiday Foods
    Home Improvements
    Recipes
    Salads
    Sewing
    Soups
    Travel

    RSS Feed

Powered by Create your own unique website with customizable templates.