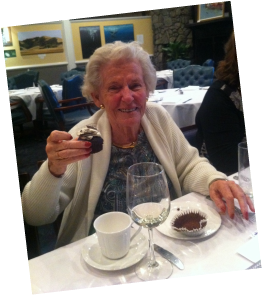
This weekend we celebrated my grandmother's 87th birthday! Additionally my husband was in Vegas on a guy's weekend. So I had the whole weekend to make a mess of my kitchen and create an artful cupcake for my grandma.
I have an absurd amount of weeds in my garden right now! Some of those pesky weeds are mint, so I decided to make chocolate mint cupcakes. I wanted something that was more elegant and had flavors an adult would enjoy.
I have an absurd amount of weeds in my garden right now! Some of those pesky weeds are mint, so I decided to make chocolate mint cupcakes. I wanted something that was more elegant and had flavors an adult would enjoy.
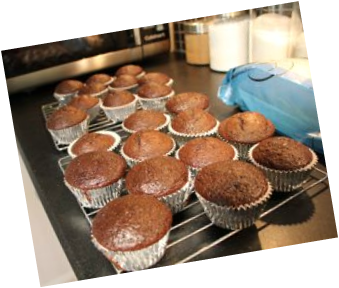
All of the recipes came out of my Martha Stewart cupcake book. It makes 18 cupcakes. The actual cupcake part was about as easy as it gets and the cupcakes turned out moist, even, and beautiful. They are great if you want a cupcake where you are going to to leave some of the surface exposed.
The leaves on the top were much more challenging. So if you are feeling artsy go for it, they were beautiful. If you aren't, throw an Andes mint on top and call it a day! I used a combo of these methods.
The leaves on the top were much more challenging. So if you are feeling artsy go for it, they were beautiful. If you aren't, throw an Andes mint on top and call it a day! I used a combo of these methods.
Ingredients
Directions
- 1 1/2 cups all-purpose flour
- 3/4 cup unsweetened Dutch-process cocoa powder
- 1 1/2 cups sugar
- 1 1/2 teaspoons baking soda
- 3/4 teaspoon baking powder
- 3/4 teaspoon salt
- 2 large eggs
- 3/4 cup buttermilk
- 3 tablespoons vegetable oil
- 3/4 cup warm water
- 1 teaspoon pure peppermint extract
Directions
- Preheat oven to 350 degrees. Line standard muffin tins with paper liners. Whisk together flour, cocoa powder, sugar, baking soda, baking powder, and salt. Add eggs, buttermilk, oil, water, and peppermint extract, and beat with a mixer on low speed until smooth.
- Divide batter among muffin cups, filling each 2/3 full. Bake, rotating tins halfway through, until a tester inserted in the center comes out clean, 20 to 25 minutes. Let cupcakes cool in tins on wire racks for 10 minutes. Transfer cupcakes to racks, and let cool. Undecorated cupcakes will keep, covered, for 1 day, or frozen for up to 2 months.
- Spoon buttercream into a pastry bag fitted with a large, plain tip. Pipe small mounds on tops of cupcakes. Flatten mounds with an offset spatula, then top with chocolate-mint leaves.
Frosting
For the frosting I made Martha's mint butter cream. I am not putting up the recipe because it was the most time consuming, mess making, hardest frosting I have even made. You had to make a custard, cook mint leaves, straining them, bla bla bla, it was ridiculous. In the end I did my own thing with it and was frustrated that I had spent so much time following the specifications of the frosting recipe.
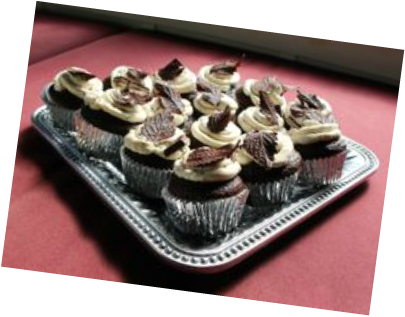
Here is what I basically did (or would recommend to you). Make a basic butter cream frosting, or any yummy white frosting. Cut 9 Andes Mints in half diagonally to have for extra garnish on the cupcakes that need a little more. Do this first in case some don't cut well. Then chop up about 10 or 12 other Andes mints and mix them in to the frosting. Pipe on the frosting with a wide round tip. I just put a flat bit of frosting in the middle leaving the shiny edge of the cupcake exposed.
For the frosting I made Martha's mint butter cream. I am not putting up the recipe because it was the most time consuming, mess making, hardest frosting I have even made. You had to make a custard, cook mint leaves, straining them, bla bla bla, it was ridiculous. In the end I did my own thing with it and was frustrated that I had spent so much time following the specifications of the frosting recipe.
Here is what I basically did (or would recommend to you). Make a basic butter cream frosting, or any yummy white frosting. Cut 9 Andes Mints in half diagonally to have for extra garnish on the cupcakes that need a little more. Do this first in case some don't cut well. Then chop up about 10 or 12 other Andes mints and mix them in to the frosting. Pipe on the frosting with a wide round tip. I just put a flat bit of frosting in the middle leaving the shiny edge of the cupcake exposed.
Chocolate Leaves
Okay, let's be honest, those directions for the leaves sound simple, but this was hard. It was impressive, so I encourage you to try it, but I made enough leaves for 3 per cupcake and I ended up with 1 successful leave per cupcake with a very few that scored a second leaf. Don't worry, I have some pointers for you that were learned through the trial and error method. They will save you some effort!
Tools and Materials
Chocolate-Mint Leaves How-To1. Using paintbrush, coat underside of 1 leaf with a thick layer of chocolate. Drape leaf, chocolate side up, over a skewer set on a parchment-lined baking sheet, top. Repeat. Refrigerate until set, about 10 minutes.Gently grasp each leaf with tweezers, and peel from chocolate. Frost tops of cupcakes with buttercream. Decorate with chocolate leaves.
Okay, let's be honest, those directions for the leaves sound simple, but this was hard. It was impressive, so I encourage you to try it, but I made enough leaves for 3 per cupcake and I ended up with 1 successful leave per cupcake with a very few that scored a second leaf. Don't worry, I have some pointers for you that were learned through the trial and error method. They will save you some effort!
Tools and Materials
- Small paintbrush
- Fresh mint leaves
- Bittersweet chocolate, melted and cooled slightly
- Skewers
- Kitchen tweezers
Chocolate-Mint Leaves How-To1. Using paintbrush, coat underside of 1 leaf with a thick layer of chocolate. Drape leaf, chocolate side up, over a skewer set on a parchment-lined baking sheet, top. Repeat. Refrigerate until set, about 10 minutes.Gently grasp each leaf with tweezers, and peel from chocolate. Frost tops of cupcakes with buttercream. Decorate with chocolate leaves.

My Tips
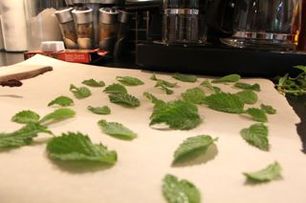
1. Wash the mint leaves and choose the ones you want. Make sure to either dry them each or let them dry for a long time before you get started. The ones that had water still on them make the chocolate all chunky and then would not peel off when the chocolate was cooled.
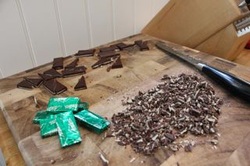
2. Chop the chocolate very finely. In my book it talked about using certain brands of very high quality chocolate, tempering it, and having it at 185 degrees. I don't have a candy thermometer, so I just used normal bakers chocolate and "guessed" how to temper the chocolate, but it worked!
3. Melt the chocolate over, but not touching, boiling water. Stir as it is melting. When it looked shiny and yummy I started painting!
1. Wash the mint leaves and choose the ones you want. Make sure to either dry them each or let them dry for a long time before you get started. The ones that had water still on them make the chocolate all chunky and then would not peel off when the chocolate was cooled.
2. Chop the chocolate very finely. In my book it talked about using certain brands of very high quality chocolate, tempering it, and having it at 185 degrees. I don't have a candy thermometer, so I just used normal bakers chocolate and "guessed" how to temper the chocolate, but it worked!
3. Melt the chocolate over, but not touching, boiling water. Stir as it is melting. When it looked shiny and yummy I started painting!
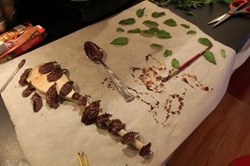
3. I turned the heat down as low as it would go on the stove and took a spoonful of chocolate at a time. Otherwise it cools too fast and becomes difficult to use.
*** Put something under the parchment paper that fits in your fridge. I didn't do this and had to painstakingly move each leave to a small cookie sheet***
Paint each of the front side of the leaves. It is gets on the back try and get it off with your finger or it makes them very hard to peal off. Lay the leaves over a spoon if you want them to be three dimensional.
4. Cool them for about 10 minutes in the fridge.
5. Use tweezers to peel the real leaf off. Don't touch them with your hands because they will melt in front of your eyes. I found it was helpful to have a second tweezer to push on the chocolate gently on each side of where I was holding the leaf. This spread the pressure out as I was peeling the leaf off and avoided cracking the chocolate. After peeling a few the chocolate will start to get soft and you will need to put it back in the fridge. Repeat until done!
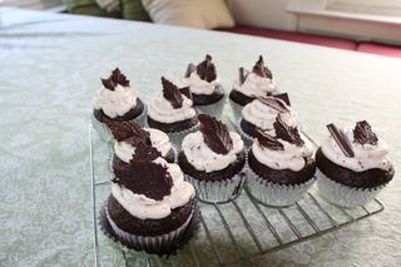
6. Place the leaves on the cupcake. The texture really looked beautiful! Add Andes mints where it looks nice and chill in the fridge. Bring everything to room temperature before serving. You will only need one per person because they are rich, but delicious!
 RSS Feed
