Robin's Urban Farmhouse
  • Robin\\\\\'s Latest
  • Meet Robin
  • The Chickens
  • The Garden
  • The Bakery
  • The House
  • Untitled

St. Patty's Corned Beef and Cabbage

3/15/2012

0 Comments

 
Picture
This is one of those delicious meals that you get major bang for your buck.  It is a super easy meal that takes minimal effort and you get a flavorful delicious mess at the end!  You literally have to buy three things: Brined corned beef, potatoes, and one head of cabbage.  If you love cooked carrots you can throw those in too.  

Picture
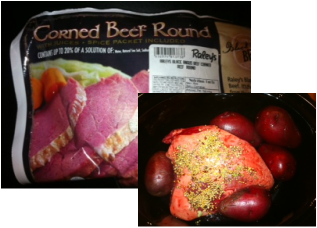
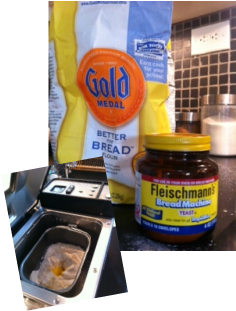
    I love the Raley's corned beef.   I have tried the Trader Joe's but we gave it a C-.  I took a picture of the package in case you want to grab the exact one.  I know it is kind of cheating to buy the meat pre-brined, but it is SOOO much better that way! 
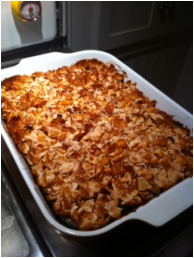
    Put the meet in your slow cooker and shove the potatoes around the side.  If it includes seasoning sprinkle this on top of everything.  Then add enough water to submerge the ingredients.  You can cook this on high for about 8 hours or low for 4.  I usually put it in before work and leave with the peace of mind that dinner is already cooked! 

Picture
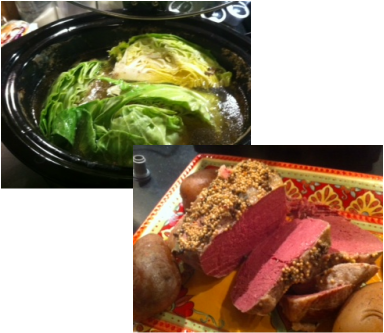
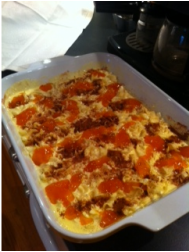
My crock put doesn't have enough room to cook everything.  So when I get home I take out the meat and potatoes, put them on a platter and keep them warm in the oven.  Cut one head of cabbage into quarters and trim a bit of the bottom off.  I then cook the cabbage in the water that is left for 1 hour on high.  This lets all the yummy flavors of the brine soak into the cabbage.  
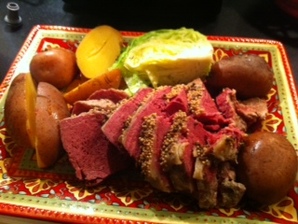
   When this is almost done you can slice the meat.  Make sure togo against the grain of the meat.  Add the cabbage to the platter, and walk out to the dining room table like you slaved away all day! 

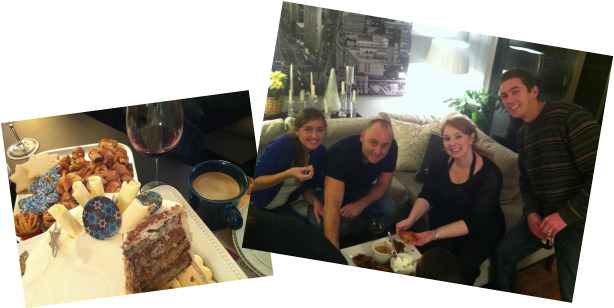
Happy St. Patrick's Day!
  

0 Comments

Noodle Kugle

12/21/2011

4 Comments

 
Picture
     Last night's Hannukah celebration turned out to be quite a feast! This is my friend Meghan in front of all the delicious food.  One of the dishes I made was noodle kugle. Noodle Kugle is kind of a noodle casserole (it is the front dish in the picture).  It has a unique combination of creamy, sweet, and savory flavors. My husband likes it just the way my mother in law Sue makes it, so this is her recipe! Every year I call her to make sure I am not missing any of the details that make it just right.
      Jewish food took me a while to get the hang of.  The combinations of flavors are very different and went against my grain at first.  After few years of being a Shiksa, I got into the groove of it and found recipes that I really enjoy.  This is one of those!

Picture
.

Picture
Recipe: Noodle Kugle
Ingredients:
1 of a bag of egg noodles
1 lb container sour cream
1 1/2 lbs of cottage cheese
1/2 cup milk
5 eggs
1 1/2 teaspoons cinnamon
apricot preserves
frosted flakes

Picture
Directions:
1. Preheat oven to 375 degrees. Bring water to a boil and cook the egg noodles for 5 minutes.  You do not want them fully cooked. 
 2. While the noodles are cooking beat the eggs thoroughly.  Mix in the sour cream, cottage cheese, and milk. 
3. Put the egg mixture in a casserole dish and sprinkle 1 teaspoon of cinnamon on top.   It is nice to get a little burst of cinnamon flavor, so it does not need to be evenly dispersed. 
4.  Put the pasta into the casserole dish as well.  The consistency should be soupy and the noodles should be completely covered.  If you need to, add a bit of milk until the noodles are submerged. 
5. Add dollops of apricot preserves to the top, and another 1/2 teaspoon of cinnamon.  Again, they do not need to be mixed in or evenly distributed. 

Picture
6. Bake for about 1 hour at 375 degrees F. 
7. Open the oven and add a layer of frosted flakes to the top.  I know this sounds crazy but it adds a nice crunchy consistency and some sweetness.  Bake for about 15-20 more minutes or until the frosted flakes begin to brown.  
8.  Serve hot.  The egg mixture and noodles will have baked into more of a solid, but should still be moist. Enjoy!

4 Comments

Happy Hannukah!

12/20/2011

0 Comments


Picture
  Hannukah starts tonight at sundown, so homemade challah is on the agenda for today!  I had a request from my friend Adi for some Jewish recipes.  Here you go! These recipes are for all the shiksas out there, or anyone who wants to take a stab at some traditional jewish food. Challah is a delicious, rich, egg bread no matter what time of year it is!  I will post new Jewish recipes all this week.  
     In our house, we get to celebrate both Hannukah and Christmas.  How do I do that you might ask? Lots of cooking and presents!  Hannukah dinner is a carb loaded feast! In it's roots, Hannukah is a celebration of the oil that lasted for eight days.  So oil is the concentration of the meal. As with most holidays, we celebrate by spending time with our friends and family, and giving thanks for all the blessings in our life.
        For this year's Hannukah dinner we will be celebrating at our friend's house, so I will be making homemade Challah, and noodle kugle.  I am sure some latkes will make it on the table sometime this week as well!

Picture
     I am using a recipe out of my cuisinart recipe book for my bread maker.  I have to admit I totally cheat when I make bread.  I make it often, but I always use my bread maker.  I will write the recipe so you can make it by hand or with the bread machine.  
         If you are using a bread machine, put the ingredients in the bread maker in the order they are listed and set your maker to a dough setting.  You can pick up the directions at #4.  If you are making it by hand, follow the instructions below. 

Picture
Recipe: Challah - 2 pound loaf
Ingredients:
1 cup water
1/3 cup + 2 tablespoons butter
    -Butter should be at room temperature and cut into roughly 1 tbls pieces
2 eggs
1 egg for the egg wash
1 1/4 teaspoon salt
3 tablespoons + 2 teaspoons sugar
3 3/4 cup bread flour
2 1/4 teaspoons yeast (I recommend bread machine yeast)

Picture
1. Combine flour, sugar, salt, and yeast in a bowl and sit together.  Mix in water, butter and eggs. Mix until well combined.  
2. Place the dough ball onto a lightly floured surface but make sure to have a pile of flour sitting nearby.   Knead the dough by pushing the palm of your hand deeply into the dough ball, then fold the dough in half, turn a half turn and repeat. Add flour to the counter as needed so the dough doesn't stick.   Continue this process for about five minutes until the dough has become elastic.
3.  Put the dough back in the bowl and cover with a clean towel.  If the air is dry I sometimes moisten the towel.  Place the dough in a warm area and let it rise for one hour. 
4.  After this time punch down the dough and knead it a bit more, about 5 turns. 
5. Divide the dough into 3 equal portions.  With your hands roll each piece out into a long rope about 12-18 inches long.  
6. Pinch one end of the dough together and place it in the corner of your baking dish.  Use an air pan if possible. Braid the three strand of dough until you get to end.  Pinch the ends together and tuck them  under the braid a bit.  
7.  Beat an egg thoroughly with 1 tablespoon of water and baste it over the whole loaf.  This will give it a nice shiny appearance when baked. 
8. Let the braid rise for 1 hour.  During this time, preheat the oven to 375 degrees.  
9. Bake the bread for approximately 25 minutes or until the top is golden brown.  You can cut it into slices or pull off chunks to serve.  

0 Comments

Peanut butter cup cookies

12/14/2011

0 Comments

 
Picture
  This is the last of the Christmas cookie recipes. But it was a good one!  
  I have a serious weakness for peanut butter.  Everything taste better to me with peanut butter on it.  If you relate, these cookies are for you.  Even if you don't, it was a nice change of flavor and shape for Christmas cookies.  It was also fun to use cupcake tins for some holiday color. Surprise, this is a recipe from allrecipes.com with Robin modifications.

Picture
Peanut Butter Cup Cookies
  • Ingredients:
  • 1 3/4 cups all-purpose flour
  • 1/2 teaspoon salt
  • 1 teaspoon baking soda
  • 1/2 cup butter, softened
  • 1/2 cup white sugar
  • 1/2 cup peanut butter
  • 1/2 cup packed brown sugar
  • 1 egg, beaten
  • 1 teaspoon vanilla extract
  • 2 tablespoons milk
  • 40 miniature chocolate covered peanut butter cups, unwrapped
Directions
  1. Preheat oven to 375 degrees F. Sift together the flour, salt and baking soda; set aside.
  2. Cream together the butter, sugar, peanut butter and brown sugar until fluffy. Beat in the egg, vanilla and milk.
  3. Add the flour mixture; mix well. Scoop a ball and drop it into the cupcake tin.  Push the peanut butter cup all the way into the dough. I recommend lining it with a cupcake tin so it is easier to get in and out, and cuter!
  4. Bake at 375 degrees for about 12-15 minutes. Remove from oven and let cool.  Carefully remove from pan.

0 Comments

Gingerbread Men

12/13/2011

0 Comments

 
Picture
     I love the gingerbread men because you can do such cute things with them! We had a great time getting creative!  Make sure to plan ahead.  After making the dough it needs to chill in the freezer for an hour.  Once it is cold everything goes quickly and you can start cookie cutting, baking, and icing.  This is a fairly spicy gingerbread, which was good for adults.  If you want it more mild I would cut the cloves and ginger in half.  This is another recipe from allrecipes.com with a few modifications.

Gingerbread Cookie Dough
 Ingredients
  • 1/2 cup butter
  • 1/2 cup sugar
  • 1/2 cup molasses
  • 1 egg yolk
  • 2 cups sifted all-purpose flour
  • 1/2 teaspoon salt
  • 1/2 teaspoon baking powder
  • 1/2 teaspoon baking soda
  • 1/2 teaspoon ground cinnamon
  • 1 teaspoon ground cloves
  • 1 teaspoon ginger
  • 1/2 teaspoon ground nutmeg


Picture
Directions
  1. In a large bowl, cream together the butter and sugar until smooth. Stir in molasses and egg yolk.
  2. Combine the flour, salt, baking powder, baking soda, cinnamon, cloves, ginger, and nutmeg.  Blend all the dry ingredients into the molasses mixture until smooth.
  3. Wrap half the dough in parchment paper and put it in the freezer.  Do the same with the other half.  This will allow you to work with one, while the other remains cold.  Chill for at least one hour.  The dough needs to be very cold to work well.
  4. Preheat the oven to 350 degrees F. On a lightly floured surface, roll the dough out to 1/4 inch thickness. Cut into desired shapes with cookie cutters. Place cookies 2 inches apart on ungreased cookie sheets.
  5. Bake for 8 to 10 minutes in the preheated oven, until firm. Remove from cookie sheets to cool on wire racks.
  6.  When the cookies are completely cool you can frost them.  I used a recipe for royal icing, however it was a compelte failure and I just had to keep adding melted butter until I got it the right consistancy.  So, until aI find a better recipe I can't offer one up.
  7. Have fun!!

0 Comments

Christmas Cookies!

12/12/2011

0 Comments

 
Picture
     There is something about baking Christmas cookies that just feels good! I invited a few girls to come over and have a baking day with me this weekend.  It was inspired by some adorable oven mitts that one of my students brought to school!
     I ran to Michael's and found cookie tins for under $3, check.  Ran to the grocery and get the candy canes, kisses, and of course butter.  Check, check.  
     Lastly,  I wanted to line the tins with something so we weren't putting cookie on metal.  I took some parchment paper, folded it up and cut it into a snowflake.  If you do this, try and keep the cuts small so you still cover most of the tin.  The snowflake thing works well as a kind of doily for any tray or sweet thing you are serving in the winter! Check, check, check. Time to bake.

Picture
     We made three different recipes.  I will post them all this week.  The first one was a double chocolate candy cane cookie.  This really provides that rich decadent flavor of the holidays. I got the recipe from allrecipes.com.  As with most recipes, I kind of did my own thing.  So below is my altered version. While baking the melted candy cane can be a bit sticky.  Make sure to use a non-stick pan or parchment paper.  The silicon guard made things worse.  After the cookies are baked, lift the endges of the cookie a bit before they cool so they candy doesn't harden and stick to the cookie sheet.

Ingredients: (Makes about 20 cookies)

3/4 cup butter
1/2 cup white sugar
1/2 cup packed brown sugar
1 egg
1 teaspoon vanilla extract
1 teaspoon peppermint extract
1 1/2 cups all purpose flour
1/4 cup unsweetened cocoa powder
1/2 teaspoon baking soda
1/2 teaspoon baking powder
1/4 teaspoon salt
5 candy canes (crushed)

Picture
Directions:
1.  Preheat the oven to 350 degrees. Grease cookie sheets.
2. In a large bowl cream together butter and both sugars until fluffy.
3. Beat in the egg, then mix in vanilla and peppermint extract.
4. IN a separate bowl combine flour, cocoa powder, baking soda, baking powder, and salt.  Then gradually stir this mixture in with the wet ingredients.
5.  Add in crushed candy cane chunks.  
6.  Drop rounded spoonfuls onto the cookie sheet.  Find a large piece of candy cane and put it right in the middle of the cookie like a button. 
7.  Bake for 12-15 minutes.  The top of the cookie will start to crack a bit.  Be careful not to overcook!
8.  Separate the edges a bit form the cookie sheet so the candy doesn't get stuck when it hardens.  After 5 minutes of cooking, transfer them to the cooling rack, then enjoy!

0 Comments

    Robin's Blog

    I am living in Downtown 
    Sacramento creating my little urban farm!

    Archives

    June 2014
    April 2014
    January 2014
    July 2013
    April 2013
    January 2013
    November 2012
    October 2012
    September 2012
    August 2012
    July 2012
    June 2012
    May 2012
    April 2012
    March 2012
    February 2012
    January 2012
    December 2011
    November 2011

    Categories

    All
    All
    Appetizers
    Breads
    Breakfast
    Chickens
    Crock Pot
    Desserts
    Fall Foods
    Gardening
    Gifts
    Holiday
    Holiday Foods
    Home Improvements
    Recipes
    Salads
    Sewing
    Soups
    Travel

    RSS Feed

Powered by Create your own unique website with customizable templates.