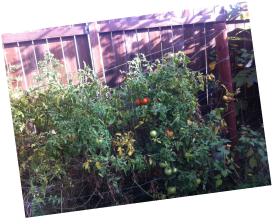
If your vegetable garden is looking like mine (sad, yellow, and a little bit dead) then it is time to do some pulling! Out of laziness I had not pulled up my summer garden yet. To my surprise I still had a few gems hiding in there. If you planted a winter garden, what did you plant? How did it work out?
During the winter there is not nearly as much maintenance necessary in the garden so it is a good time to prepare the soil for the next planting season. You will definitely need some sort of compost bin to put all the remaining plants. If you don't, then just make a pile for now. Send me a comment and I can give you some ideas!
During the winter there is not nearly as much maintenance necessary in the garden so it is a good time to prepare the soil for the next planting season. You will definitely need some sort of compost bin to put all the remaining plants. If you don't, then just make a pile for now. Send me a comment and I can give you some ideas!
Step one:
Pull all the remaining plants that grew during the summer. If the roots are hard to pull up you can cut off the plant and let the roots rot in the soil for the winter. If you planned ahead for a winter garden, obviously leave those plants to continue to grow. I discovered today that I had some chard, lettuce, peppers, carrots, and onions growing so I decided to leave them for a few more weeks. I have to admit, I didn't plant a winter garden, but these fighters either held on from the summer, or were seeds that waited until fall to germinate.
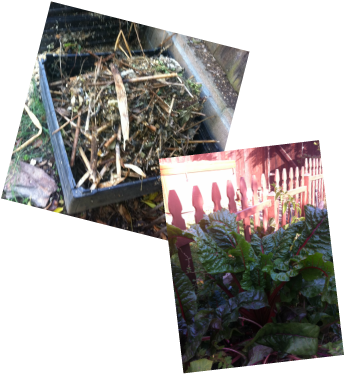
If your compost bin is stackable, put the top layer in a new location. Put all the pulled up plants in the compost. The smaller you chop everything up, the quicker they will decompose.
I took of picture of this compost to show you that this is NOT ready to spread. Leave this size material in the compost bin.
Pull all the remaining plants that grew during the summer. If the roots are hard to pull up you can cut off the plant and let the roots rot in the soil for the winter. If you planned ahead for a winter garden, obviously leave those plants to continue to grow. I discovered today that I had some chard, lettuce, peppers, carrots, and onions growing so I decided to leave them for a few more weeks. I have to admit, I didn't plant a winter garden, but these fighters either held on from the summer, or were seeds that waited until fall to germinate.
If your compost bin is stackable, put the top layer in a new location. Put all the pulled up plants in the compost. The smaller you chop everything up, the quicker they will decompose.
I took of picture of this compost to show you that this is NOT ready to spread. Leave this size material in the compost bin.

Step two:
Dig down to the bottom of your compost until you find the stuff that looks almost like dirt. It should smell like forest floor. If it smells rotten or stinky it is probably too wet. If the leaves are dried and crunchy, then it is to dry. I will get into more details about composting another time.
Spread this mulchy compost over the dirt where you will be planting next year. If you are feeling very ambitious you can till the compost in the soil, however leaving it on the surface is just fine!
Step Three:
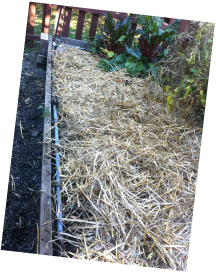
After the compost is down you want to lay some sort of weed barrier. I used hay. It is cheap and fairly easy to access. We got ours at the pumpkin patch and used it for porch decoration with our pumpkins. Any local feed store should have some.
The hay will act as a weed barrier and an insulator. It reduces the sunlight that can get to weeds. It will keep the soil a bit warmer in the winter and allow for better composting. If you have plants that you want to keep, simply spread the hay around them.
I am working on my garden in sections. So today I just winterized what you see. The rest will have to wait until another day!
 RSS Feed
